Using UPP’s Meta Business Suite
Process of PUBLISHING POSTS AND STORIES TO UPP’S FACEBOOK PAGE AND INSTAGRAM ACCOUNT
Meta Business Suite on App Store (Apple Devices)
GETTING STARTED:
DOWNLOAD META BUSINESS SUITE:
App Store Download Link (Apple Devices)
Google Play Store Download Link (Android Devices)
LOG IN DETAILS FOR META BUSINESS SUITE:
Select “Log In with Facebook Account” when prompted:
User: online@unleashingpersonalpotential.com.au
PW: UPPmbs2024!
PARAMETERS FOR FILMING AND POSTING:
Team members will be directed as to which day to publish a Story
If necessary, team members will be directed to create a Post
UNDER NO CIRCUMSTANCES are students to be filmed by Team Members for Stories and Posts.
Before filming, ask for permission from the contact/staff present on the day
Explain the purpose of filming (for stories on socials), explain what, where and when of filming
Avoid filming on school grounds outside of the main space used
If filming involves moving outside of school grounds through areas where students may also be moving, film a selfie in order to minimise risk
REMEMBER: Our priority is the impacts we create and smashing out an exceptional day. Anything to do with social media comes second to this. When directed to create a story, ensure this does not effect the running of a day.
Film only if the time is available, and after any set up/pack up/feedback
ADVICE FOR FILMING AND POSTING:
Film videos/take photos in portrait, not landscape.
Keep videos under 30 seconds (ideally 15-20 seconds).
Create variety in your story posts:
Don’t just film flat against a wall/screen, think of using angled shots or creating depth by standing further away
Film at different parts of the day (before the start, during breaks, away from students during the Epic Race to capture the noise, etc)
Occasionally have props (ER gear, hoops, mats, etc)
Use camera movement (don’t always have static videos - pan the camera or walk with the camera)
Avoid using music, even in the background, as this can cause a copyright claim and disable the audio for the video
Ensure that different facilitators have turns at being the focal point of the video - we want as even of a spread of as many team members as possible on Stories
Don’t always introduce yourself in dialogue - jump right in and include the facilitator’s name in a caption
When directed to film a STORY VIDEO, add specifics around the time frame to boost the “real time” element
“Hey guys, we’re here at Auburn South Primary, it’s a sunny Tuesday and we’re ready to jump into Session 1!”
When directed to film a POST VIDEO, try to lessen the specifics around the time frame so that the post can be scheduled for a later day/time
“Hey guys, we’re here at Auburn South Primary, we’re ready to have a blast with some Year 5’s and help them become better leaders!”
PUBLISHING ONTO UPP’S SOCIALS
HOW TO POST A STORY: META BUSINESS SUITE APP
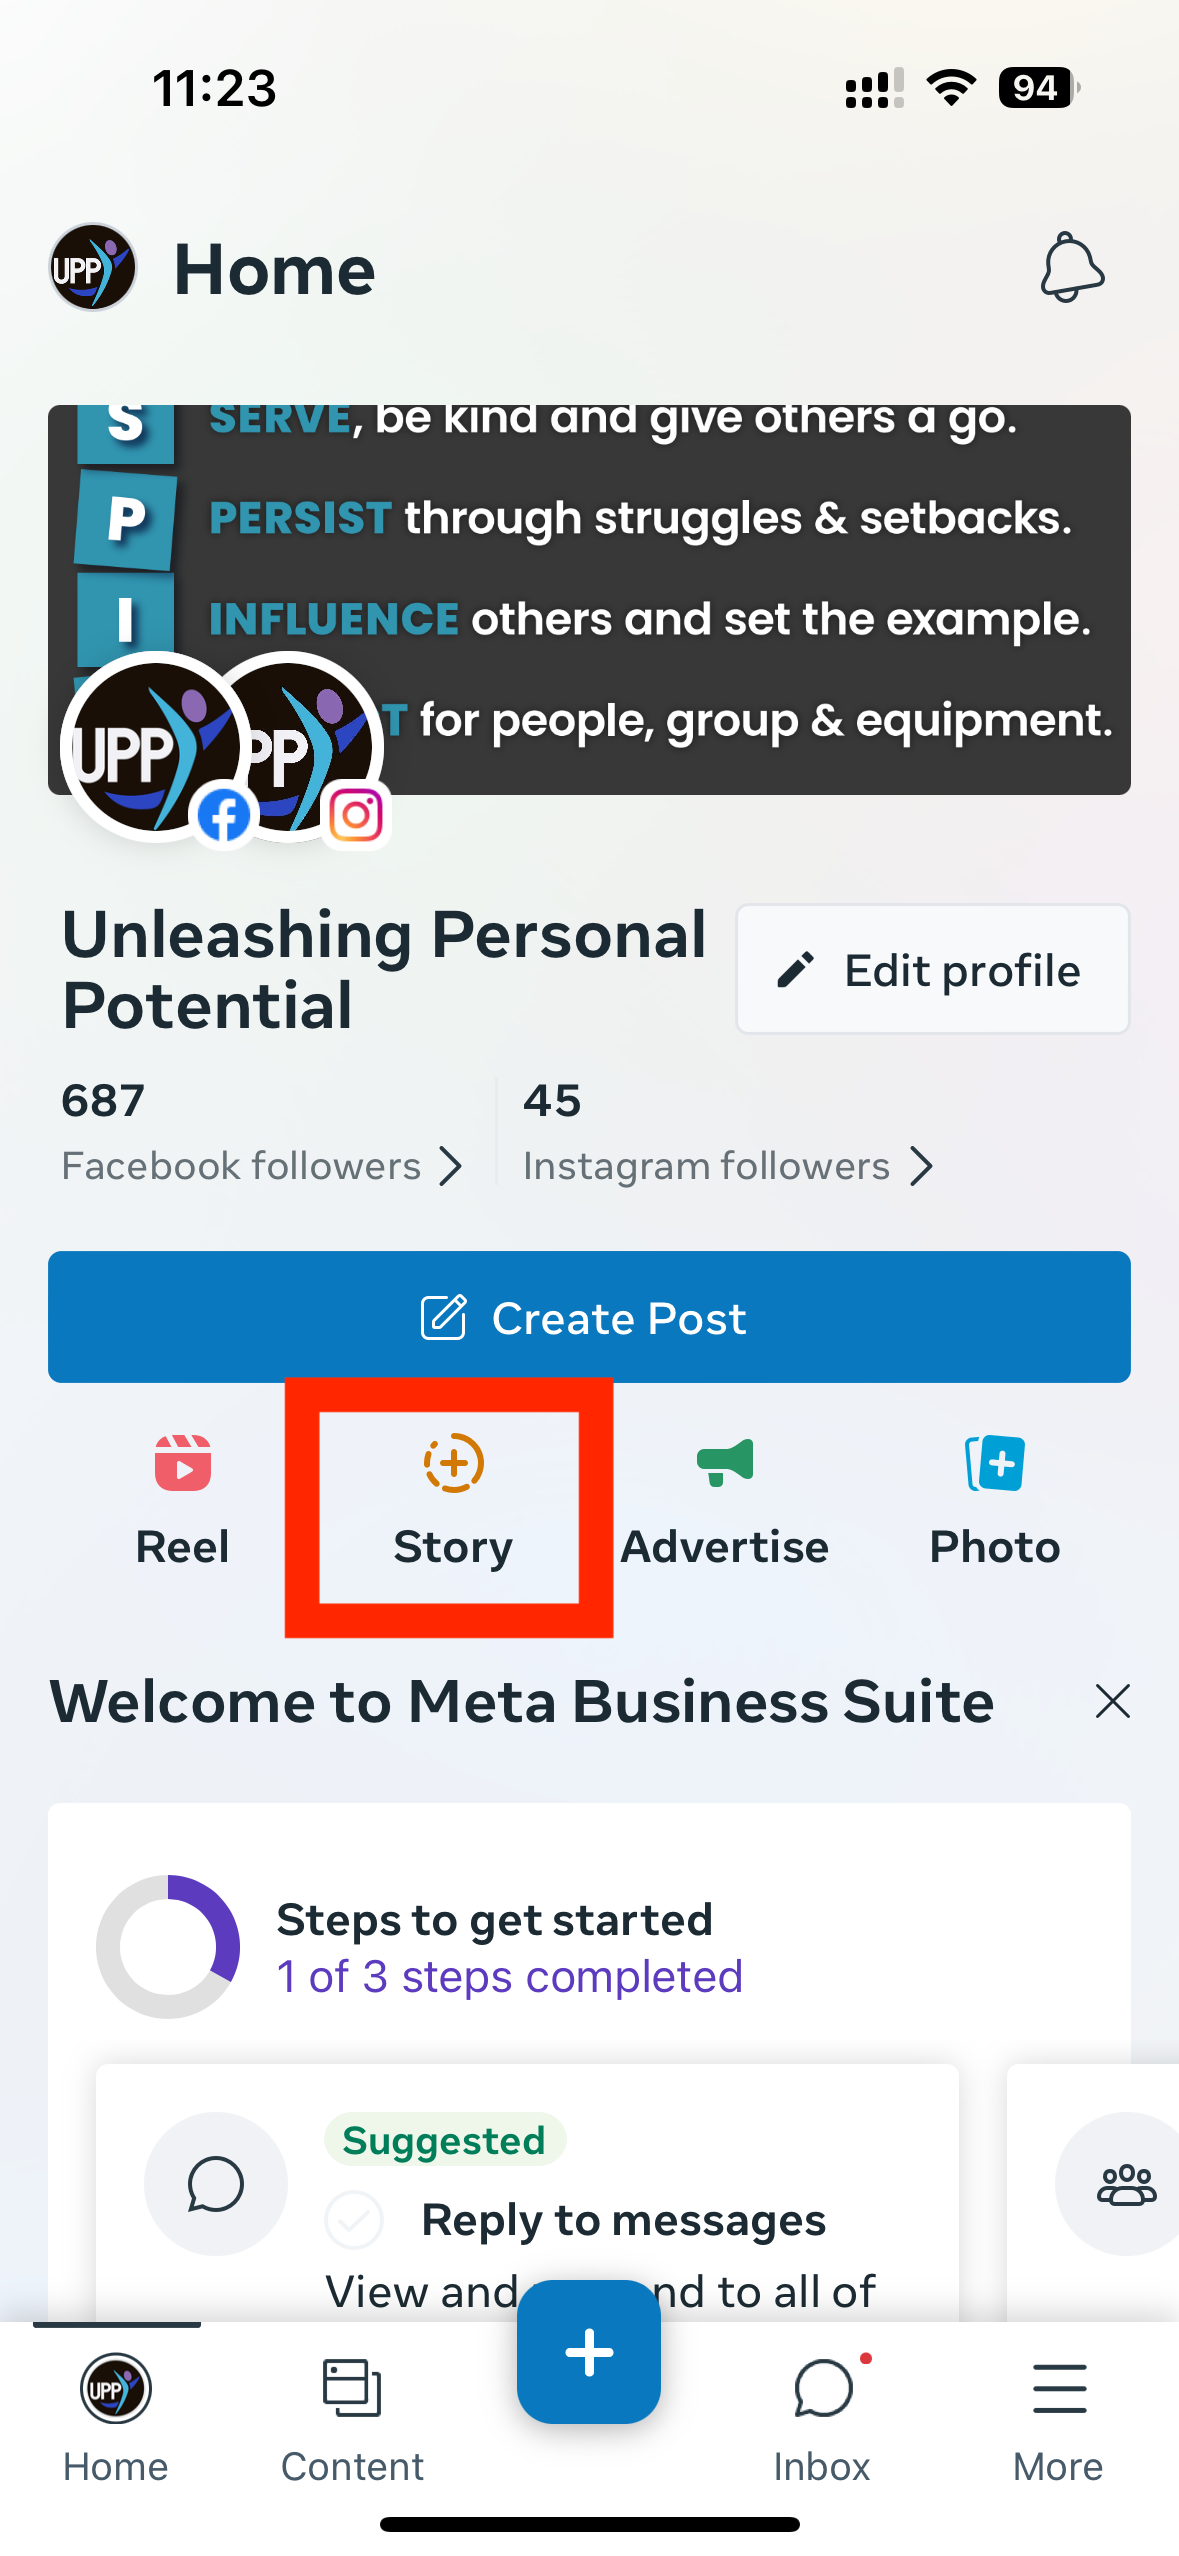
STEP 1: SELECT “STORY”
Open the Meta Business Suite App
Select “Story”
STEP 2: SELECT PHOTO OR VIDEO FOR STORY
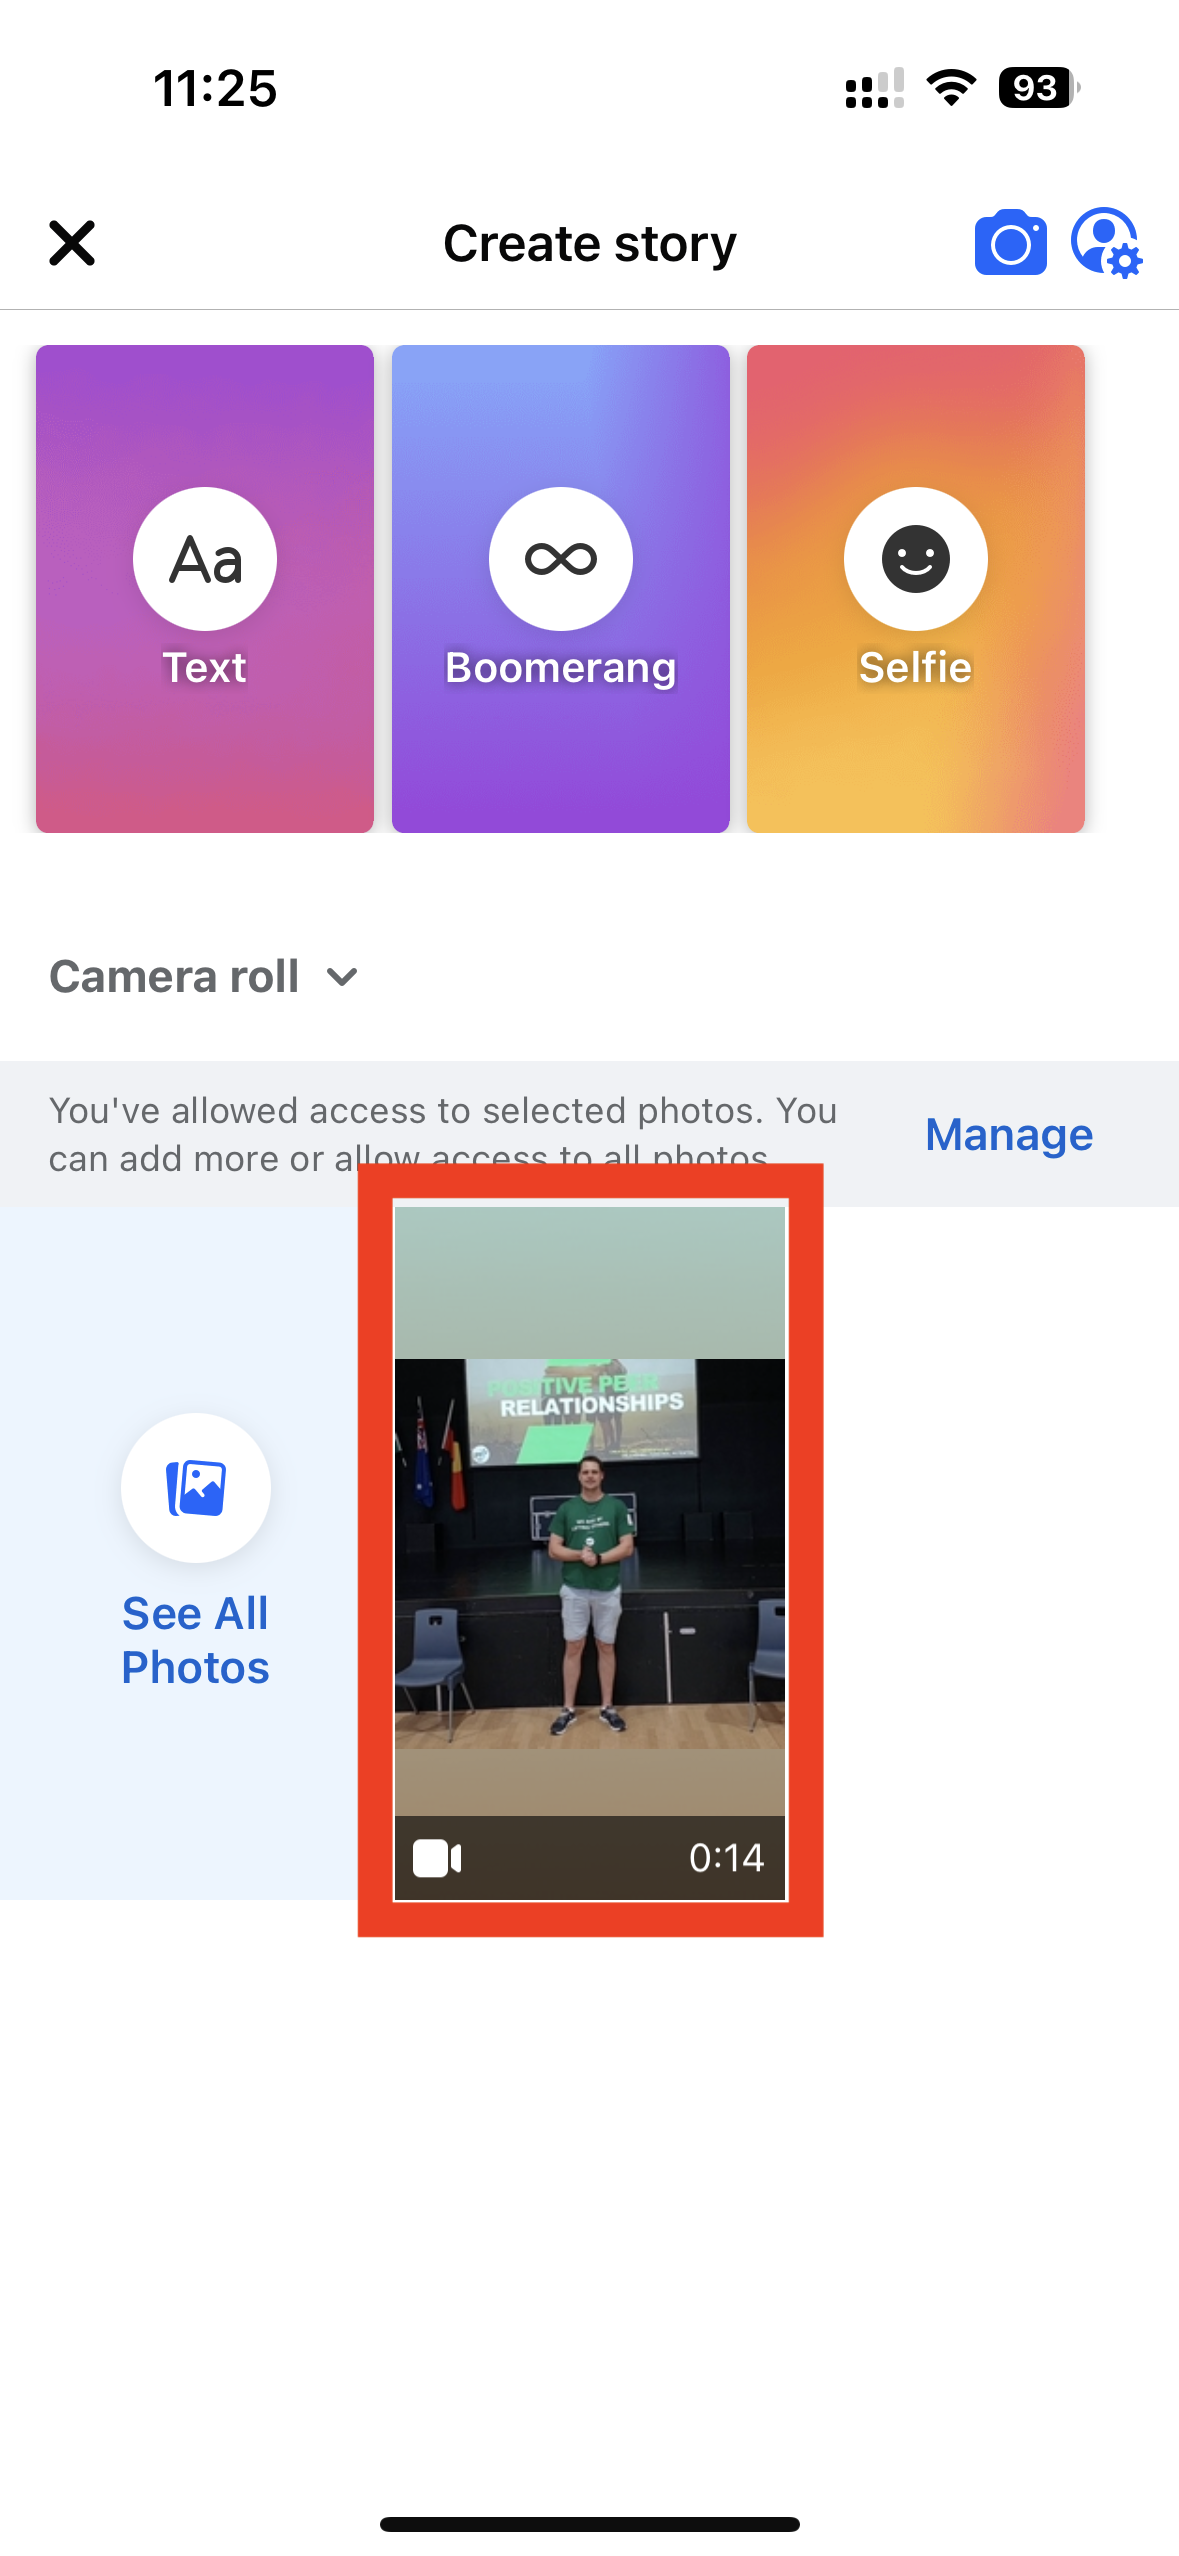
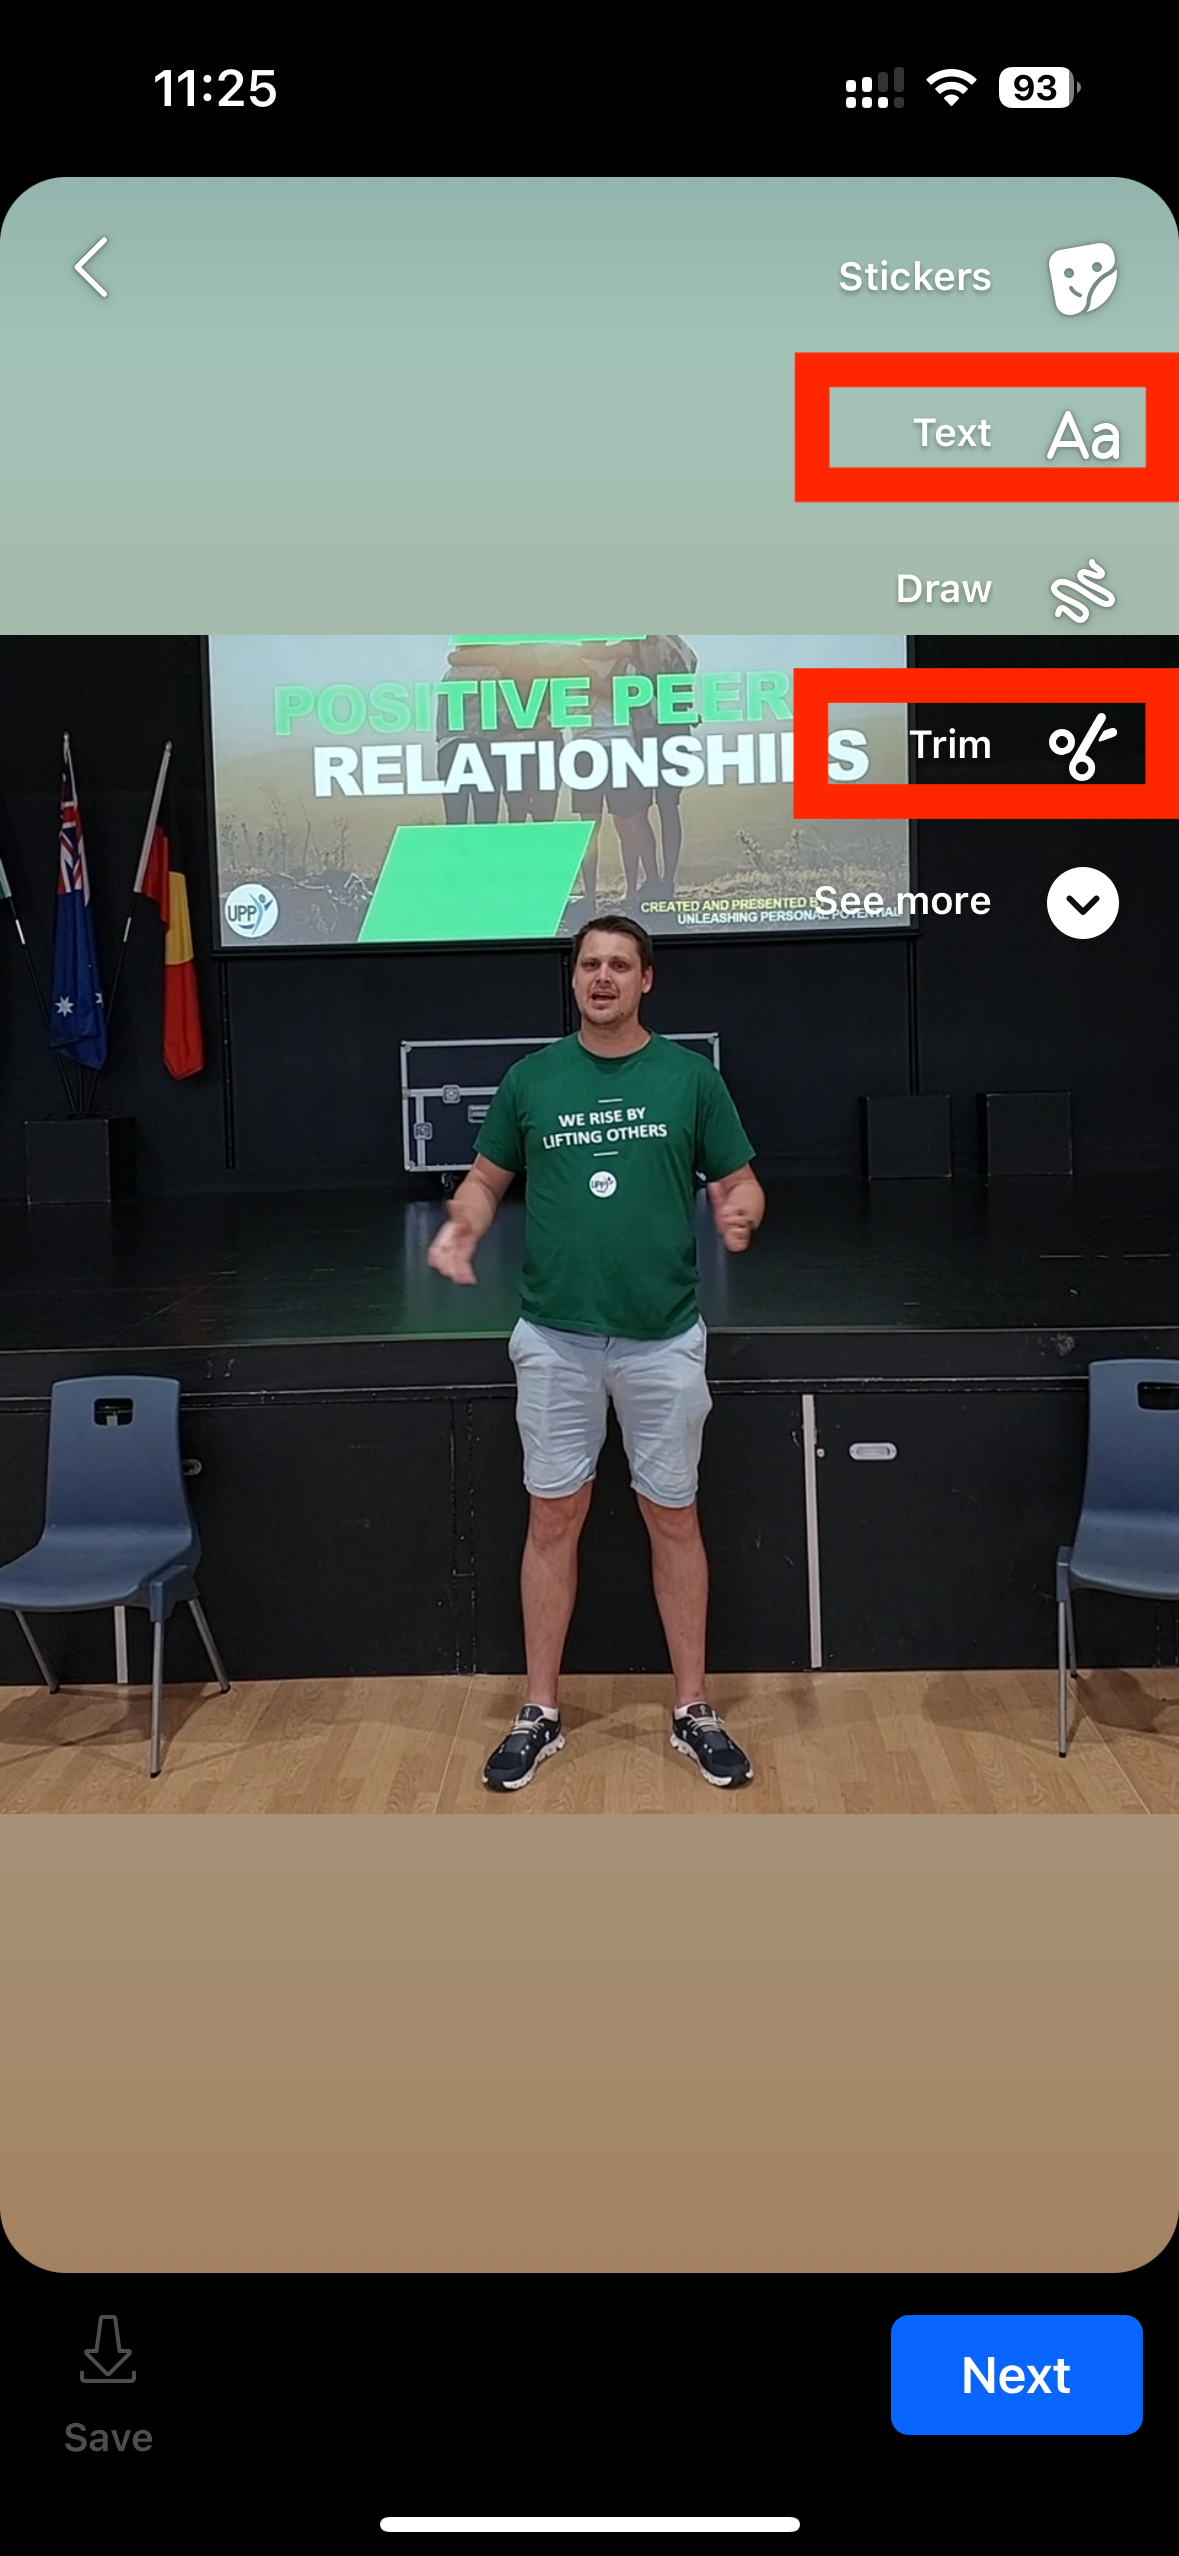
STEP 3: MEDIA WILL OPEN IN EDIT MODE
This will allow you to edit the media before posting.
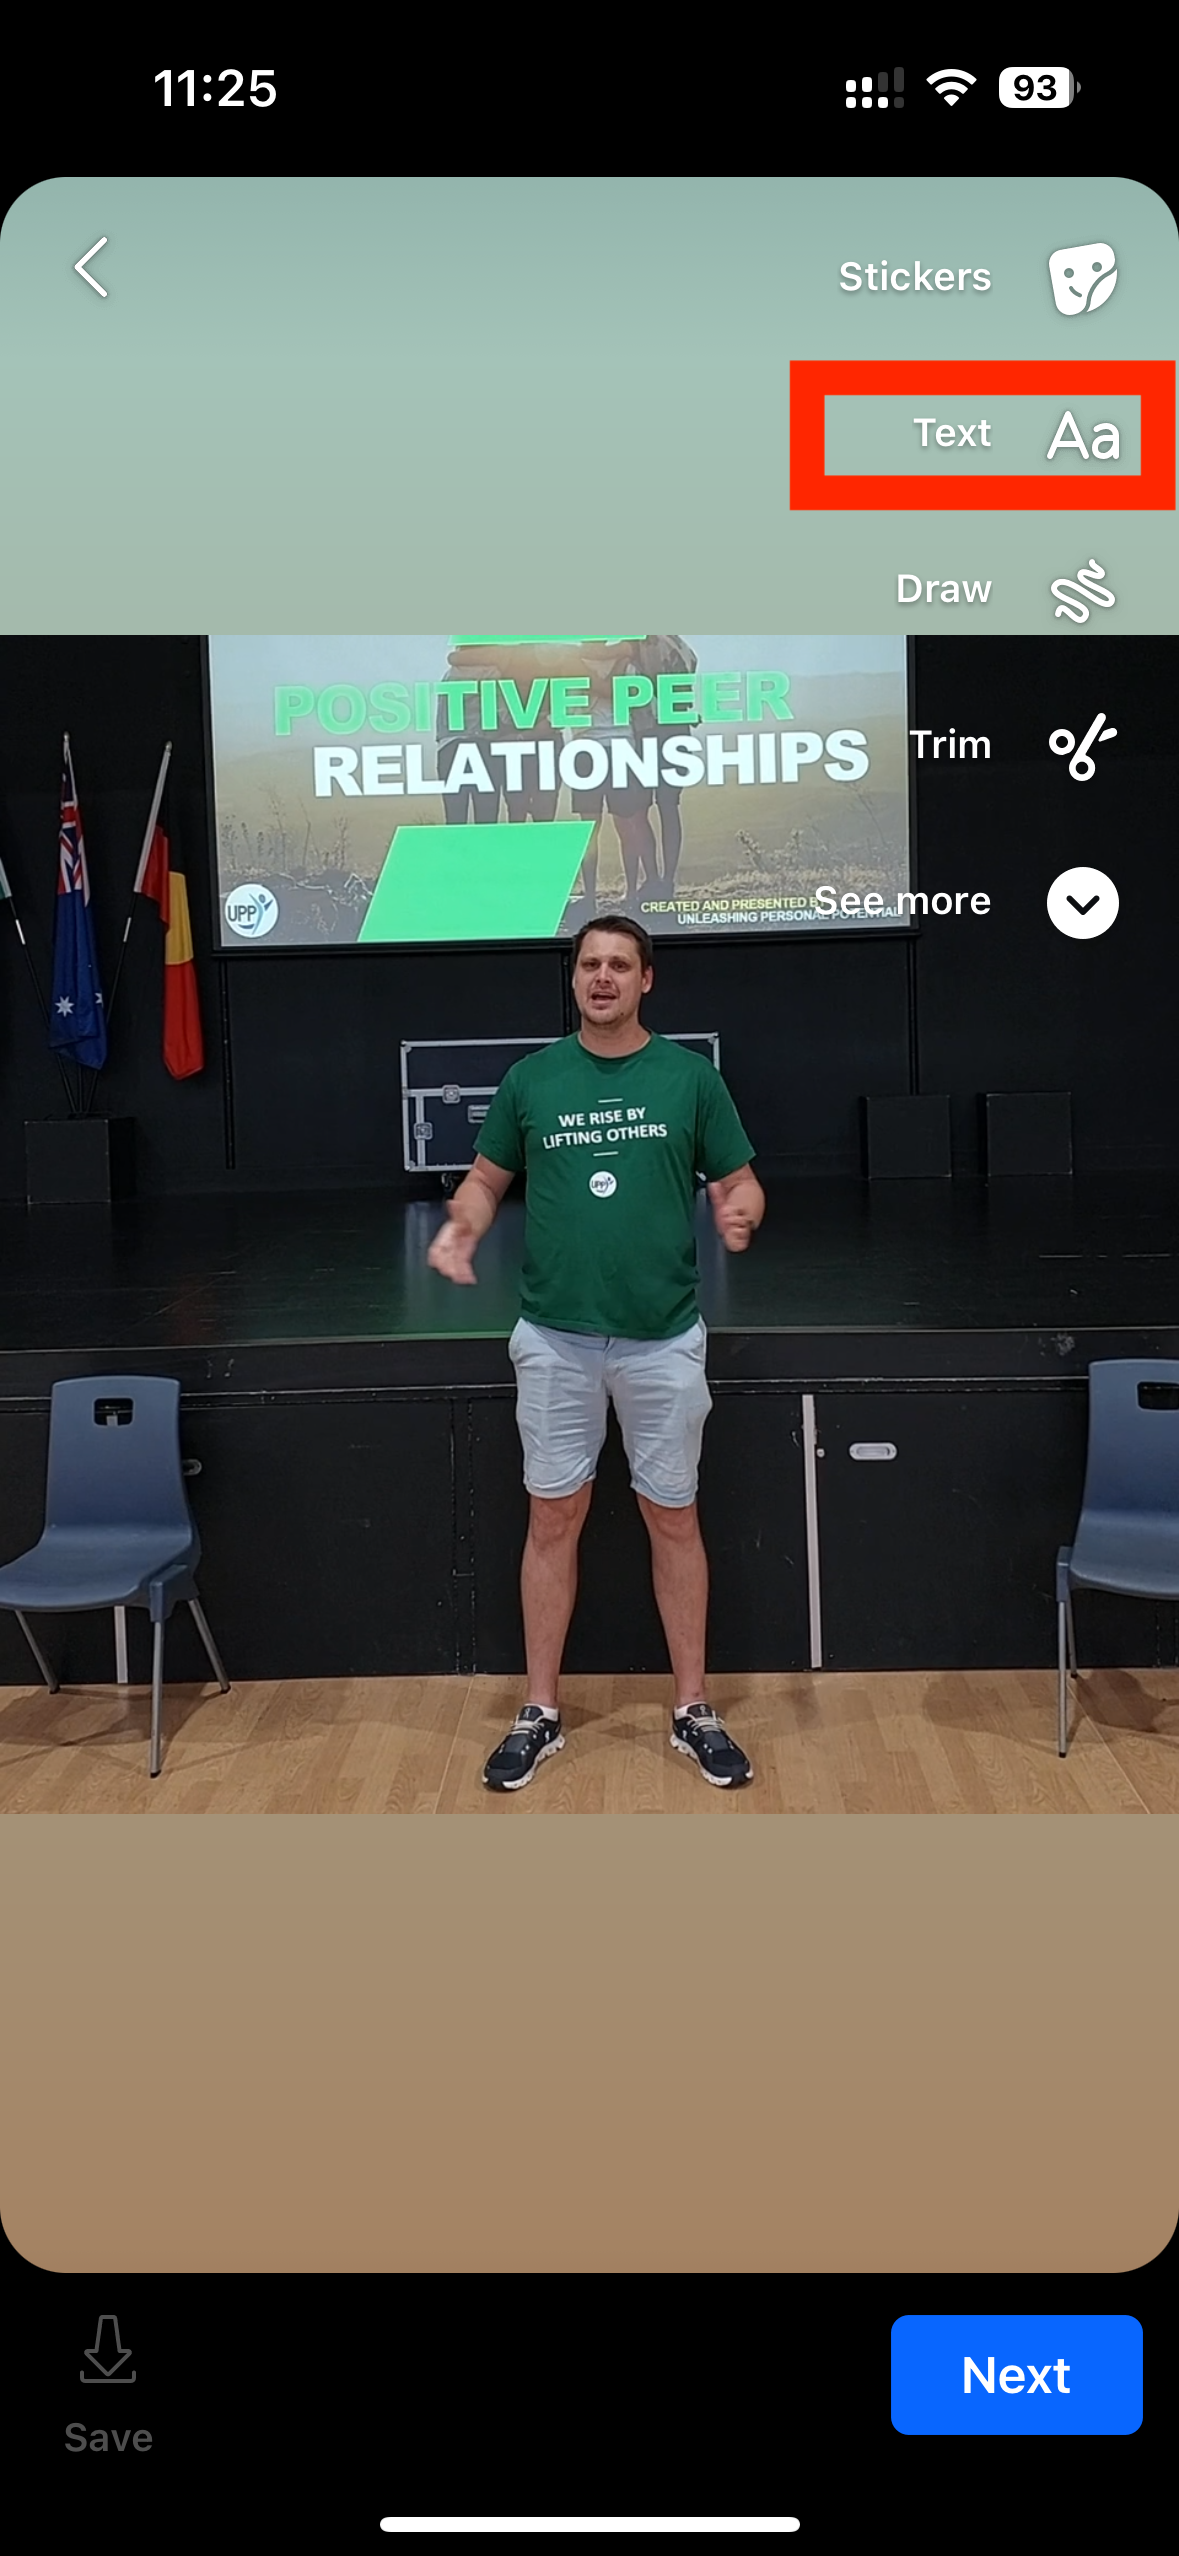
The important ones to note:
Text: Allows you to overlay text on top of the media
Trim: Allows you to edit the length of the video
Sounds (under “See More”): edit level of the volume
Links (under “See More”): Allows you to add a “swipe up to go to link” function
This allows us to link to the UPP Website or to Schools

STEP 4: ADDING TEXT TO MEDIA
Select “Text” option
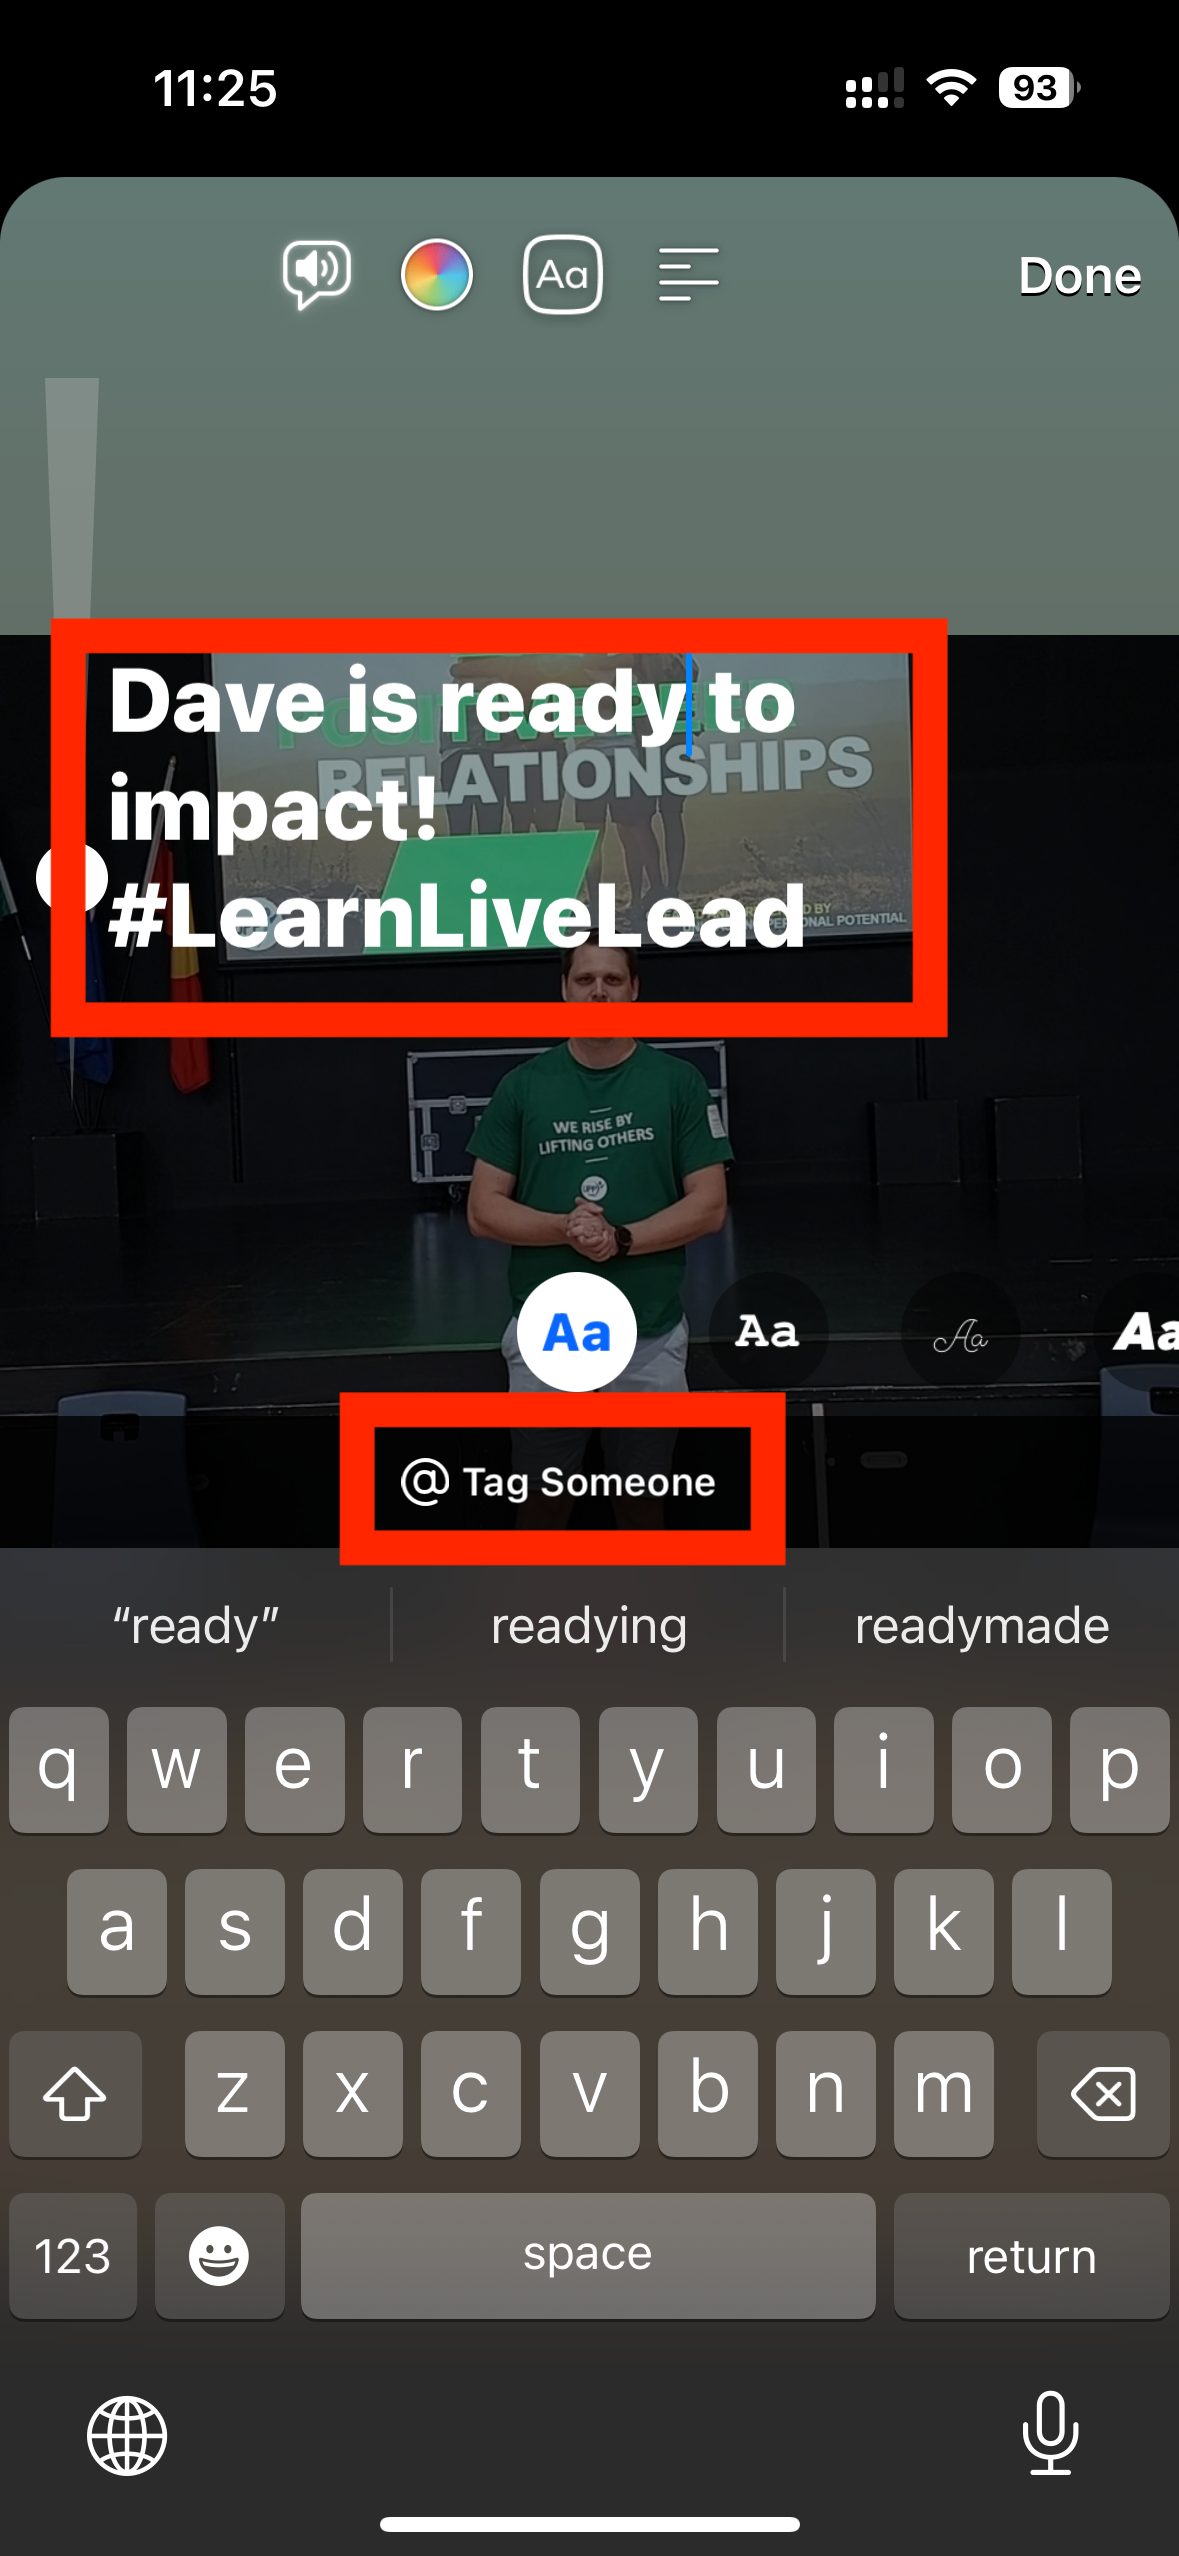
Type in text wanted for the post
Place text in a corner of the post, trying your best to svoid overlapping the main focus of the story
Hashtags can be added here and selecting “@ Tag Someone” to tag schools can be added here
EXAMPLES OF SUITABLE CAPTIONS (think of the main focus of the story vid/photo):
Ready to impact!
Epic Race is ready to roll!
Jazz is raring to go!
Great view for an even better day
EXAMPLES OF SUITABLE HASHTAGS:
HASHTAGS ABOUT WHAT WE DO:
#StudentWellbeing
#StudentLeadership
#BuildingSocialSkills
#LearningforLife
HASHTAGS ABOUT OUR TARGET AUDIENCE:
The name of the school: #RedlandBayStateSchool, #GeelongGrammar
#secondaryschool
#primaryschool
#brisbaneschools
#sydneyschools
#melbourneschools
#teachers
#studentleaders
#education

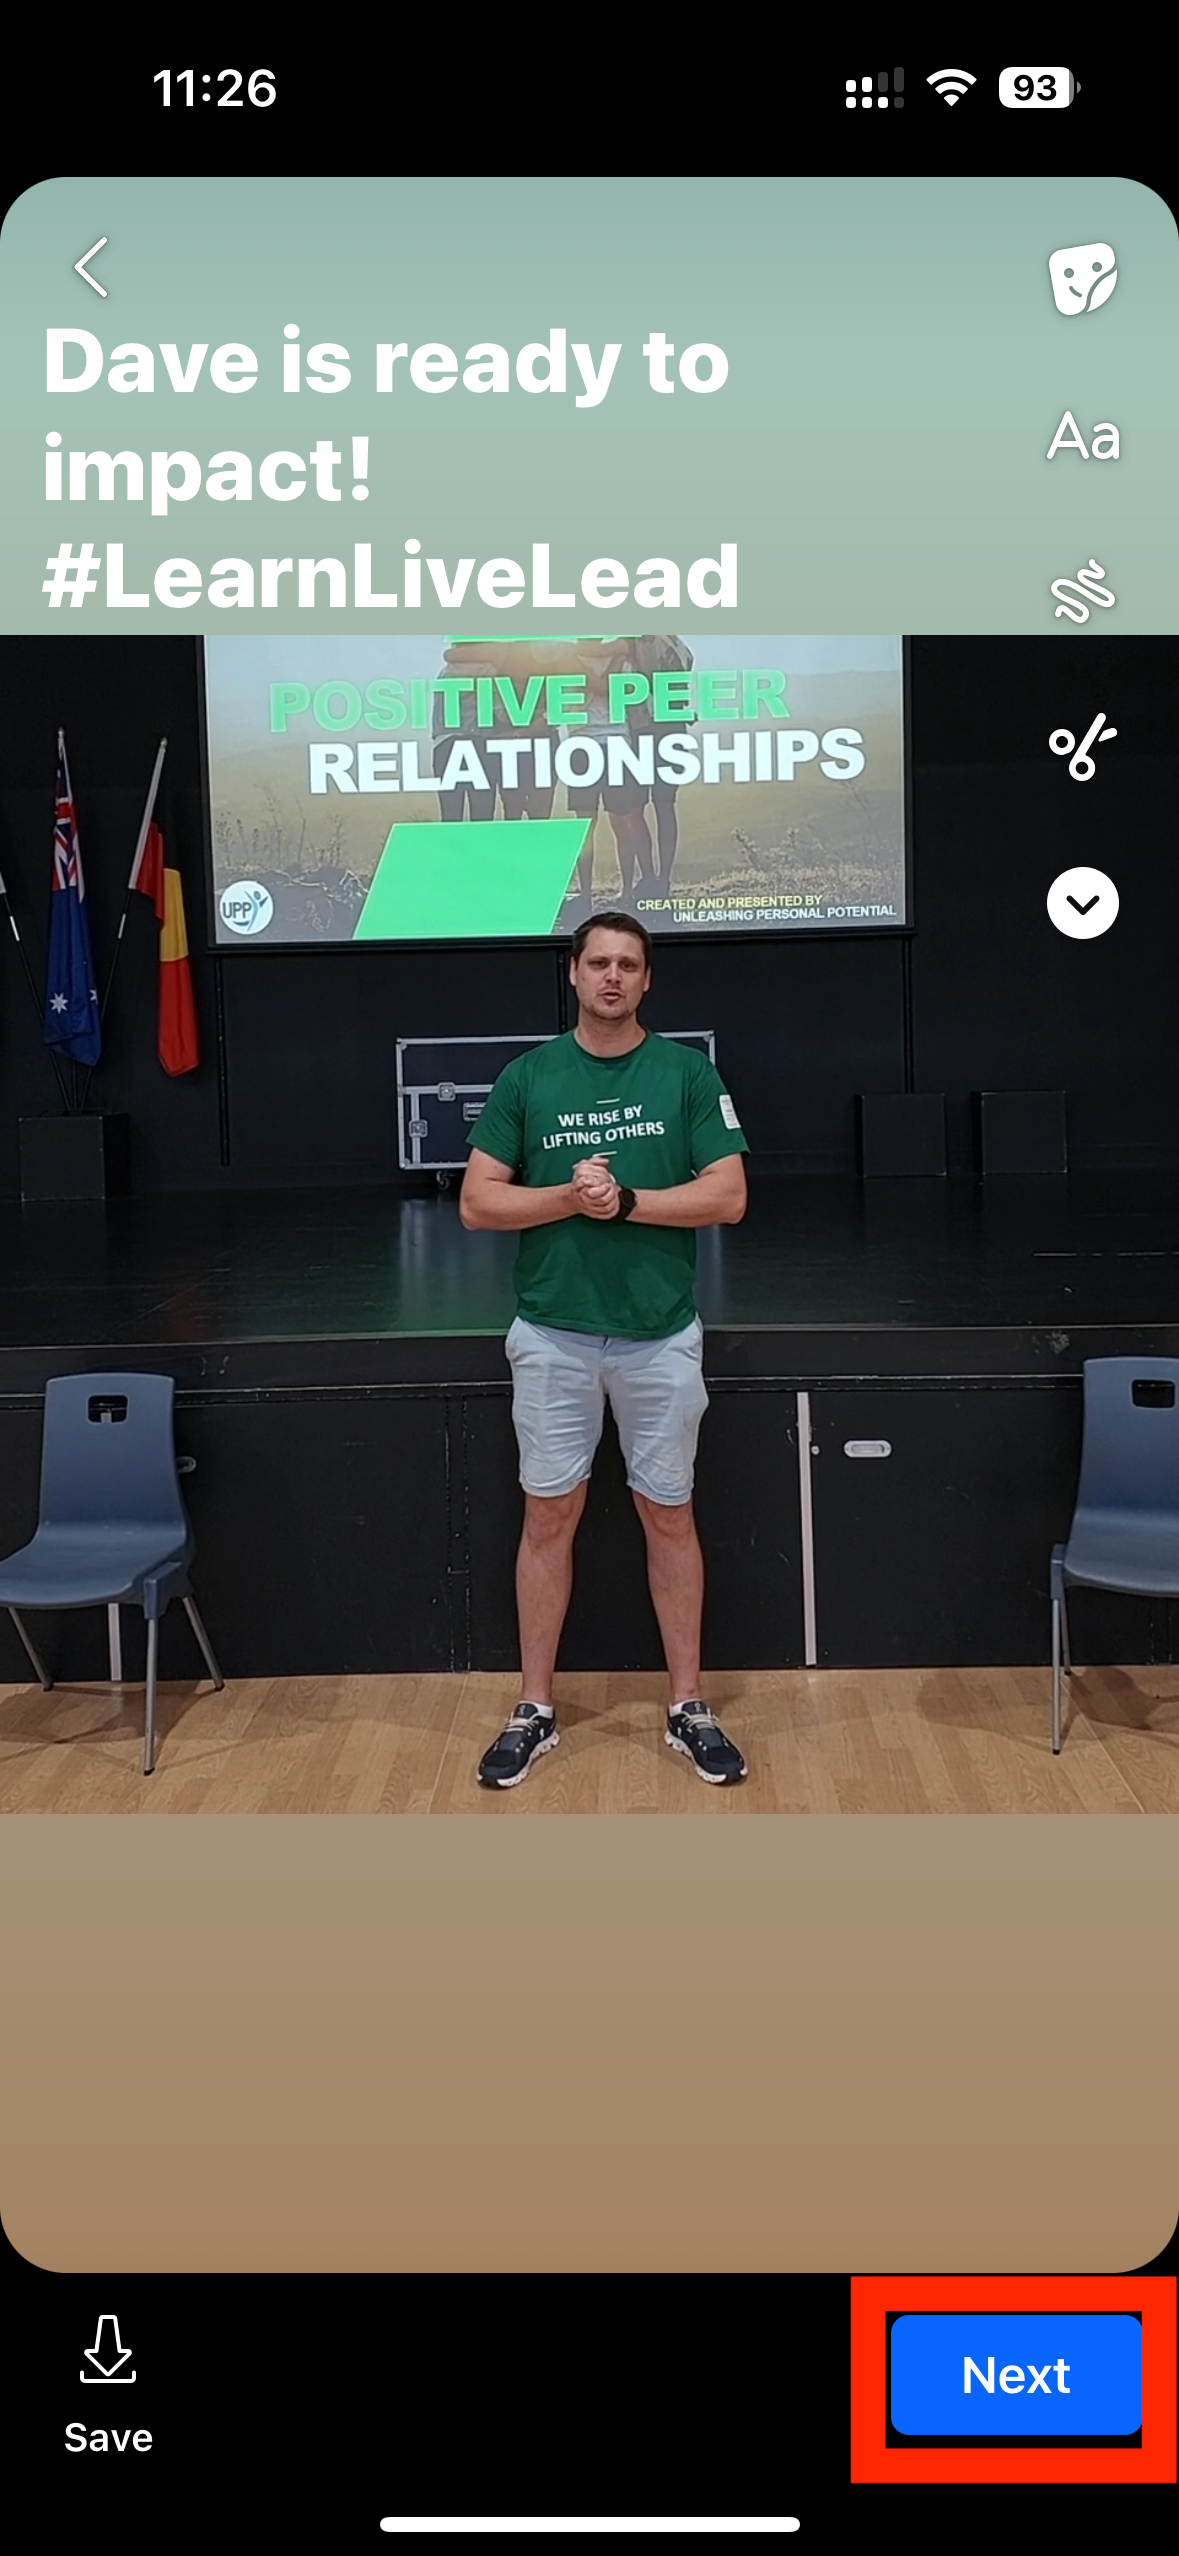
STEP 5: CONFIRM EDITING WITH “NEXT”
Once edits are complete and text is placed in the right spot, hit “Next” to lock in selections.
STEP 6: SELECT LOCATION OF POST
Select the list of accounts towards the top of the screen
Select which of the UPP Accounts you wish to create a post on
You can post to both simultaneously, or just to one
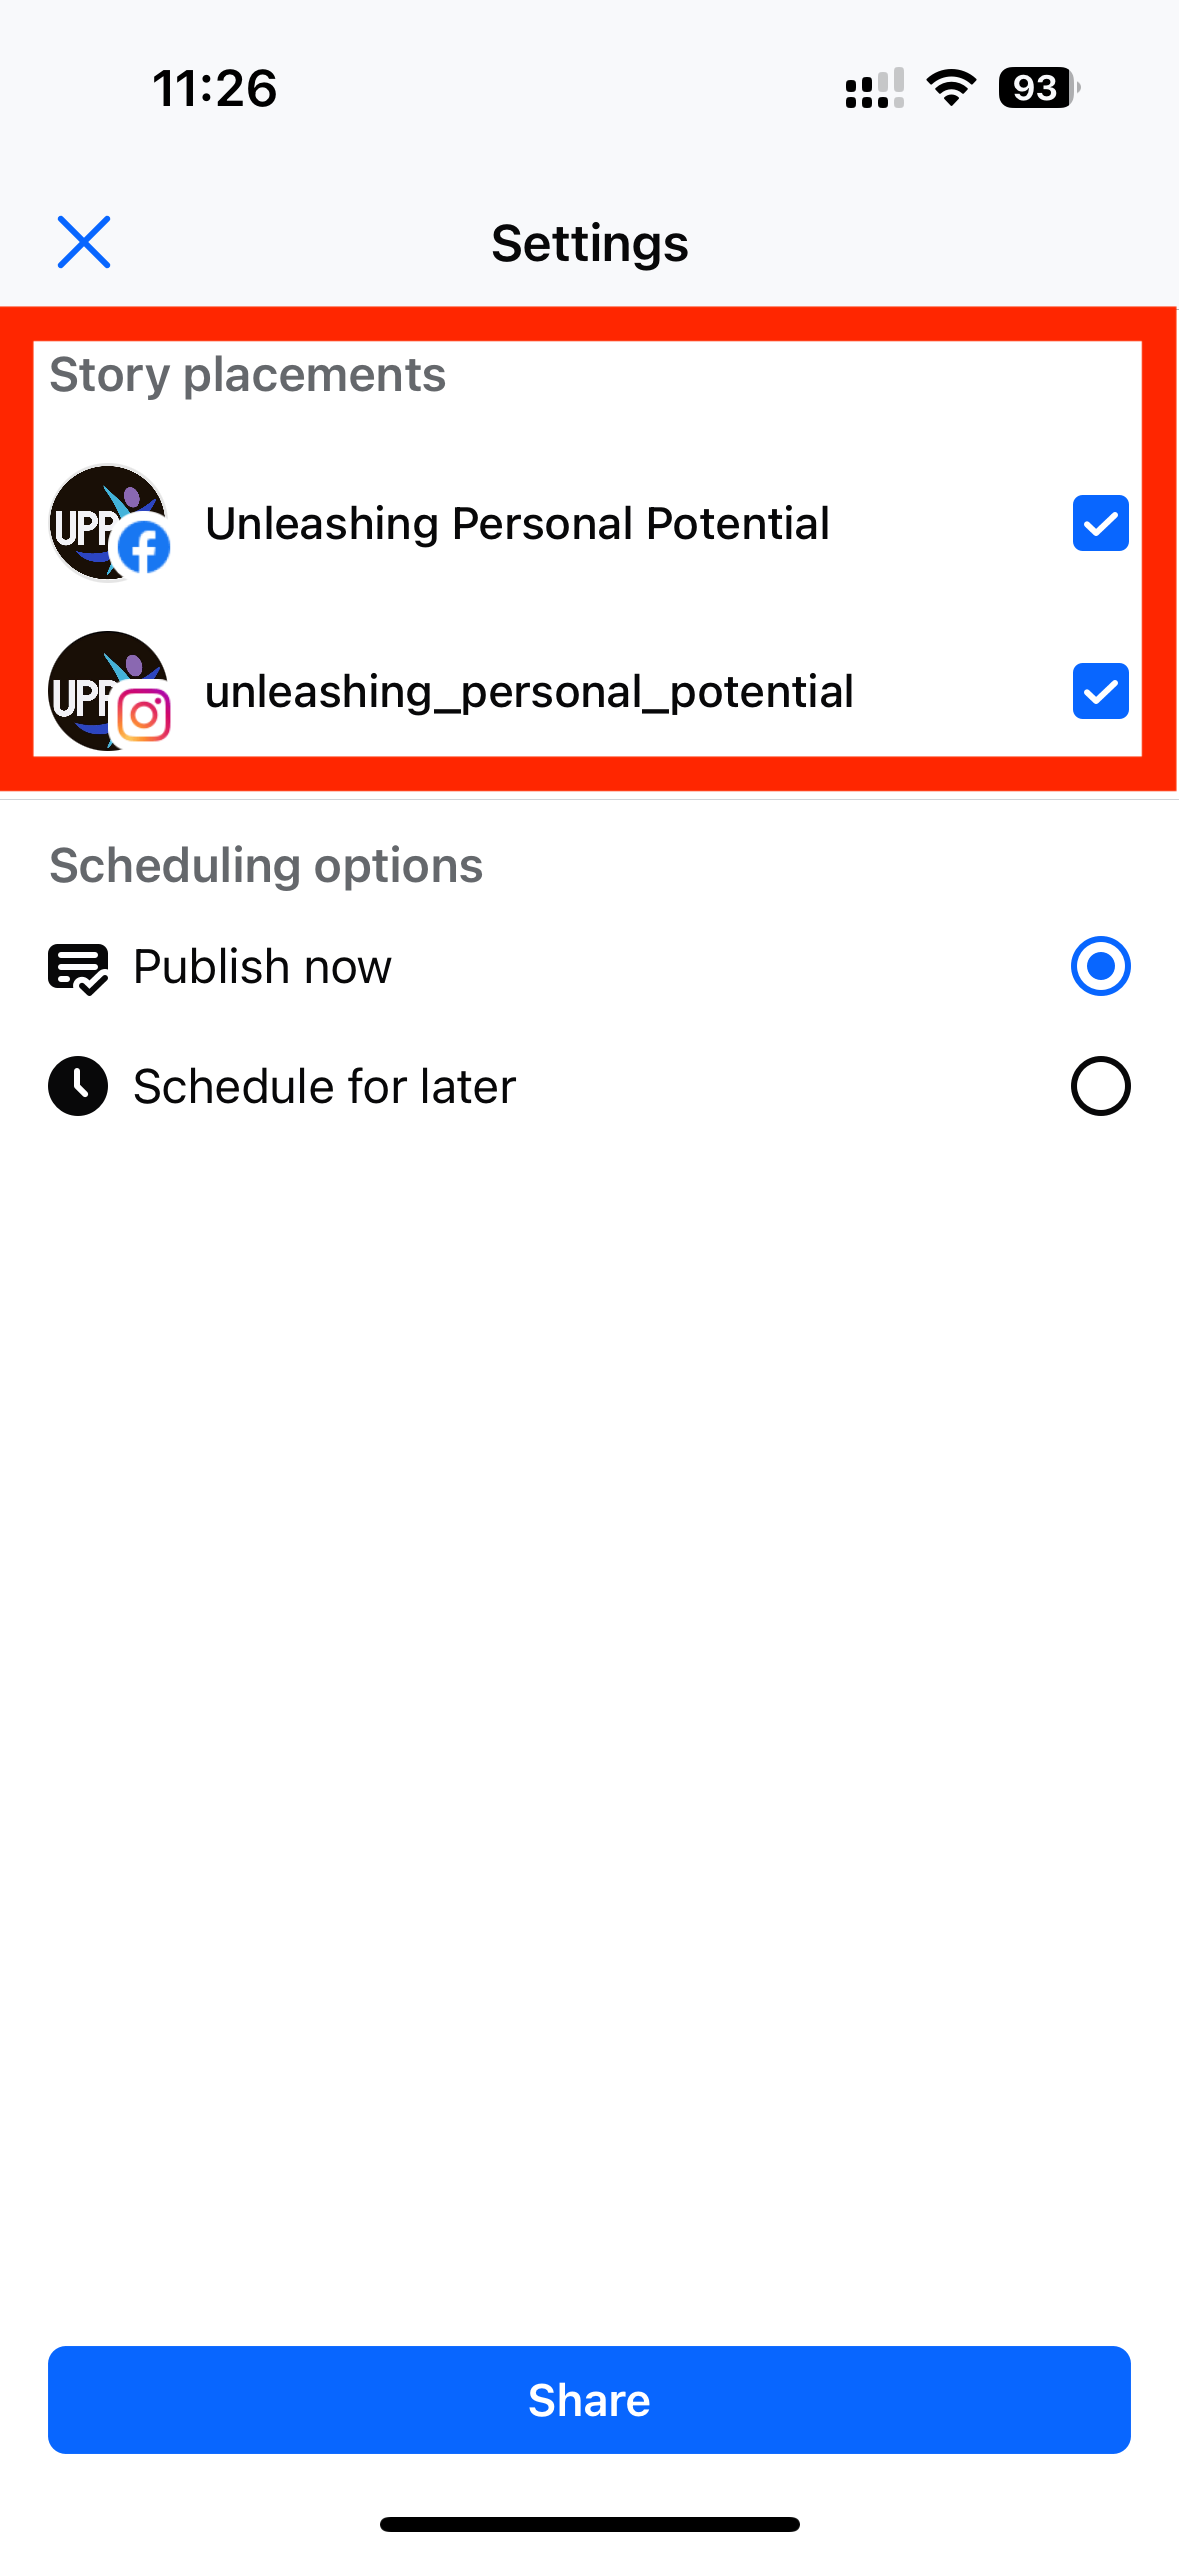
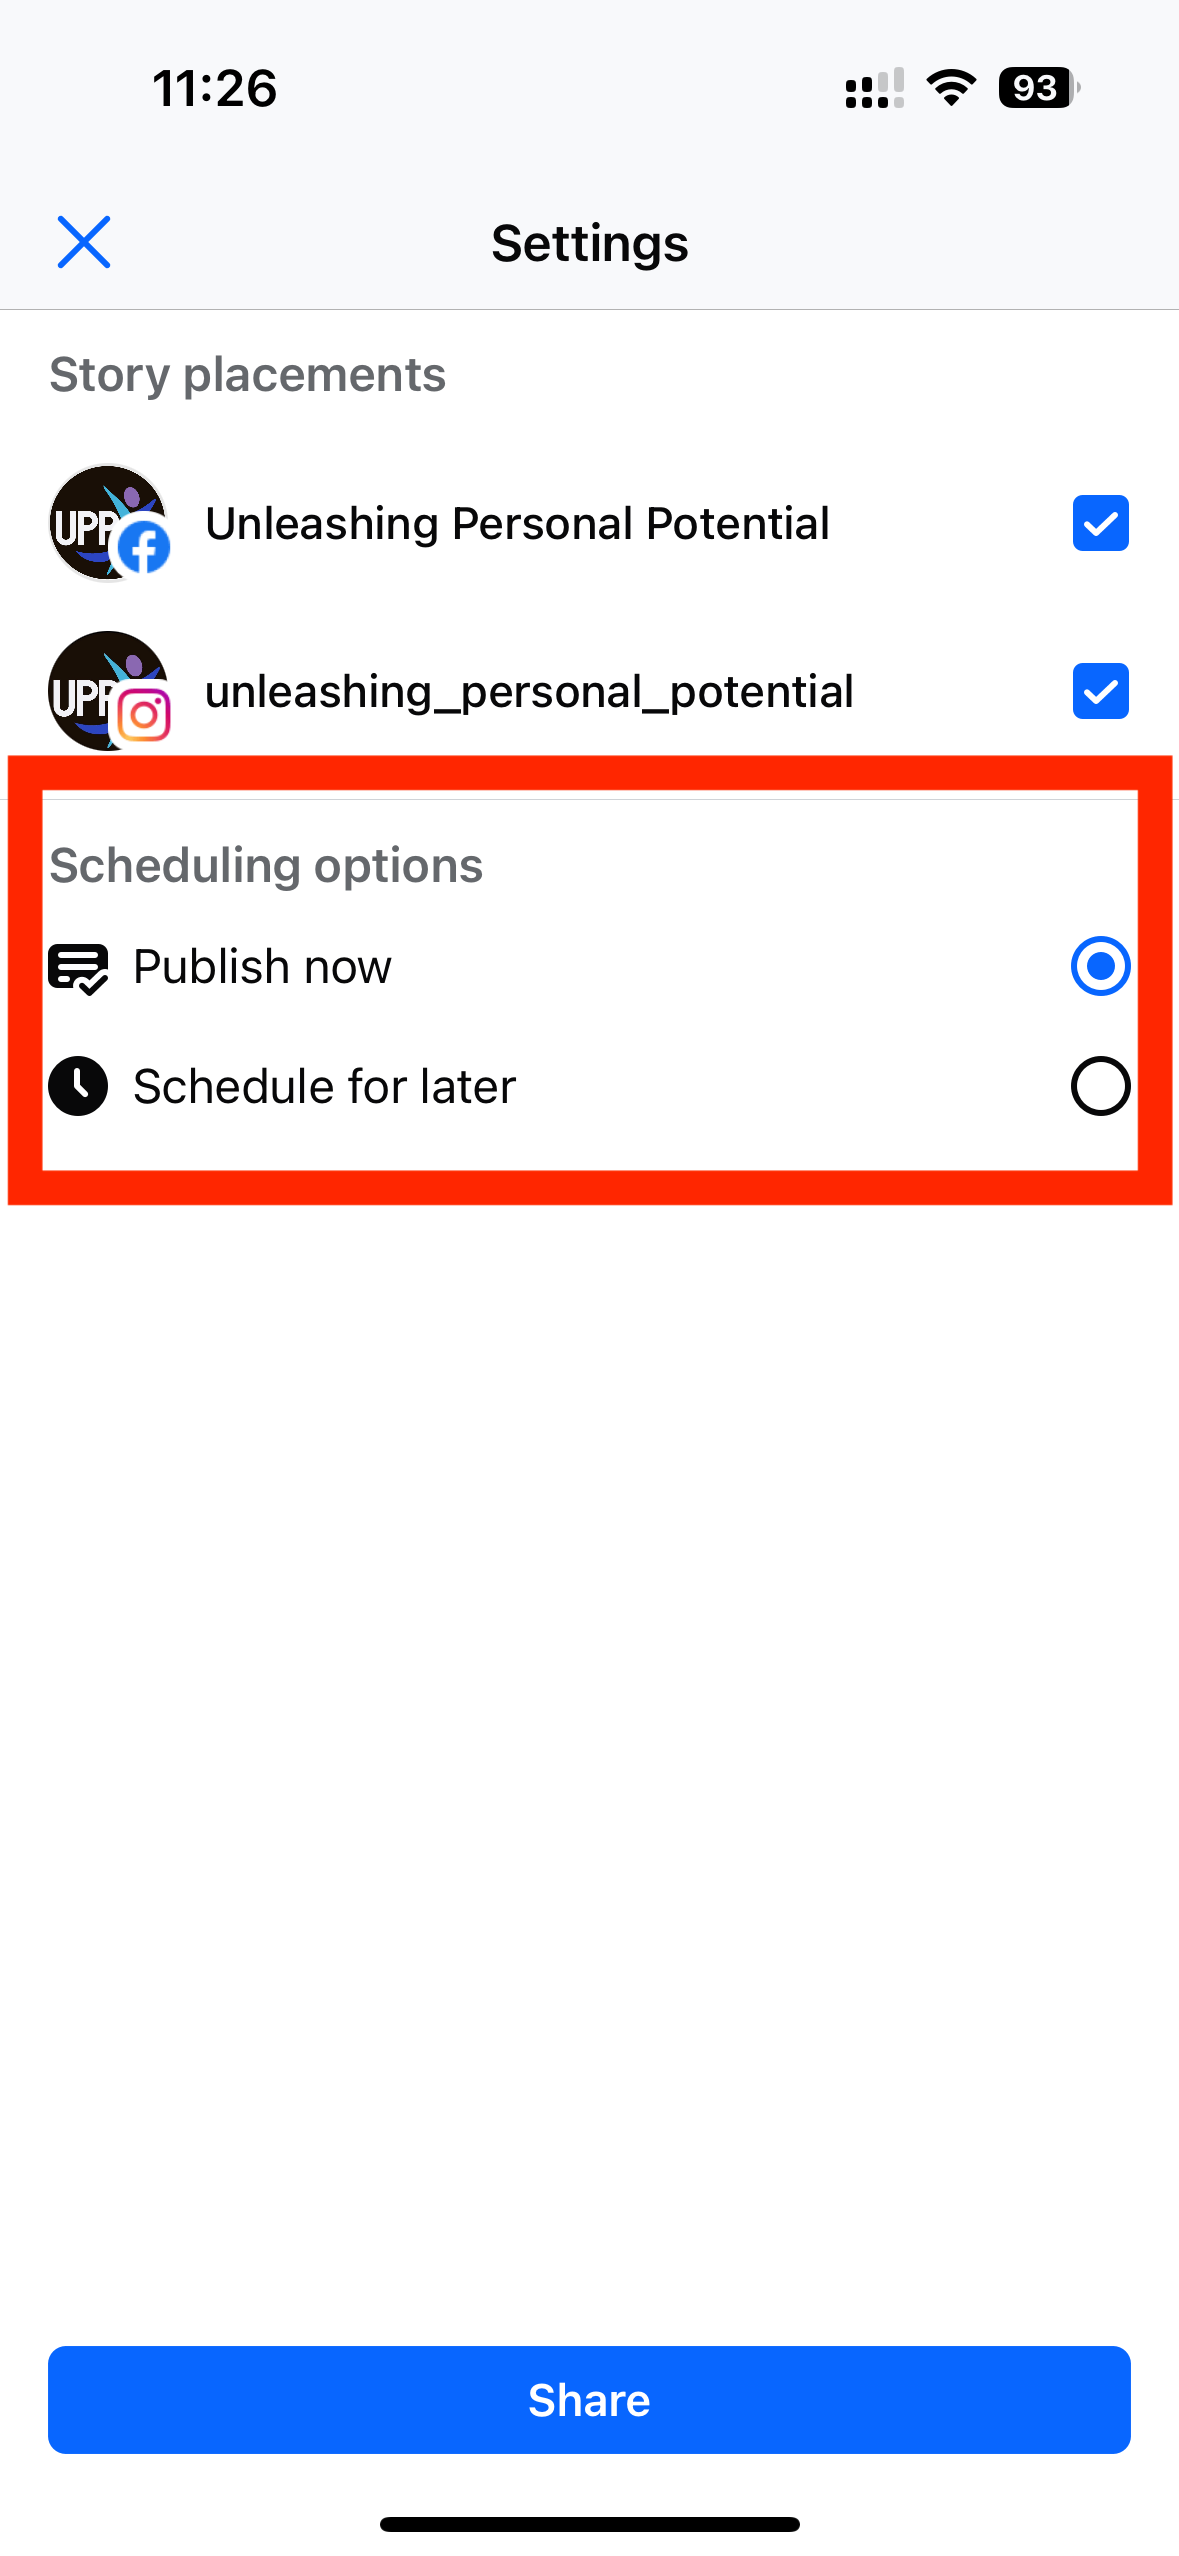
(OPTIONAL STEP): SELECT SCHEDULING OPTIONS
When directed to post a story, the story will be posted immediately to give it a “real time” element
However, if directed to schedule a story for a later time and date, follow the instructions below:
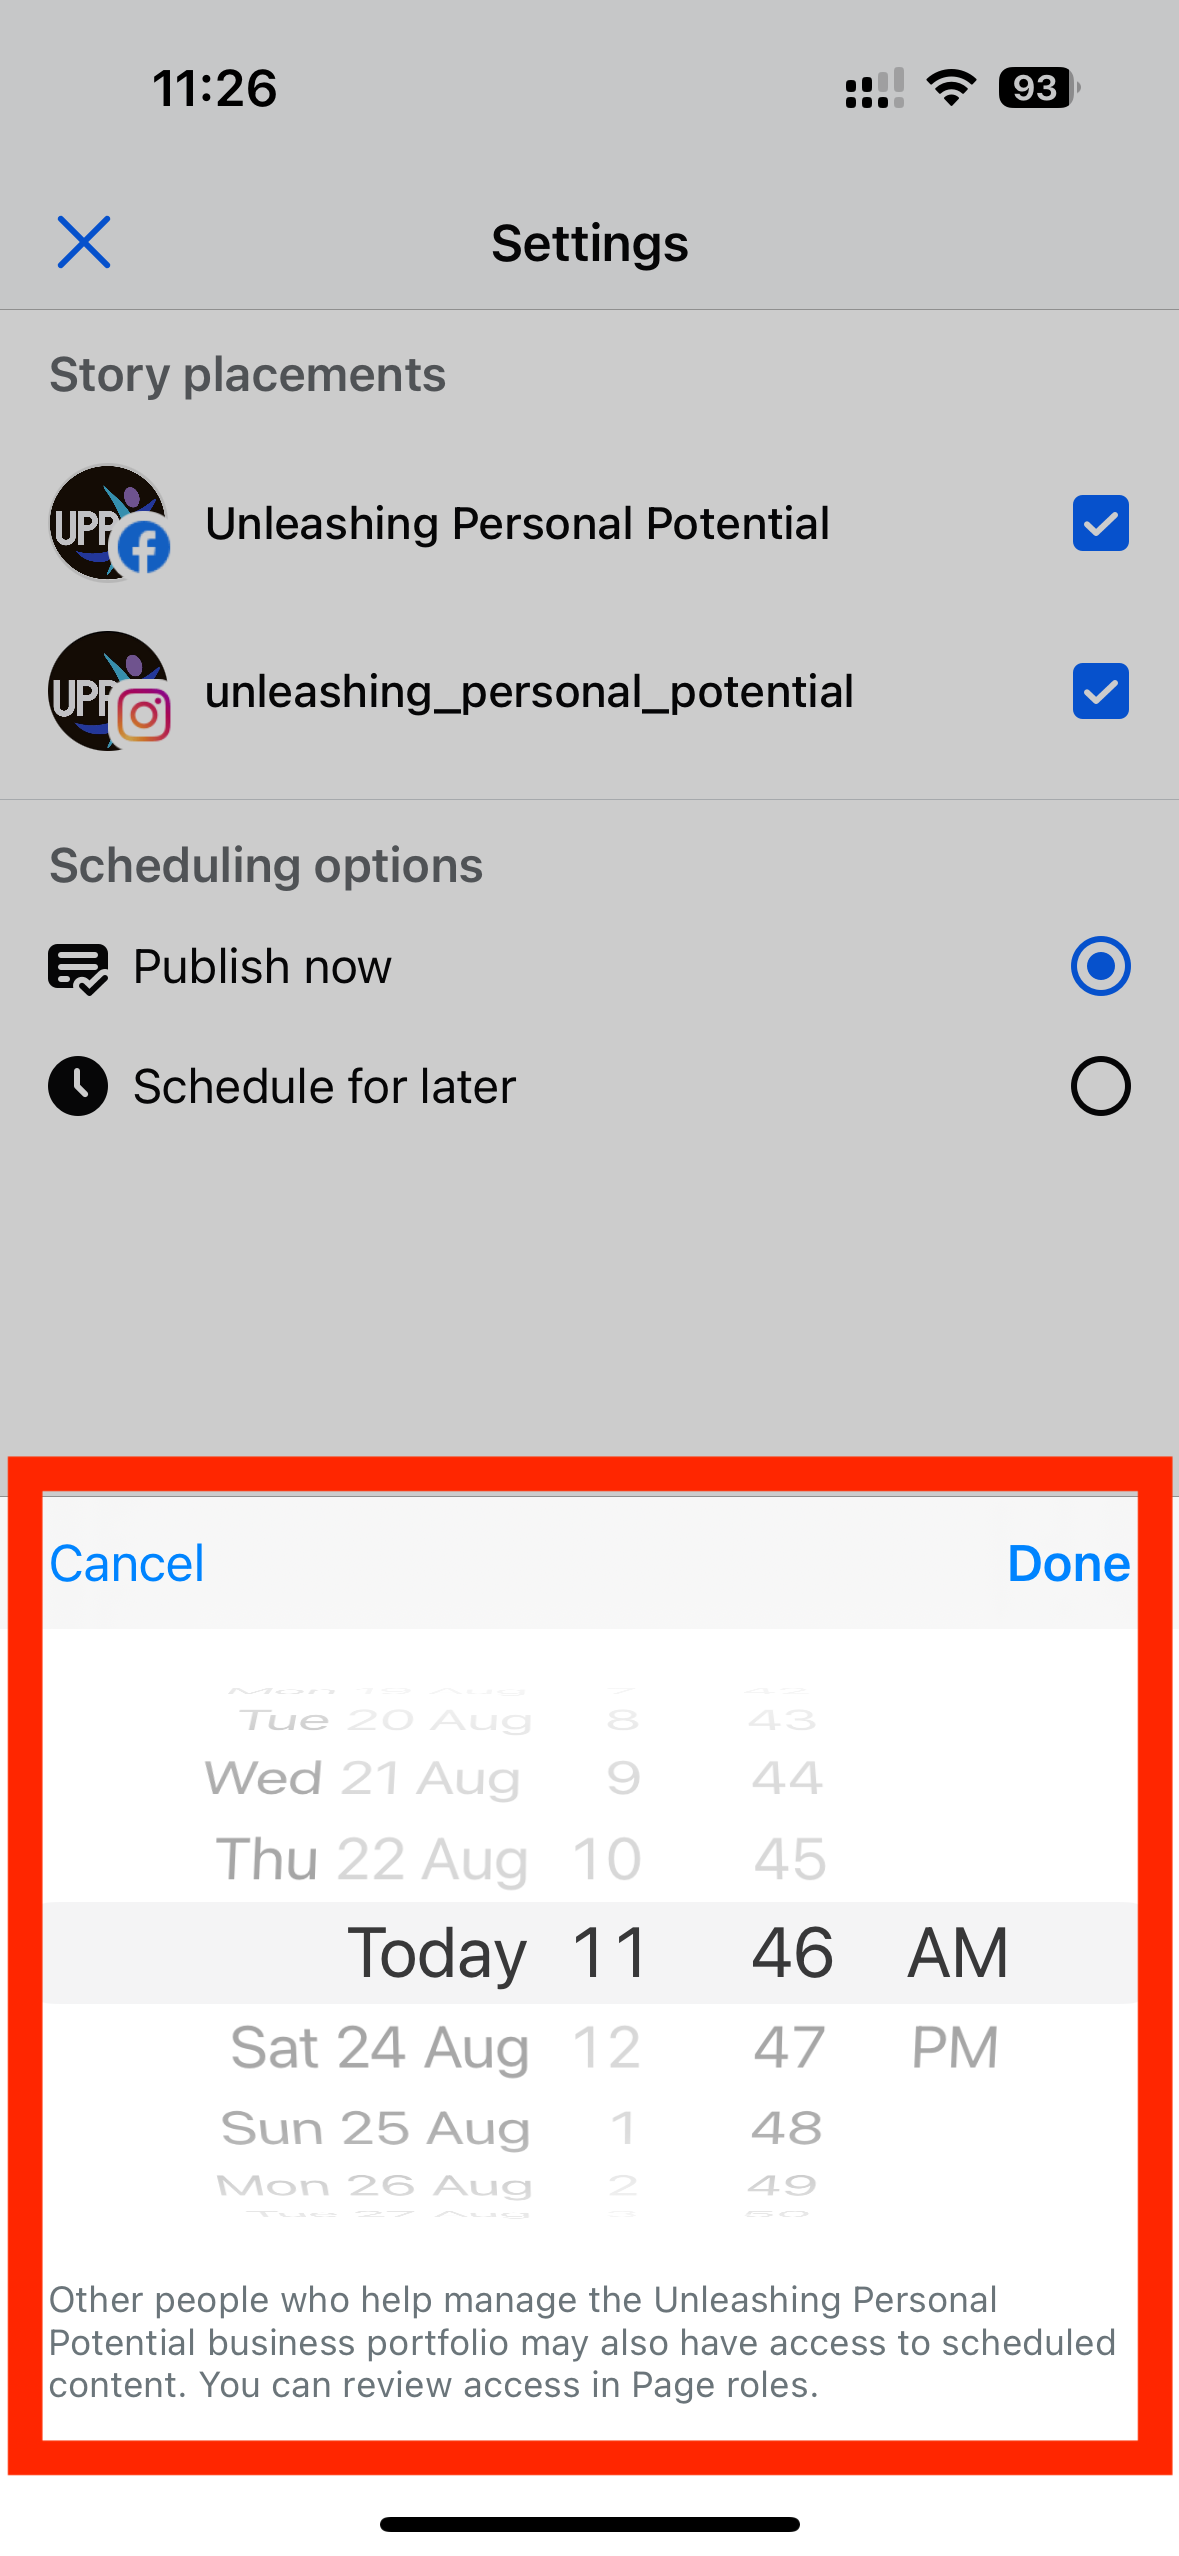
Select “Schedule for a later”
When selected, you may schedule a post for up to 30 days in advance, at the time of day of your choosing.
Select “Done” to confirm selection
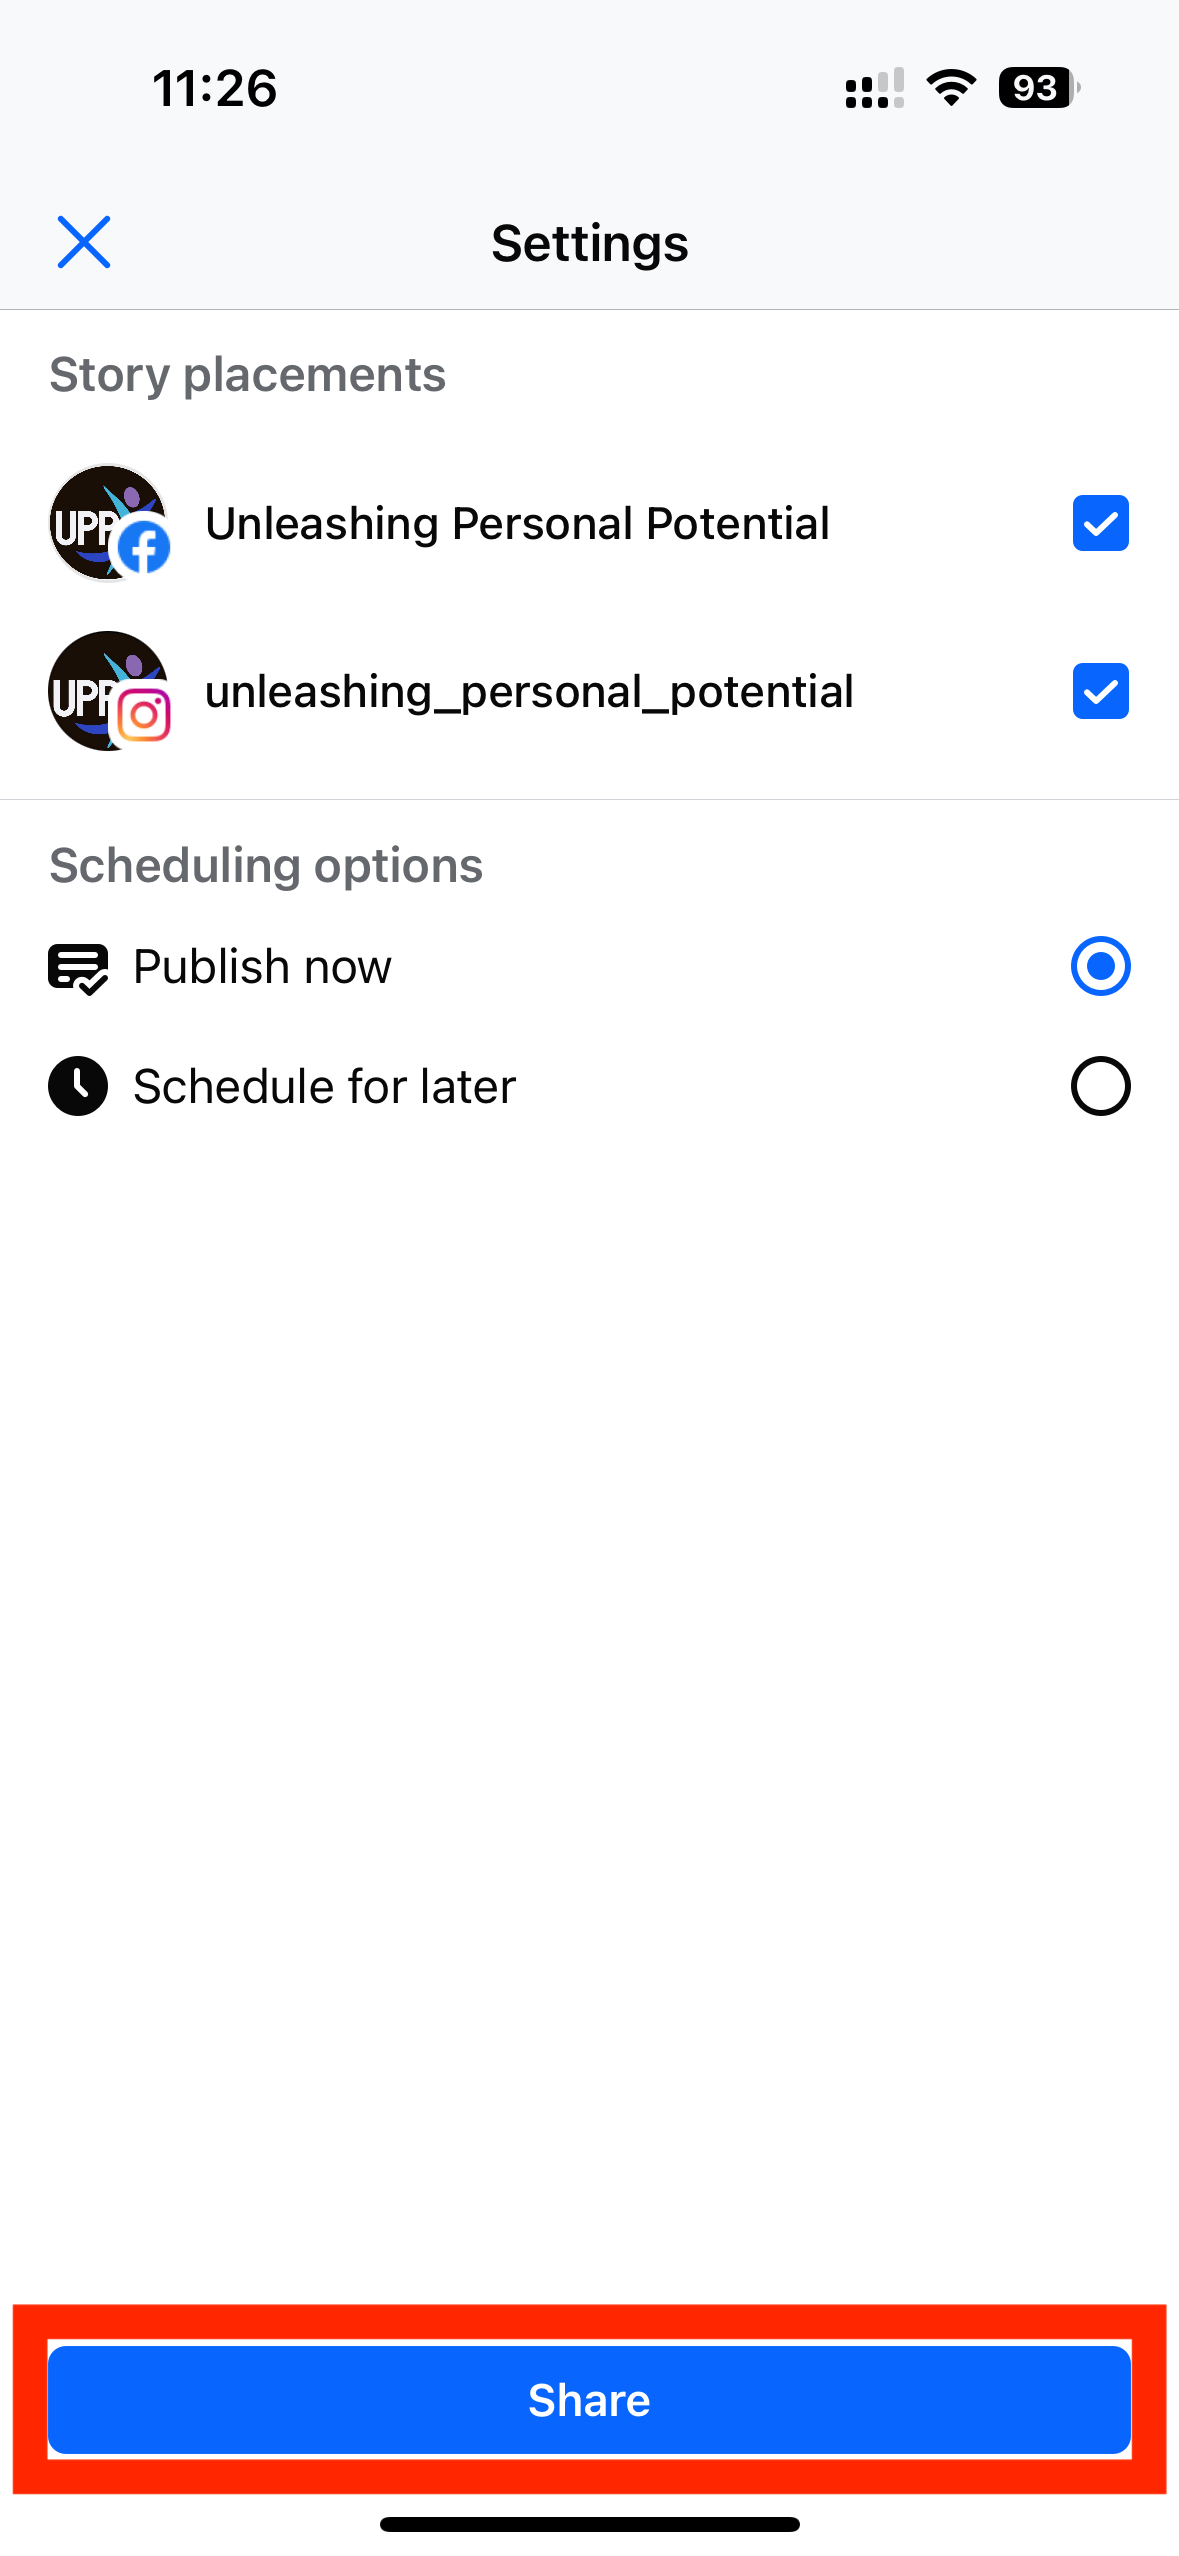
STEP 7: PUBLISH STORY
Press “Share” at the top of the page in order to publish the post to the selected socials.
NOTE: It is difficult to edit certain details of the story once published (such as the length of the video and volume), so any mistakes means stories must be deleted and then reuploaded with corrections
HOW TO CREATE A POST: META BUSINESS SUITE APP
STEP ONE: START A NEW POST
Open the Meta Business Suite App
Press “Create Post”

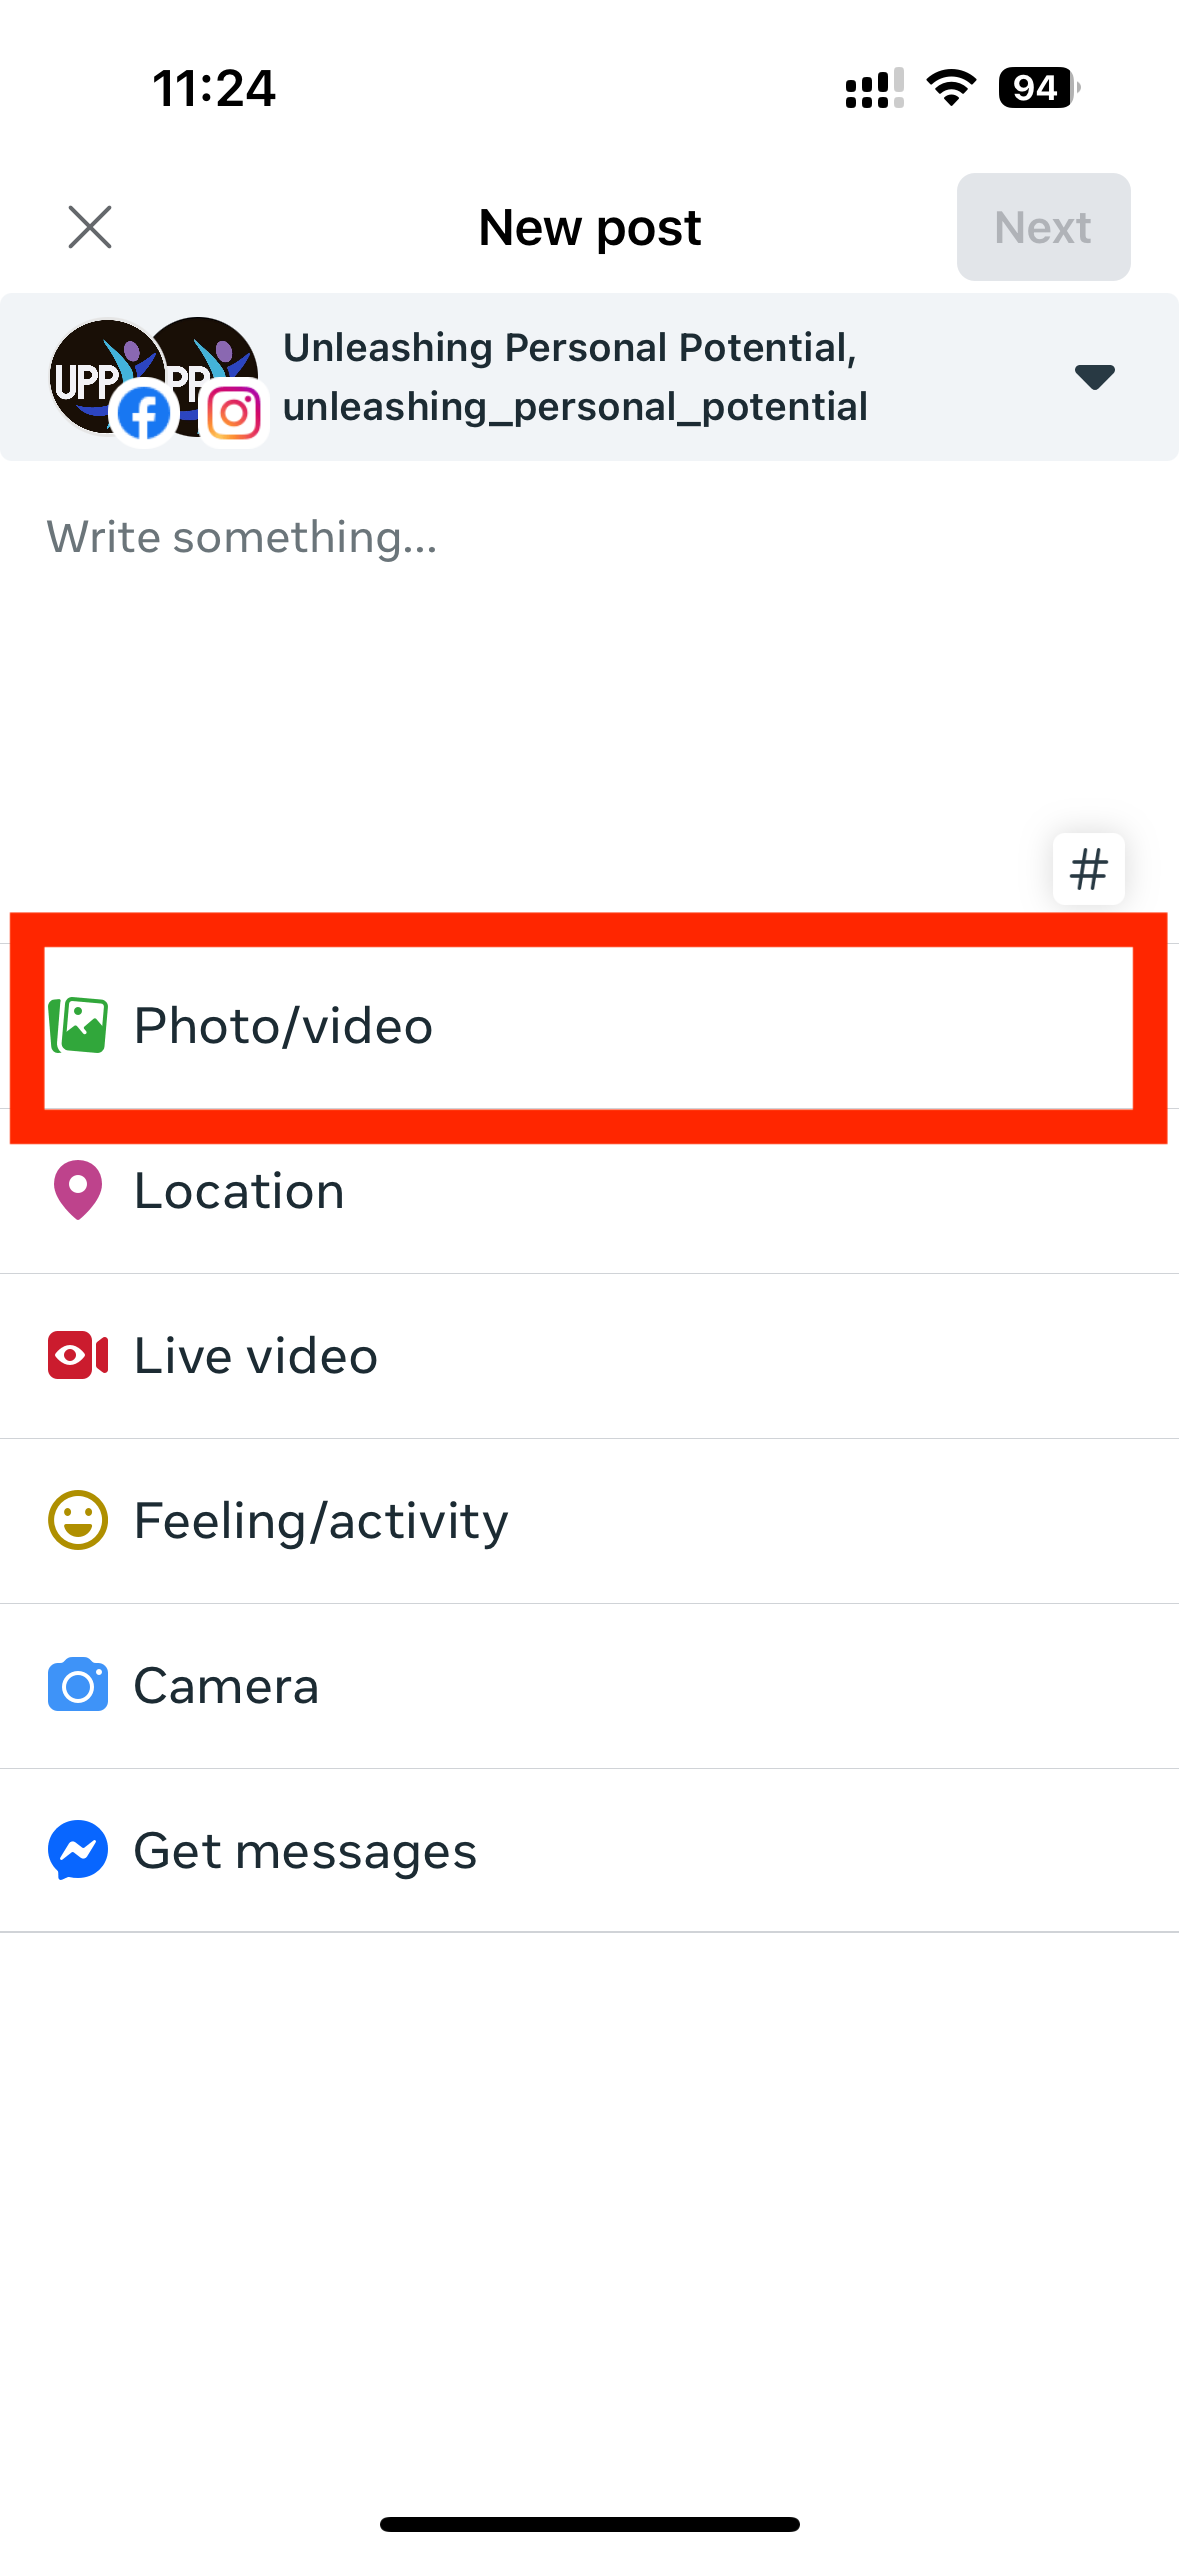
STEP 2: SELECT PHOTO/VIDEO
Other details, such as tagging school location and/or other types of posts can also be found as options in the list
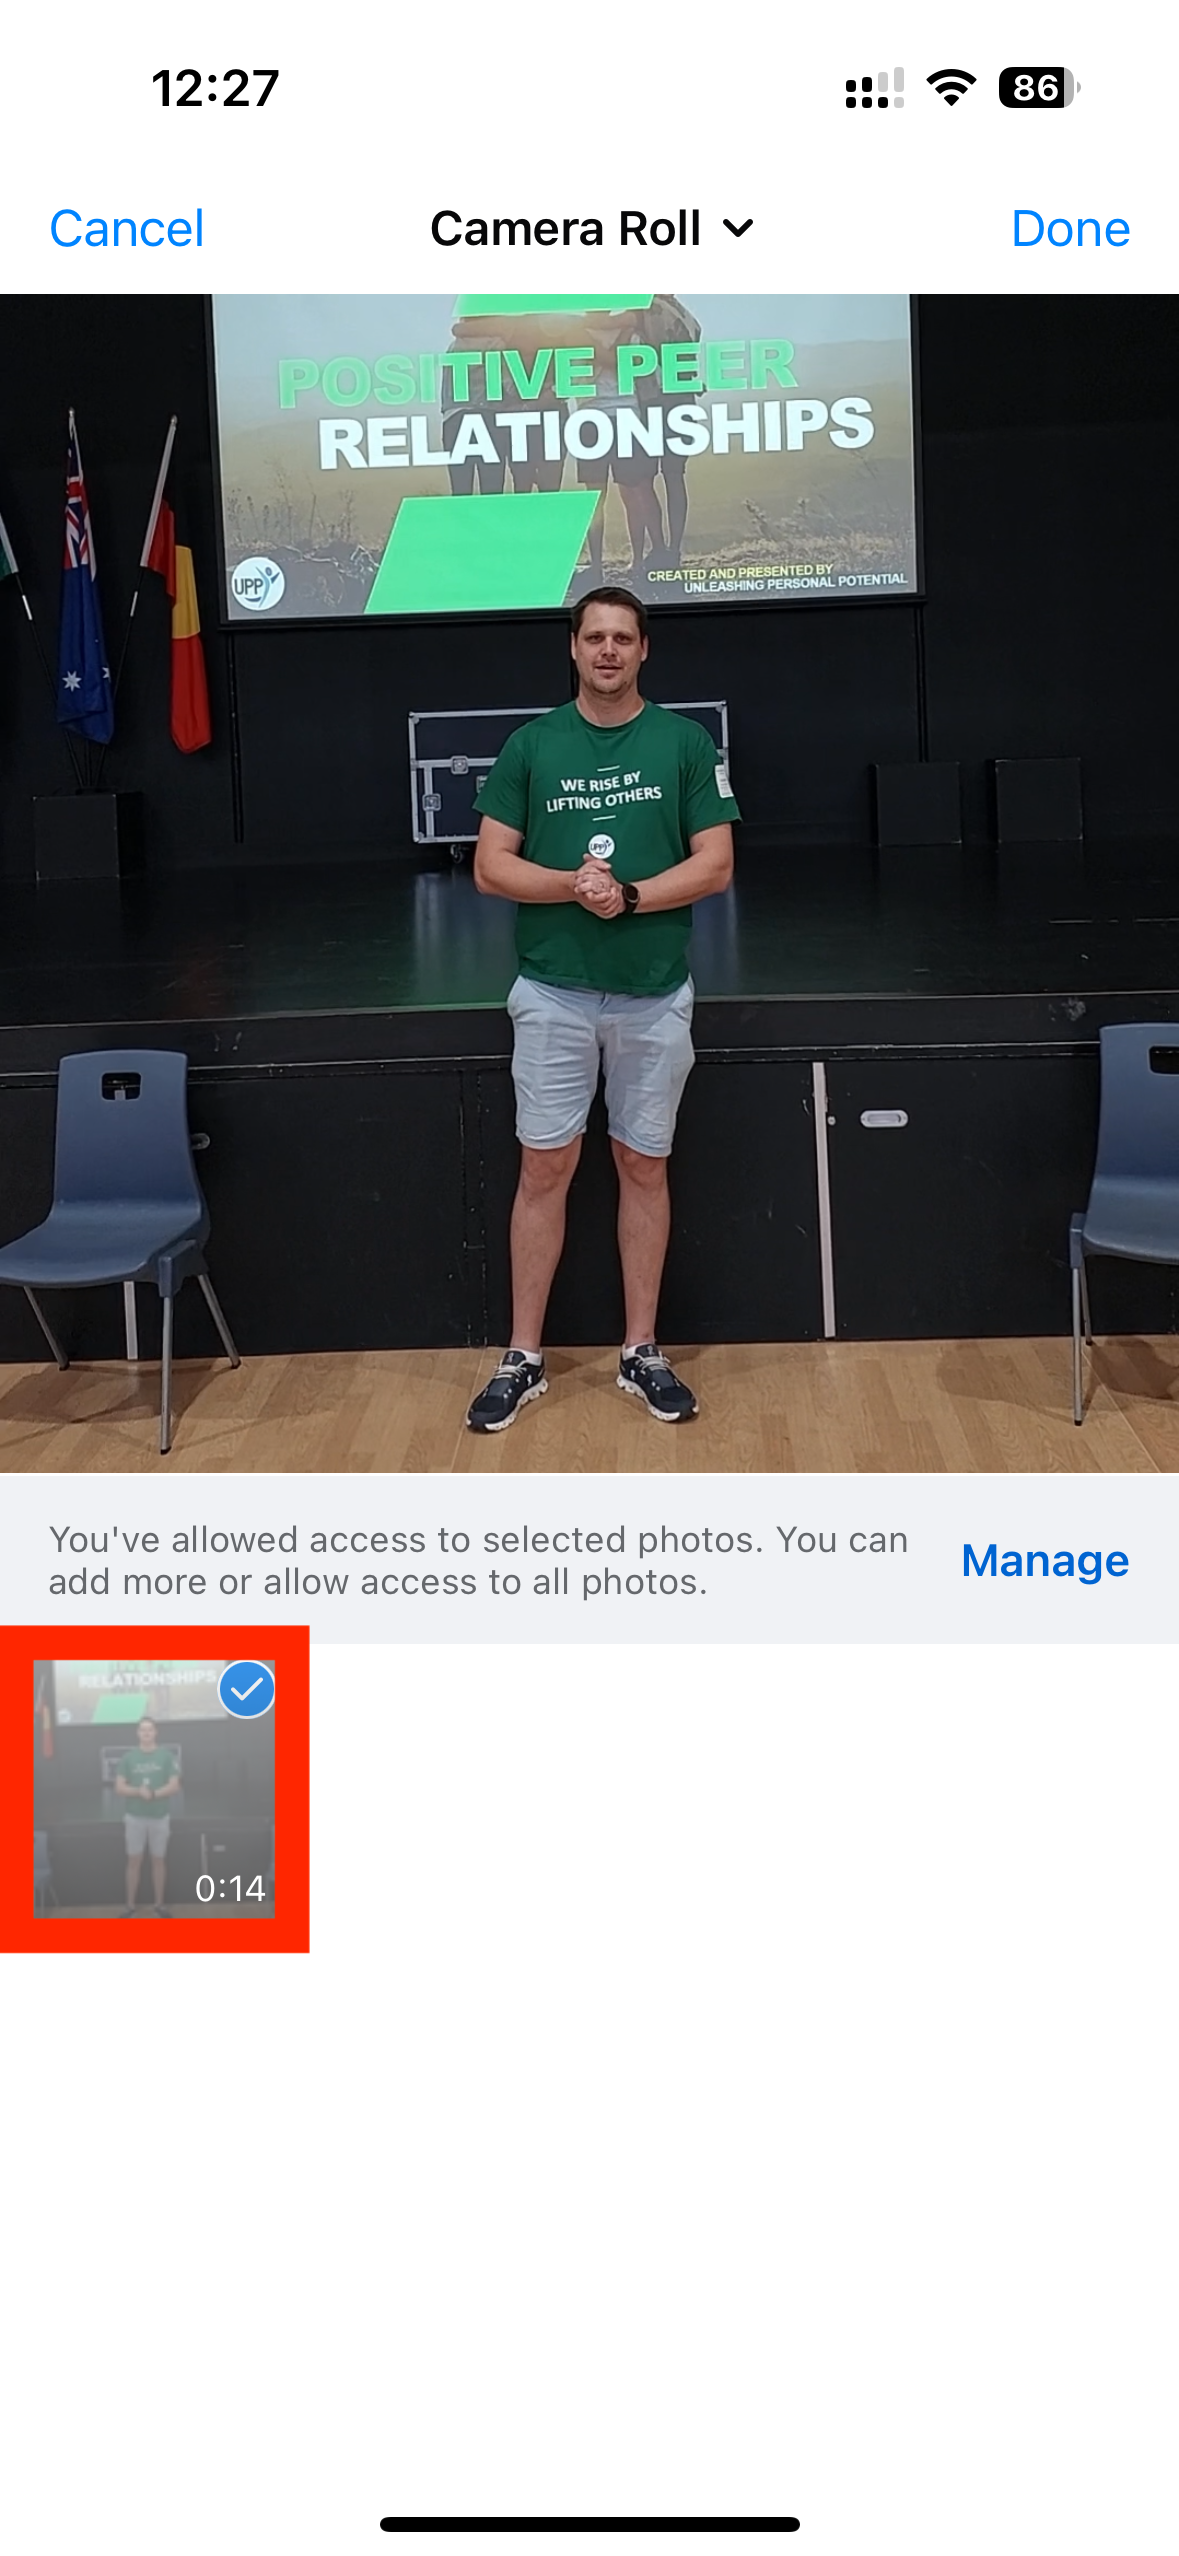
STEP 3: SELECT THE MEDIA YOU WANT FOR THE POST
You may need to allow access to the Meta Business app to your camera roll
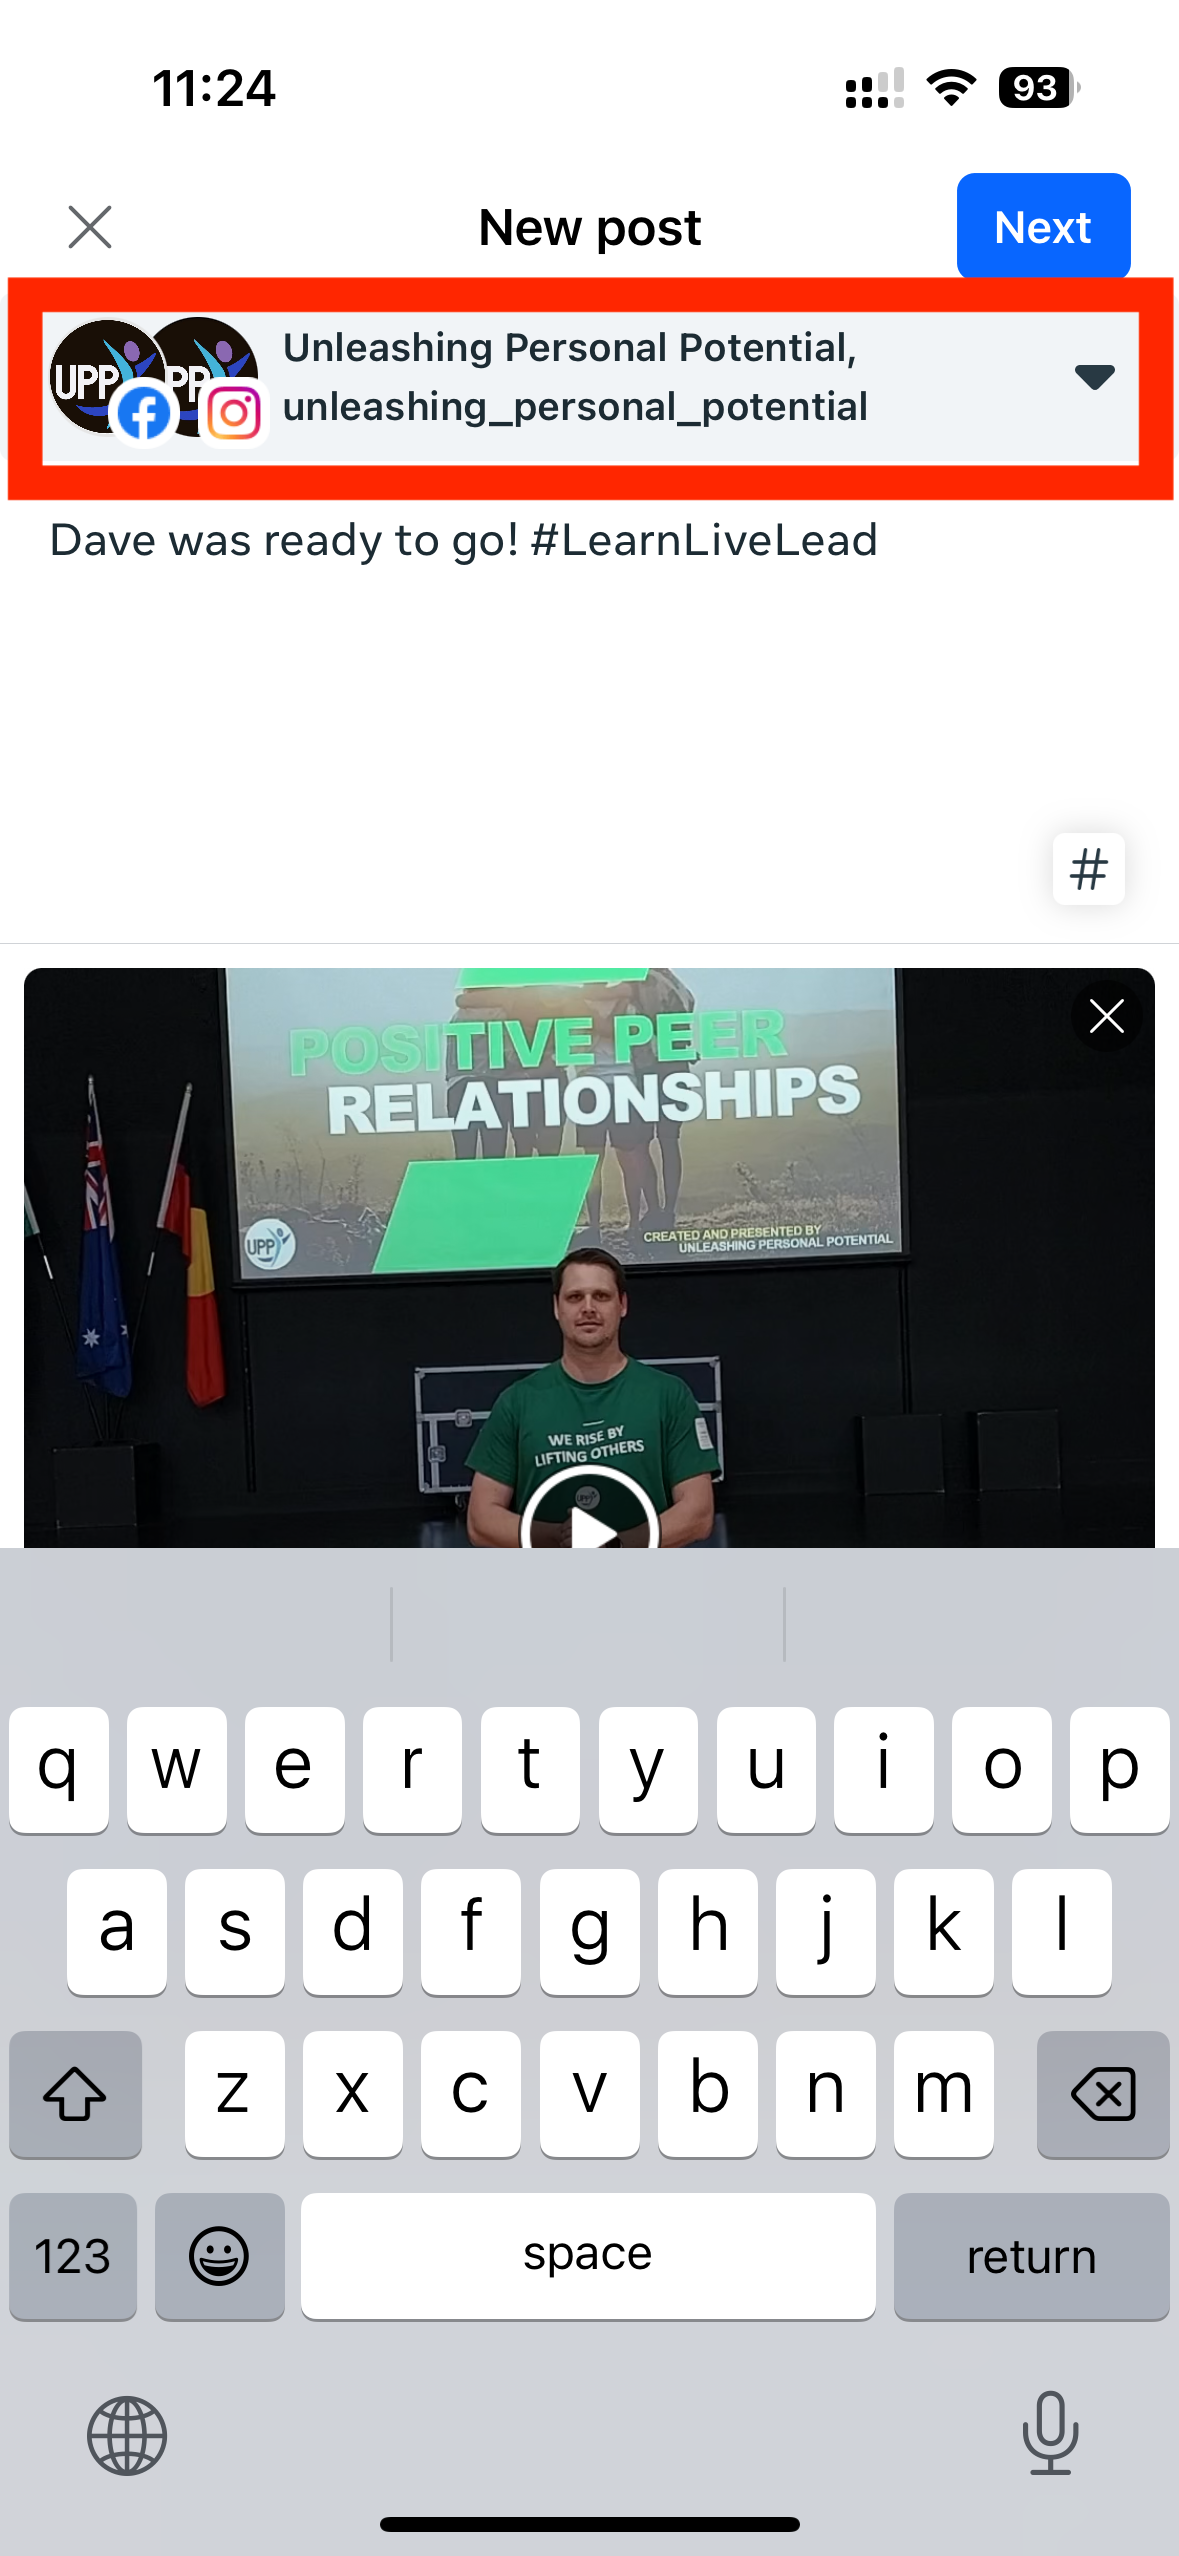
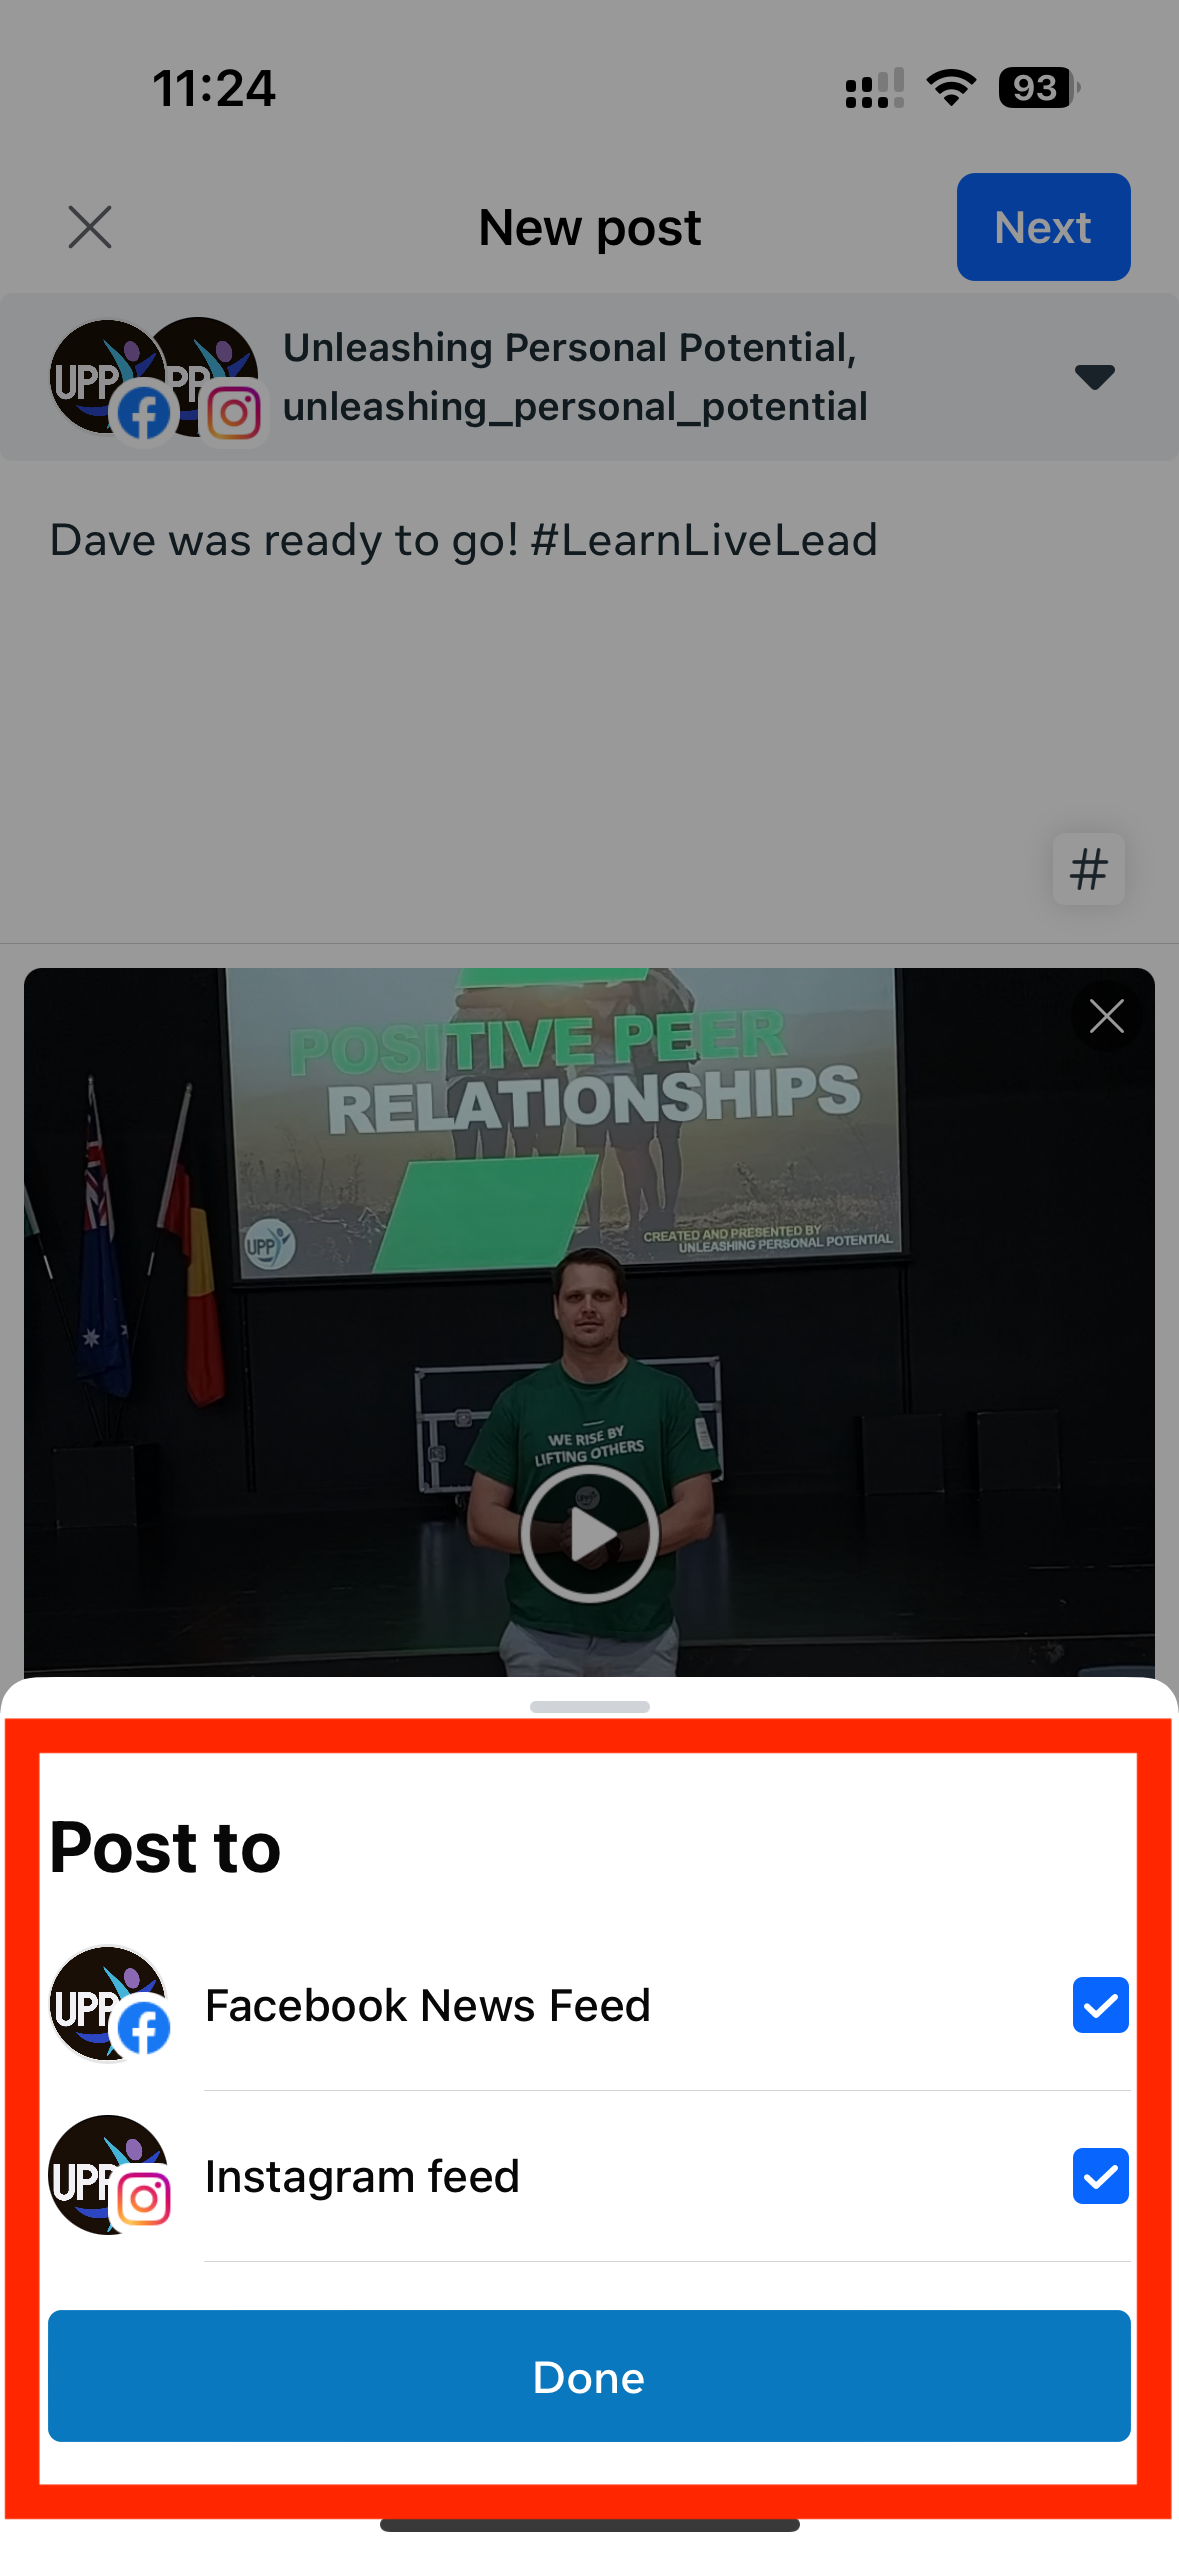
STEP 4: SELECT LOCATION OF POST
Select the list of accounts towards the top of the screen
Select which of the UPP Accounts you wish to create a post on
You can post to both simultaneously, or just to one
Select “Done” to confirm your selection
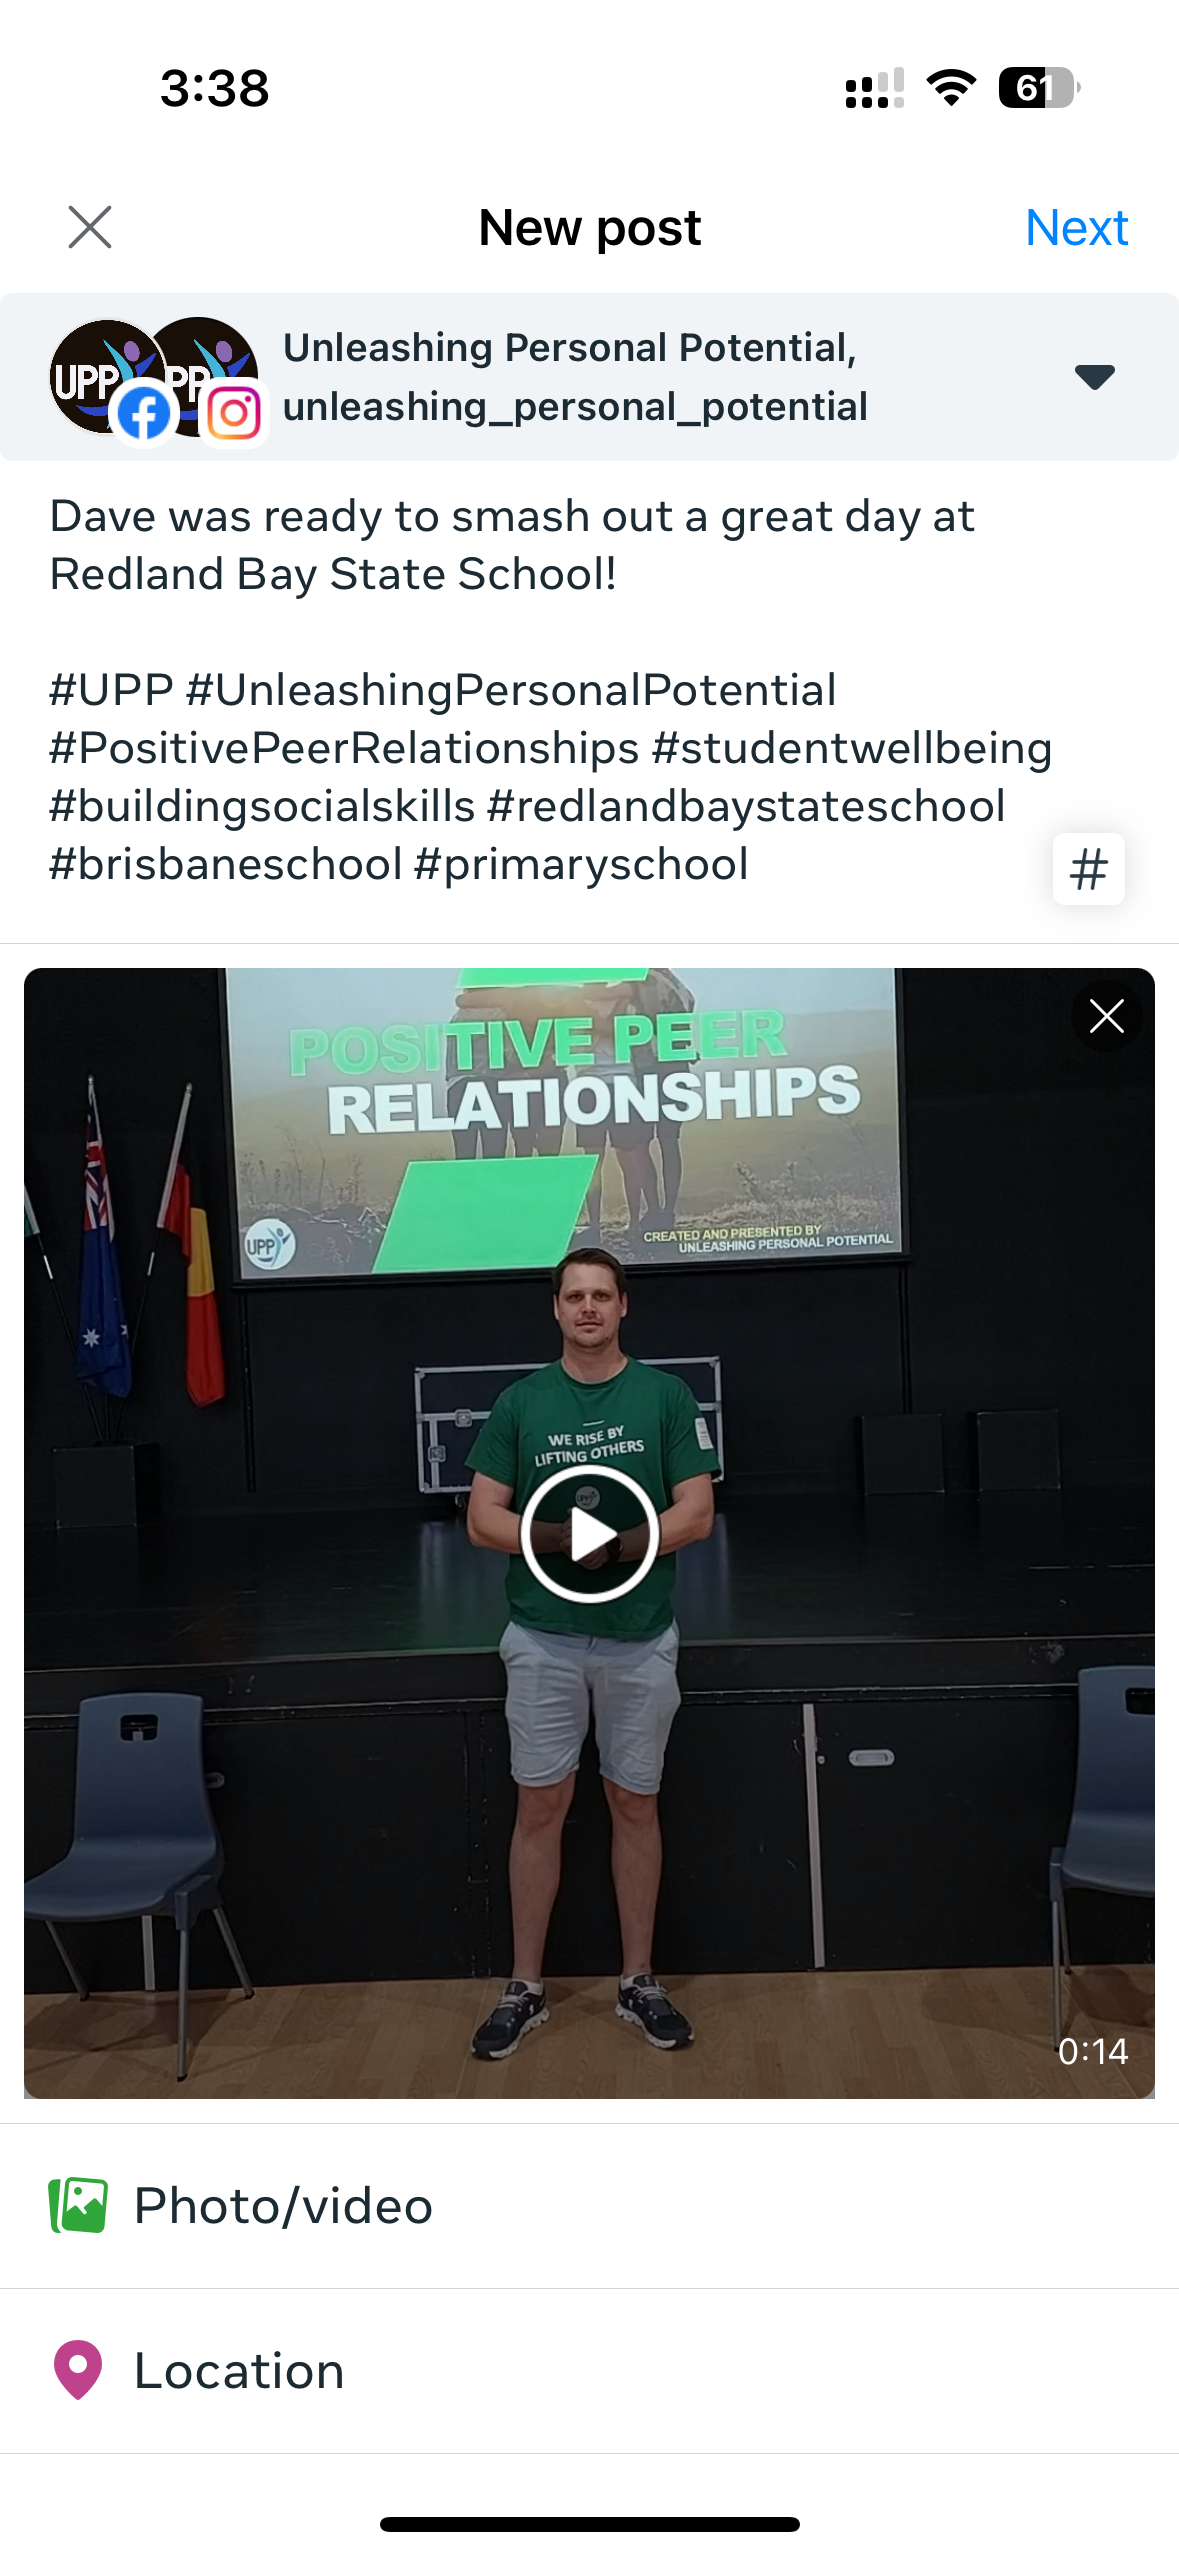
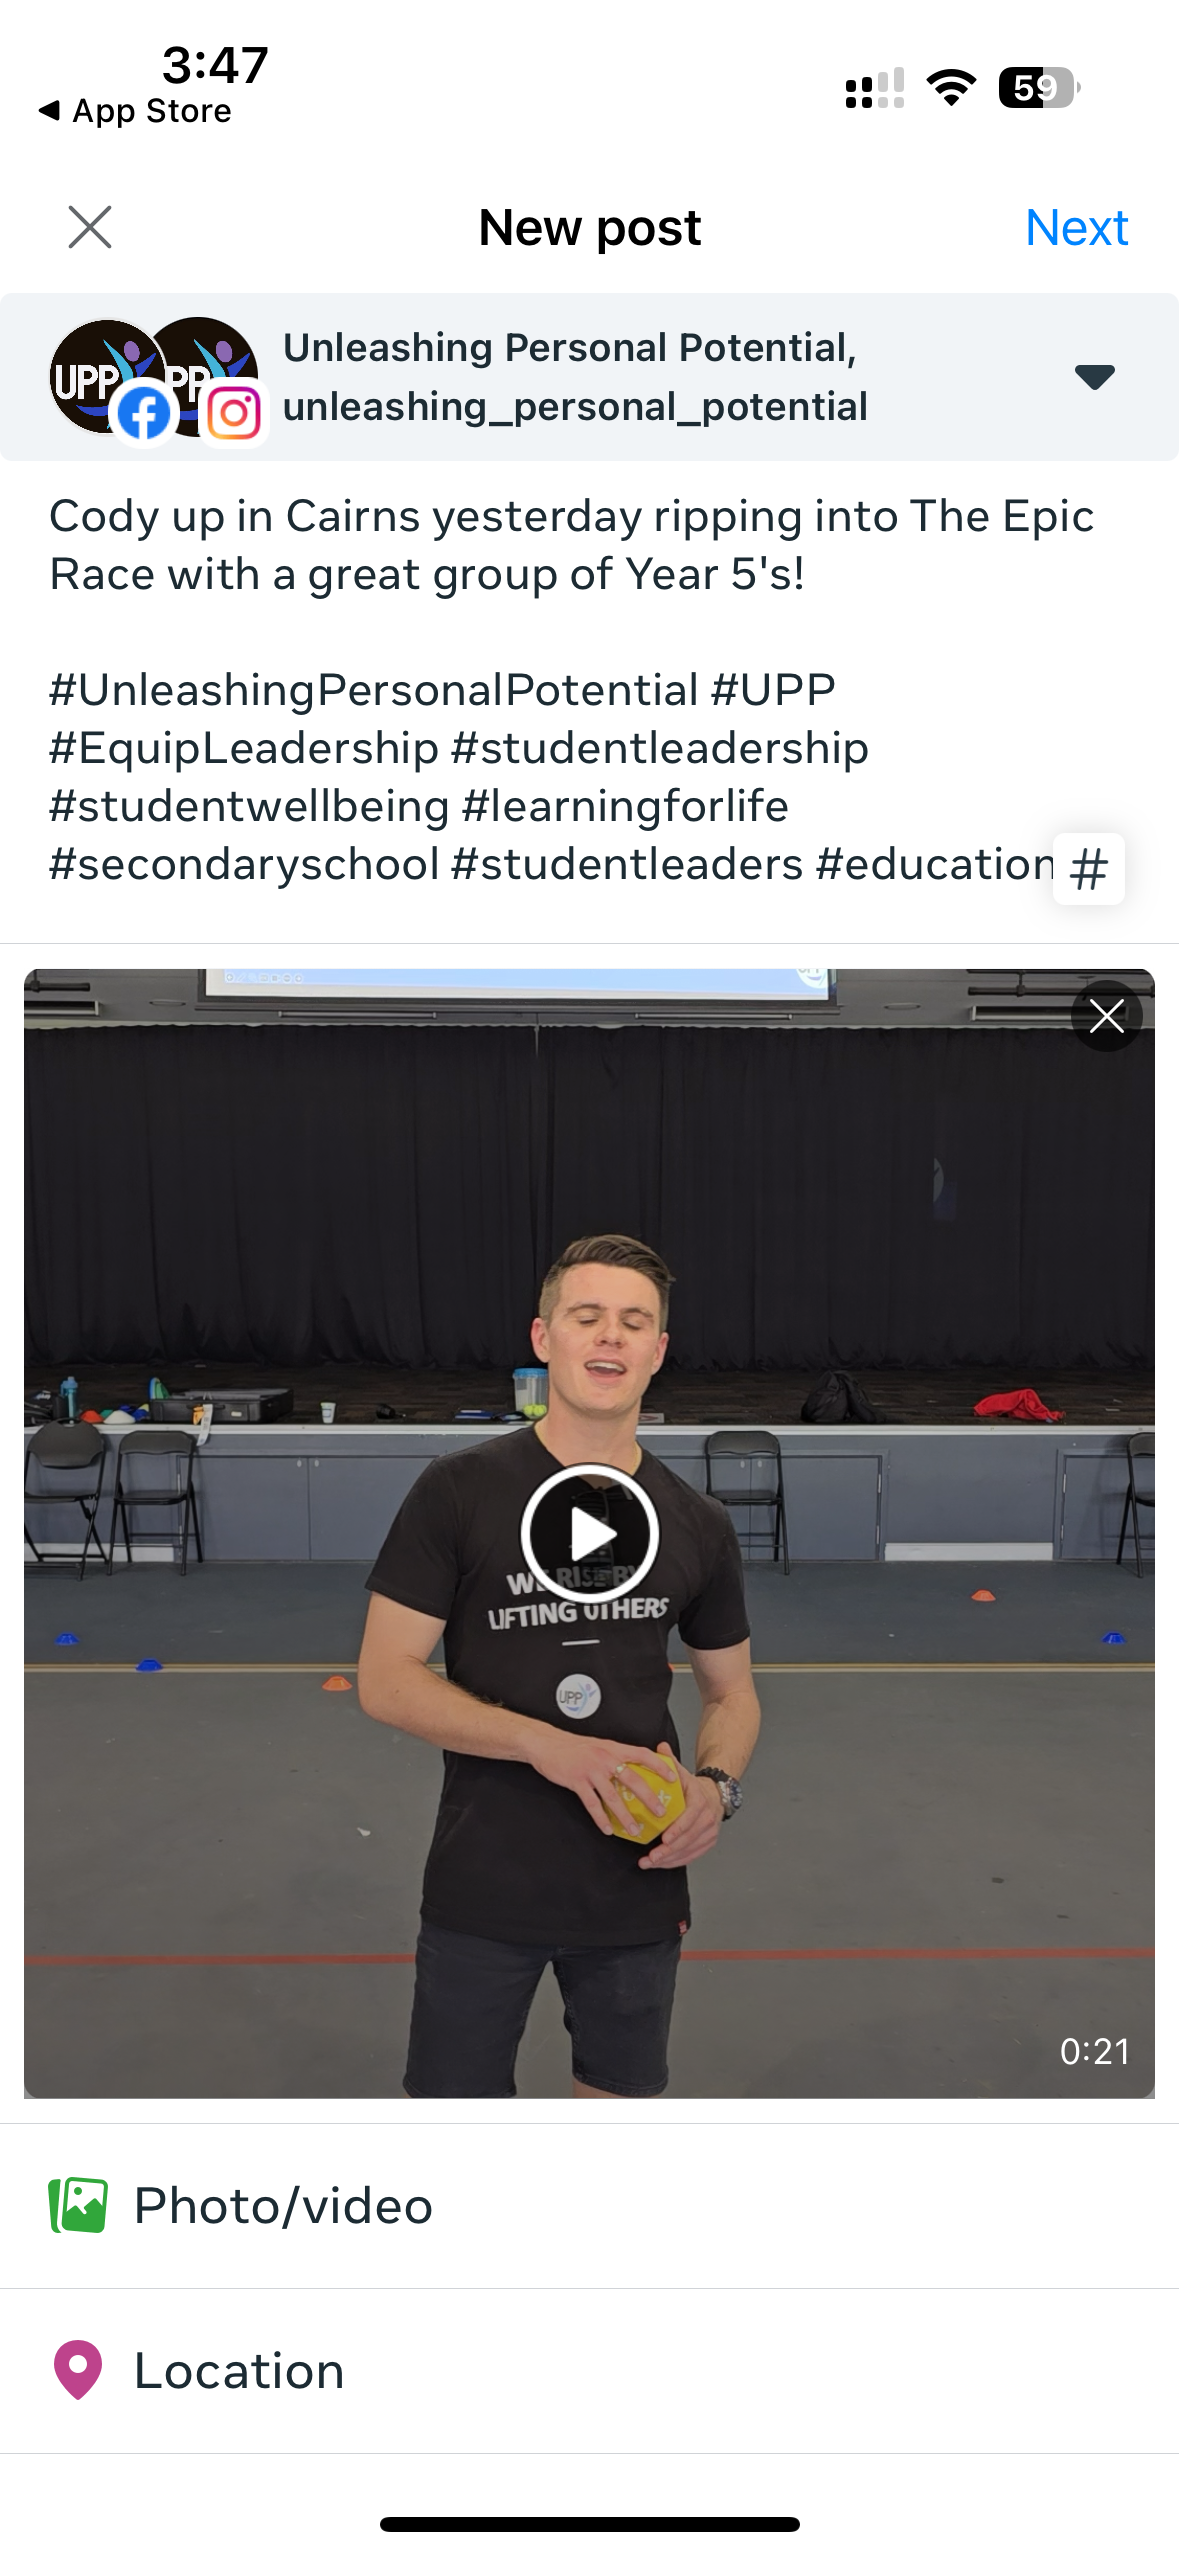
STEP 5: ENTER DESCRIPTION/CAPTION and hashtags
Enter into the textbox a quick and simple caption and/or description for the video
EXAMPLES OF SUITABLE CAPTIONS:
Matt from the SYD Team had a blast helping the Yr 6’s at Randwick Public School learn how to step up and lead their school
Jazz worked with the Yr 7’s at Marist, helping them build Stronger Connections.
Earlier in the week, Pete impacted the Yr 11’s at Kilcoy State High School, helping them step up to the responsibility of being the senior leaders of their school.
Our Melbourne Team we’re grateful for the opportunity to travel to Geelong and impact a group of their student leaders.
Below the caption, enter an appropriate selection of the following hashtags:
UP TO 3 HASHTAGS ABOUT UPP:
#UnleashingPersonalPotential
#UPP
The name of the Program/Impact Session in the video: #StepUp, #LeadershipIsInfluence, #StrongerConnections, etc
UP TO 3 HASHTAGS ABOUT THE NEED THAT WE ADDRESS FOR SCHOOLS:
#StudentWellbeing
#StudentLeadership
#BuildingSocialSkills
#LearningforLife
UP TO 3 HASHTAGS ABOUT OUR TARGET AUDIENCE:
The name of the school: #RedlandBayStateSchool, #GeelongGrammar
#secondaryschool
#primaryschool
#brisbaneschools
#sydneyschools
#melbourneschools
#teachers
#studentleaders
#education
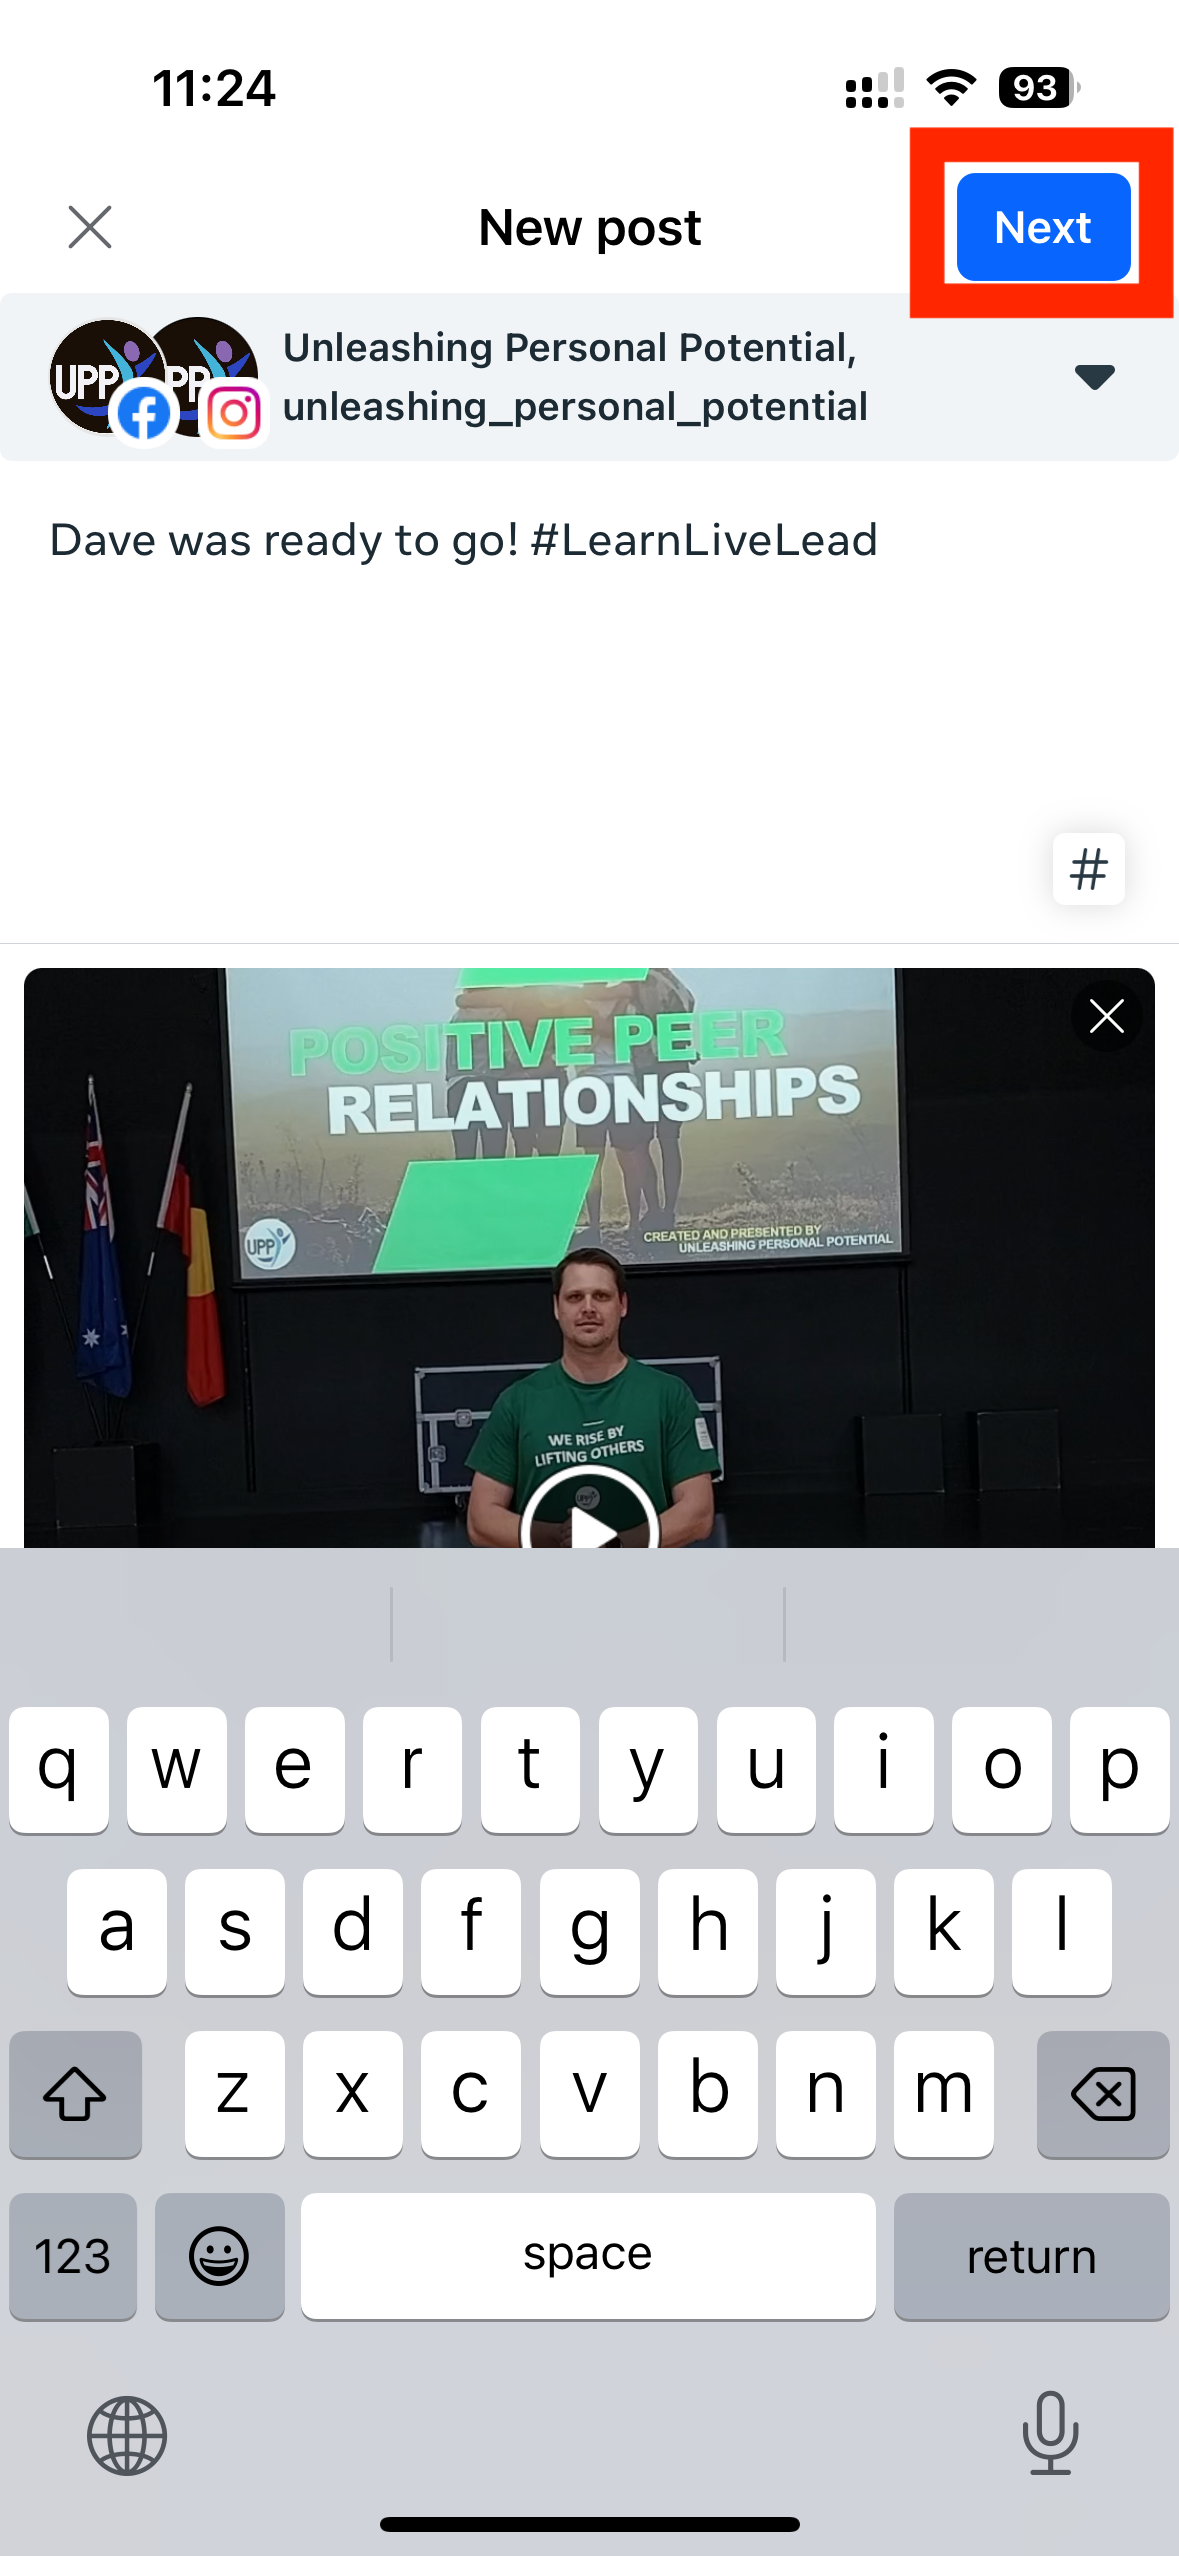
STEP 6: SELECT NEXT AT THE TOP OF THE SCREEN TO CONTINUE
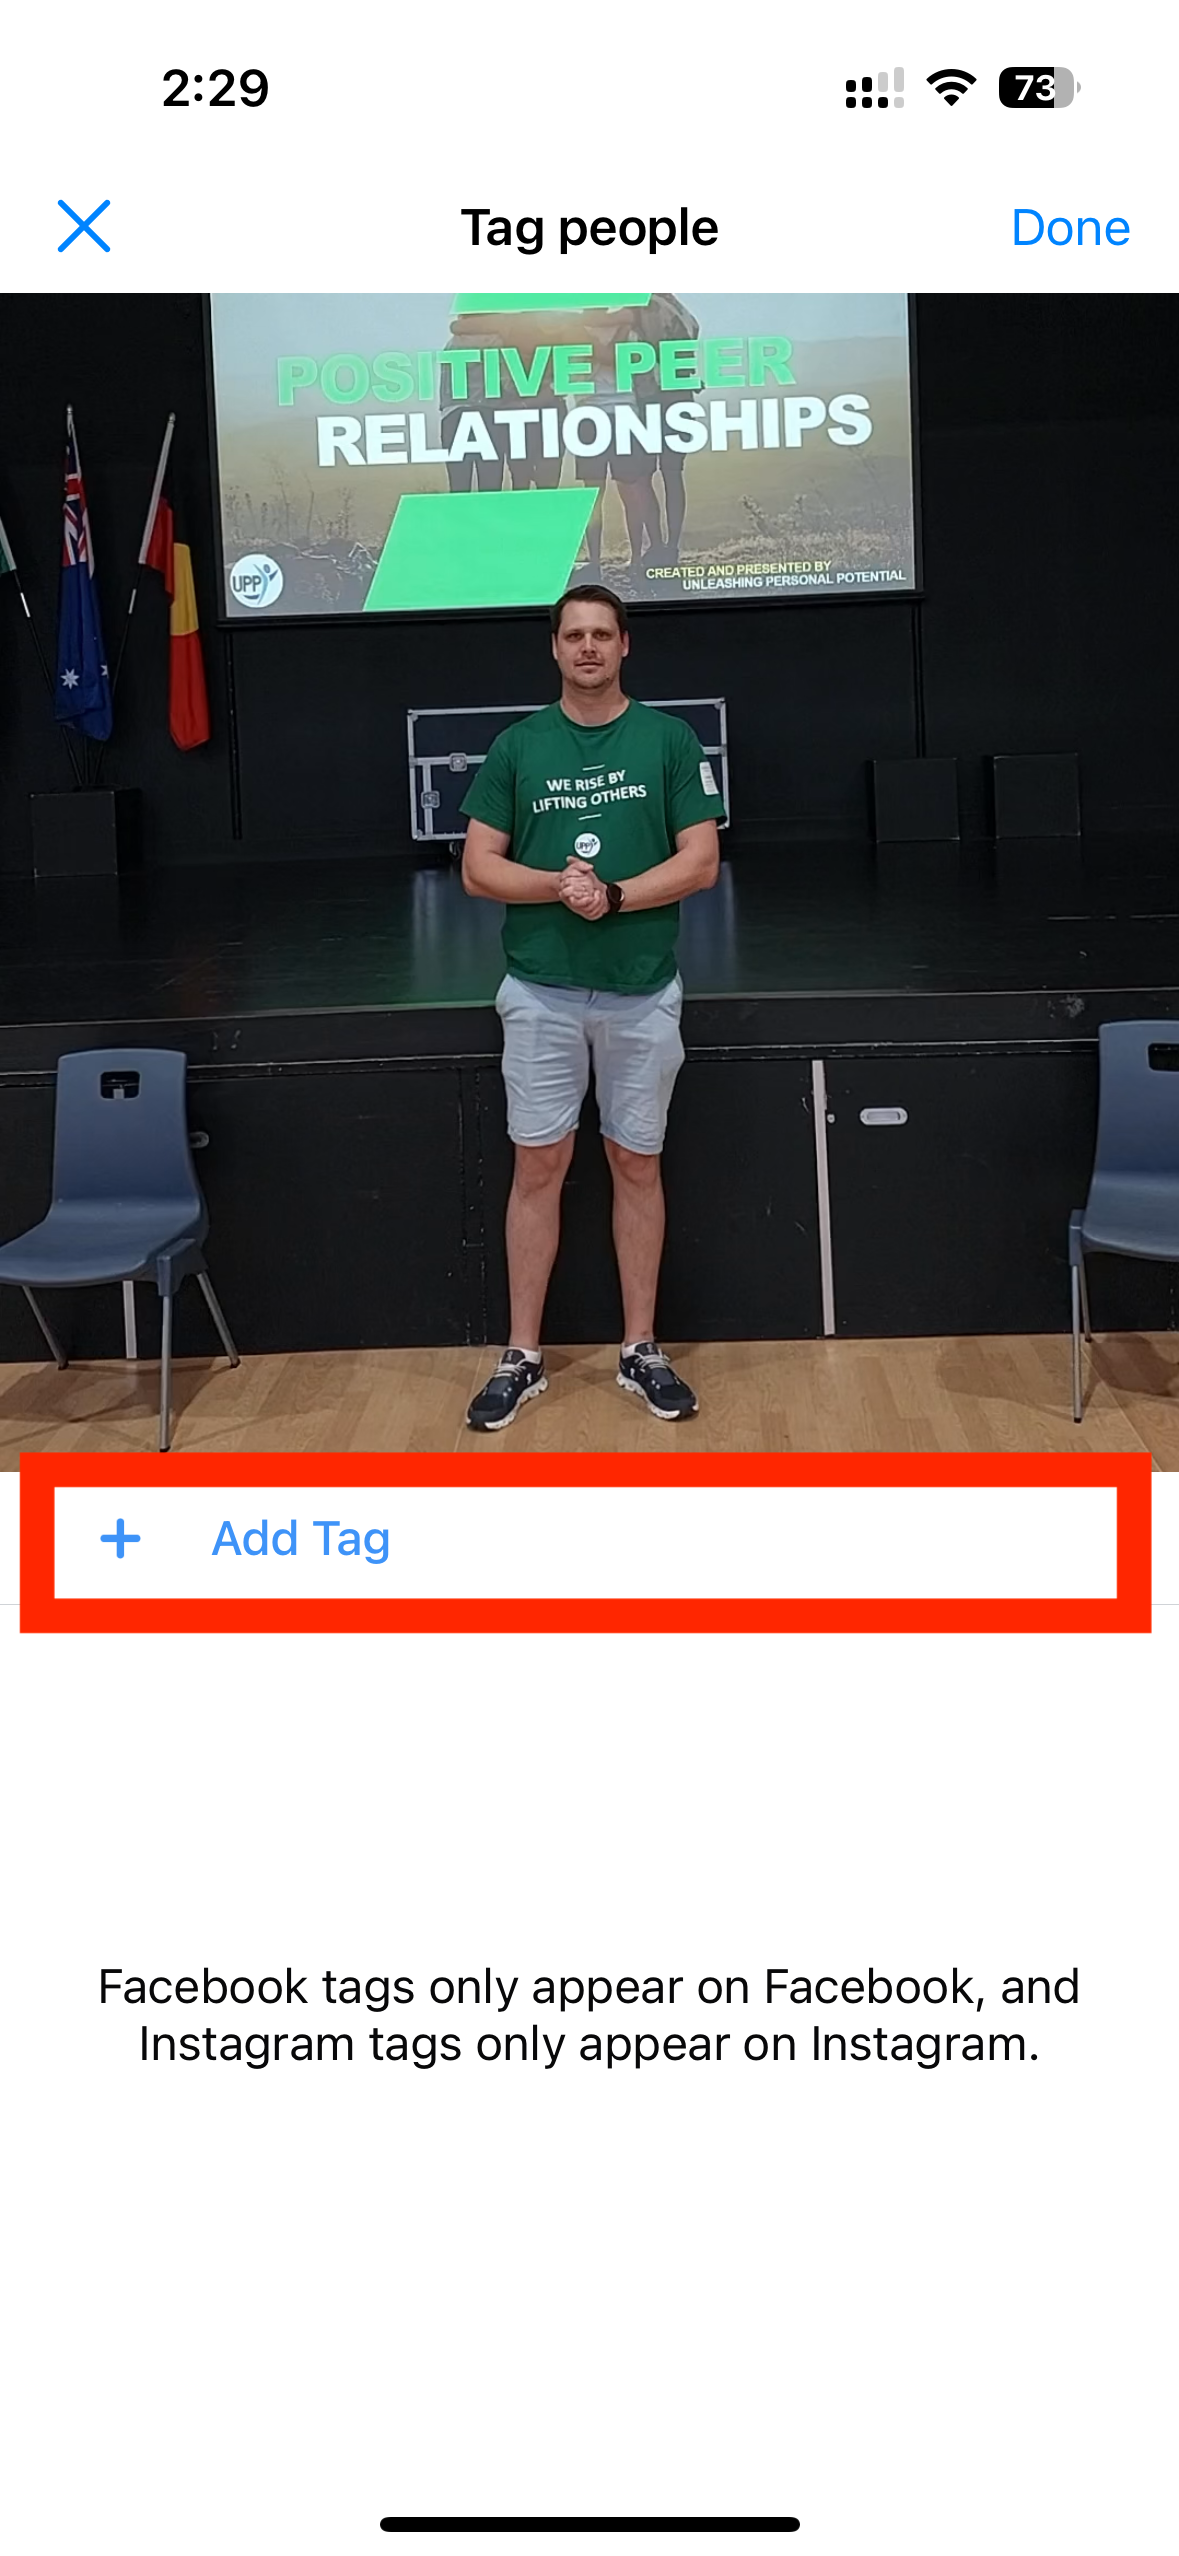
STEP 7: TAG SCHOOLS
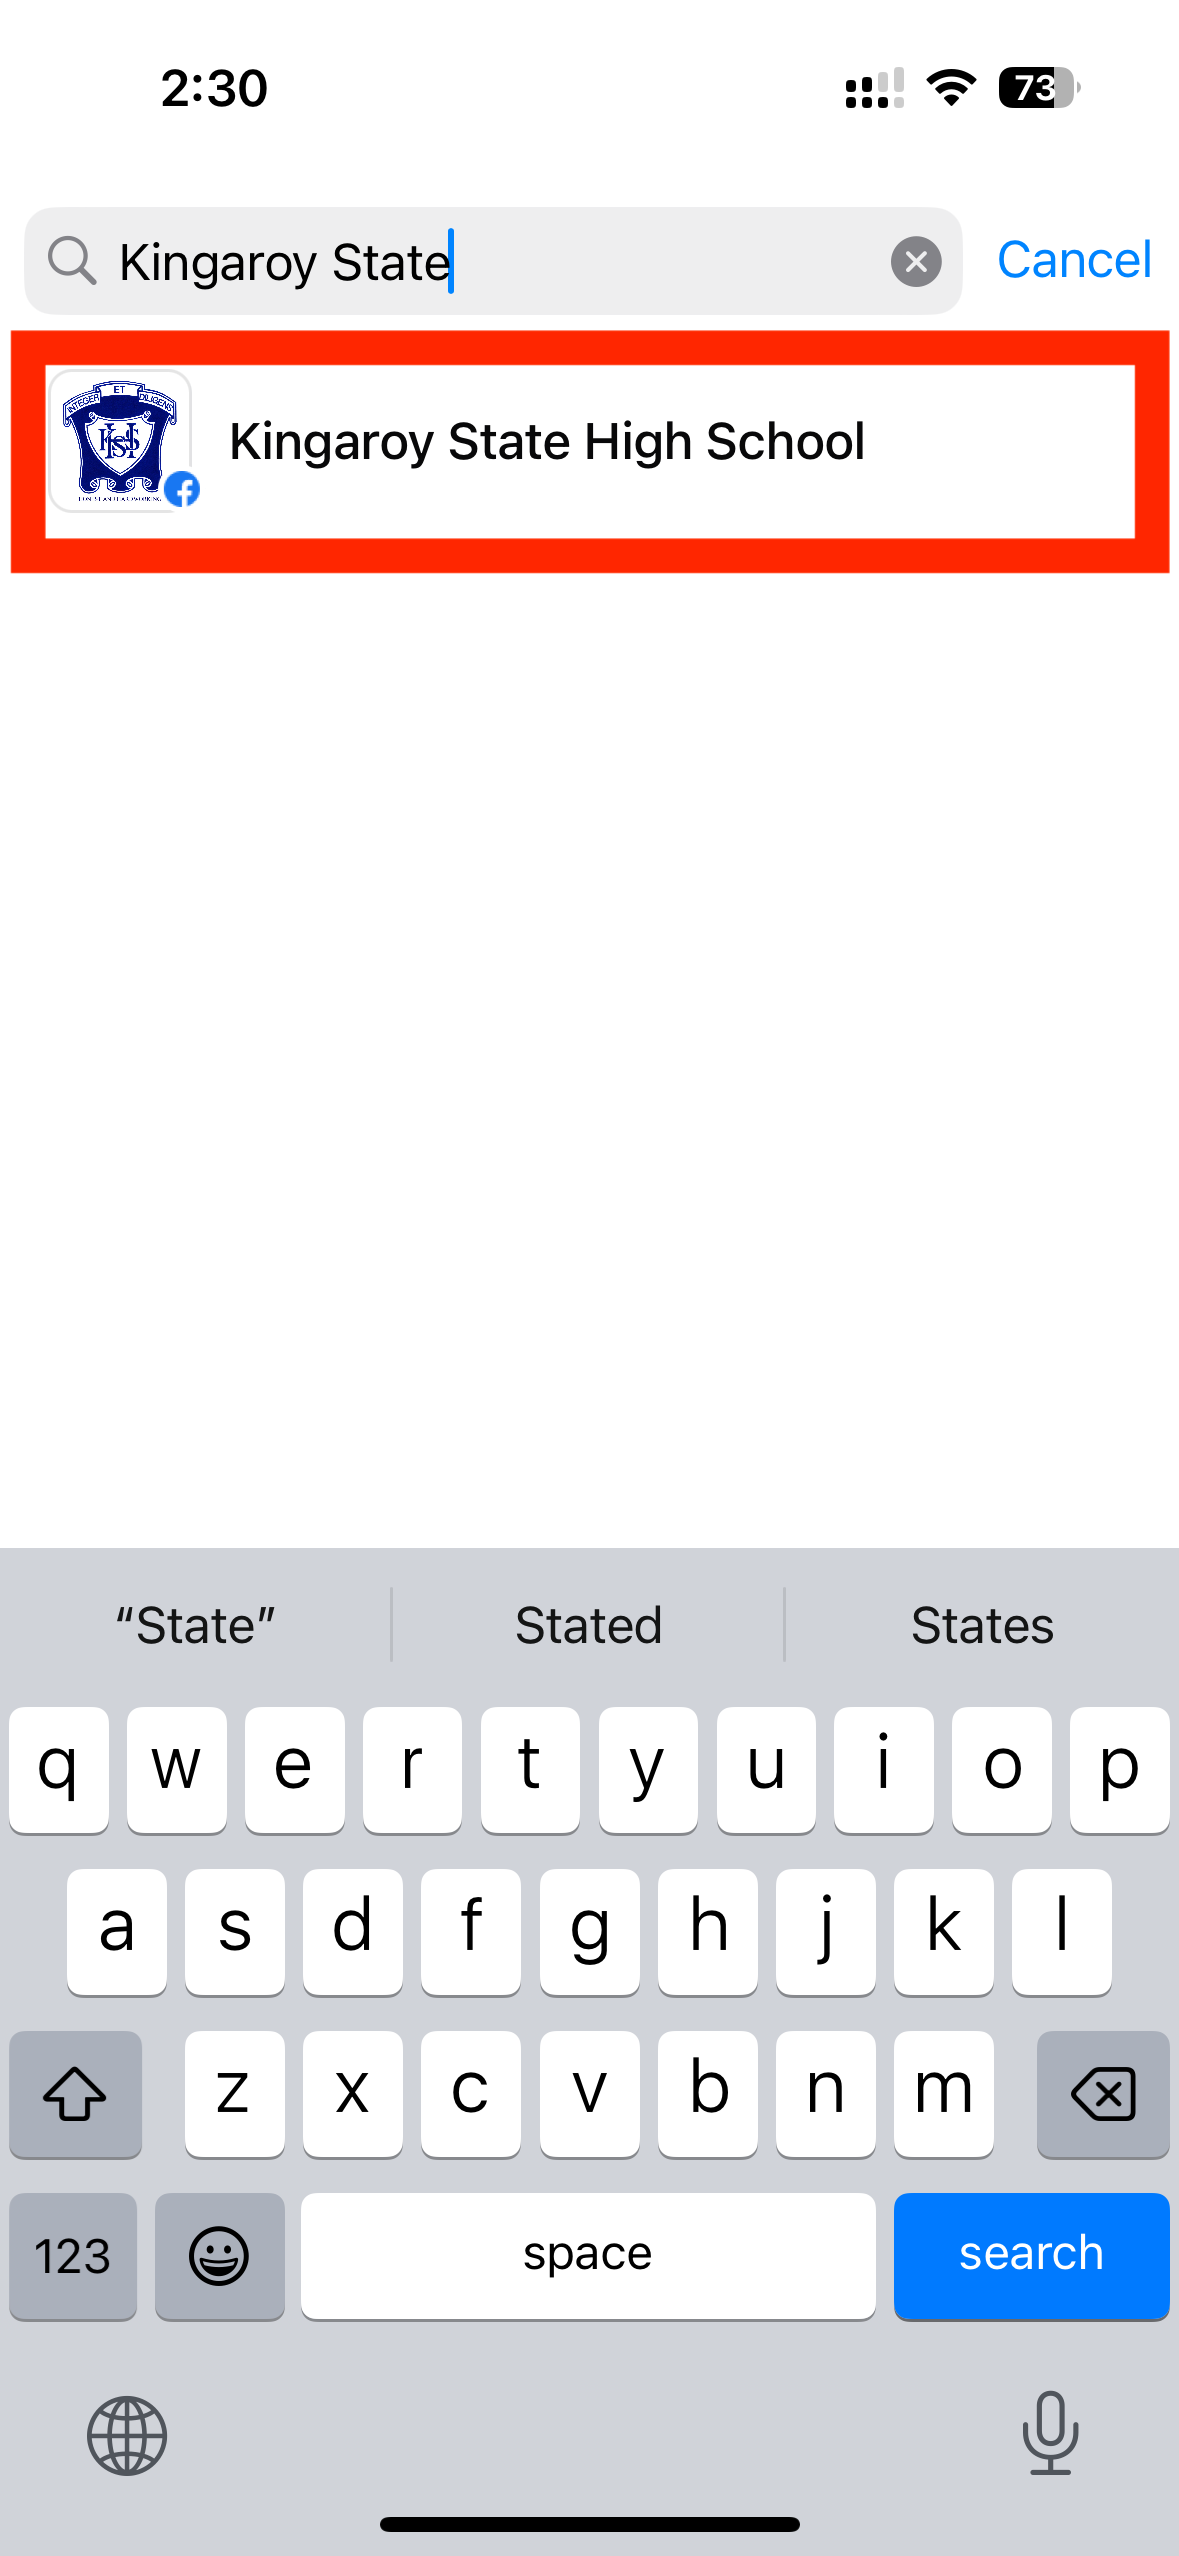
Select “Tag People” and enter the school name into the search bar.
Select the correct school if they appear as an option
If a school does not appear, it may mean:
They do not have FB and/or Insta (if they have one, they should be able to be selected)
Either they do not like the UPP social medias or UPP does not like them on socials

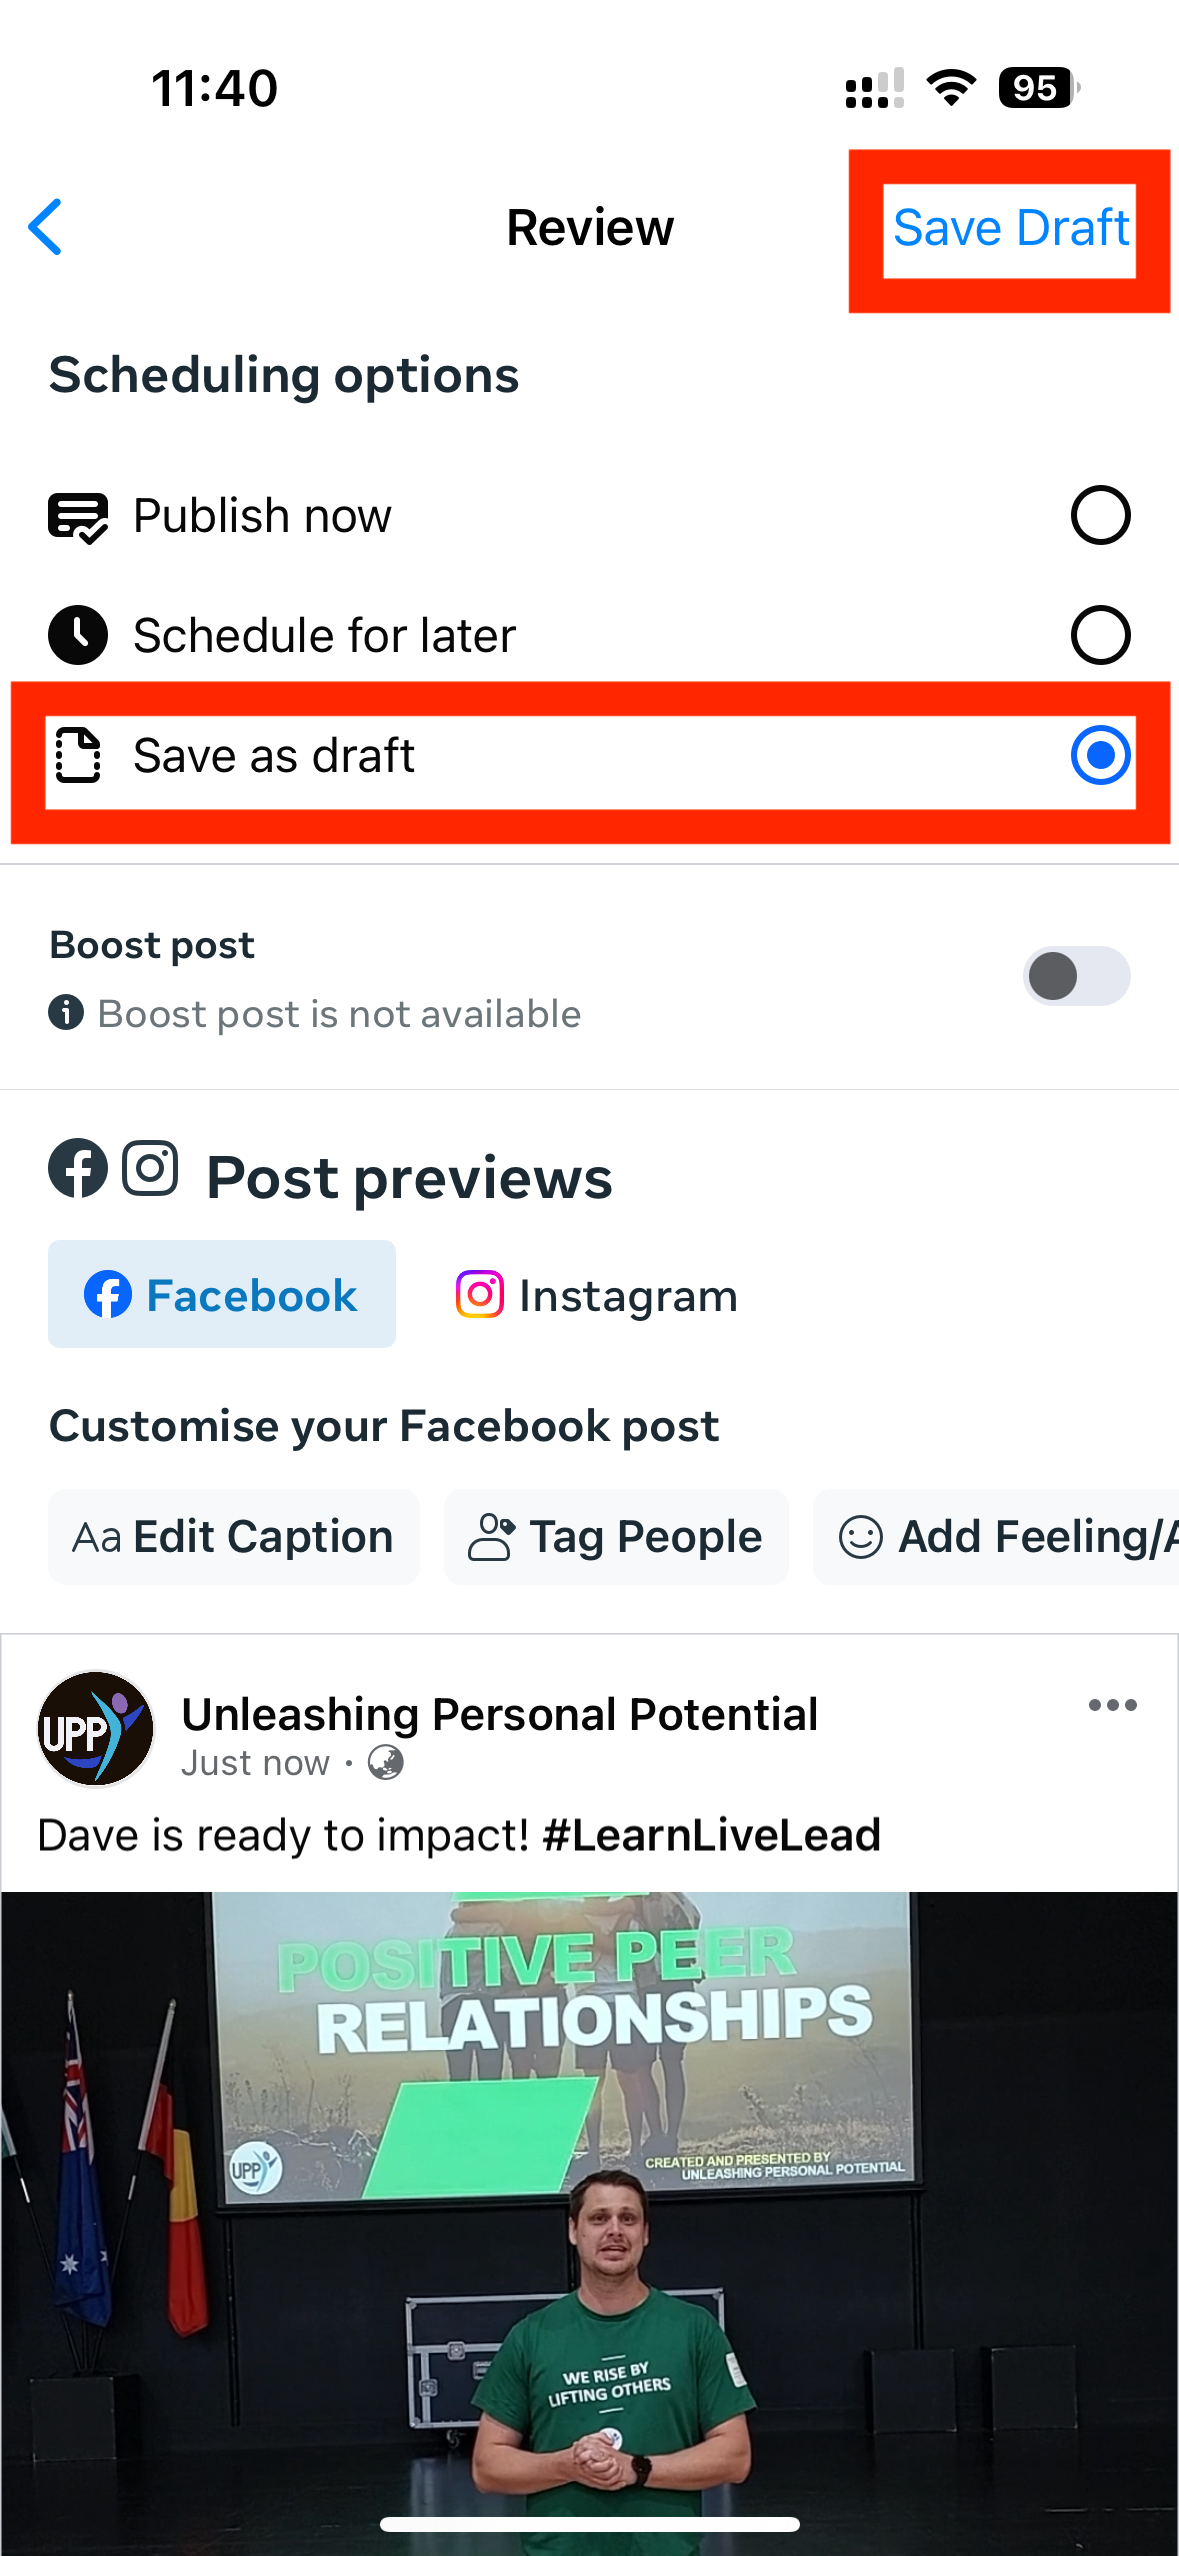
STEP 8: SELECT SAVE AS DRAFT (ANd other SCHEDULING OPTIONS)
All posts will need final approval before publishing
Select “Save as a draft” and press “Save Draft” before exiting
FINAL STEP: PUBLISH POST
IF DIRECTED TO PUBLISH POST:
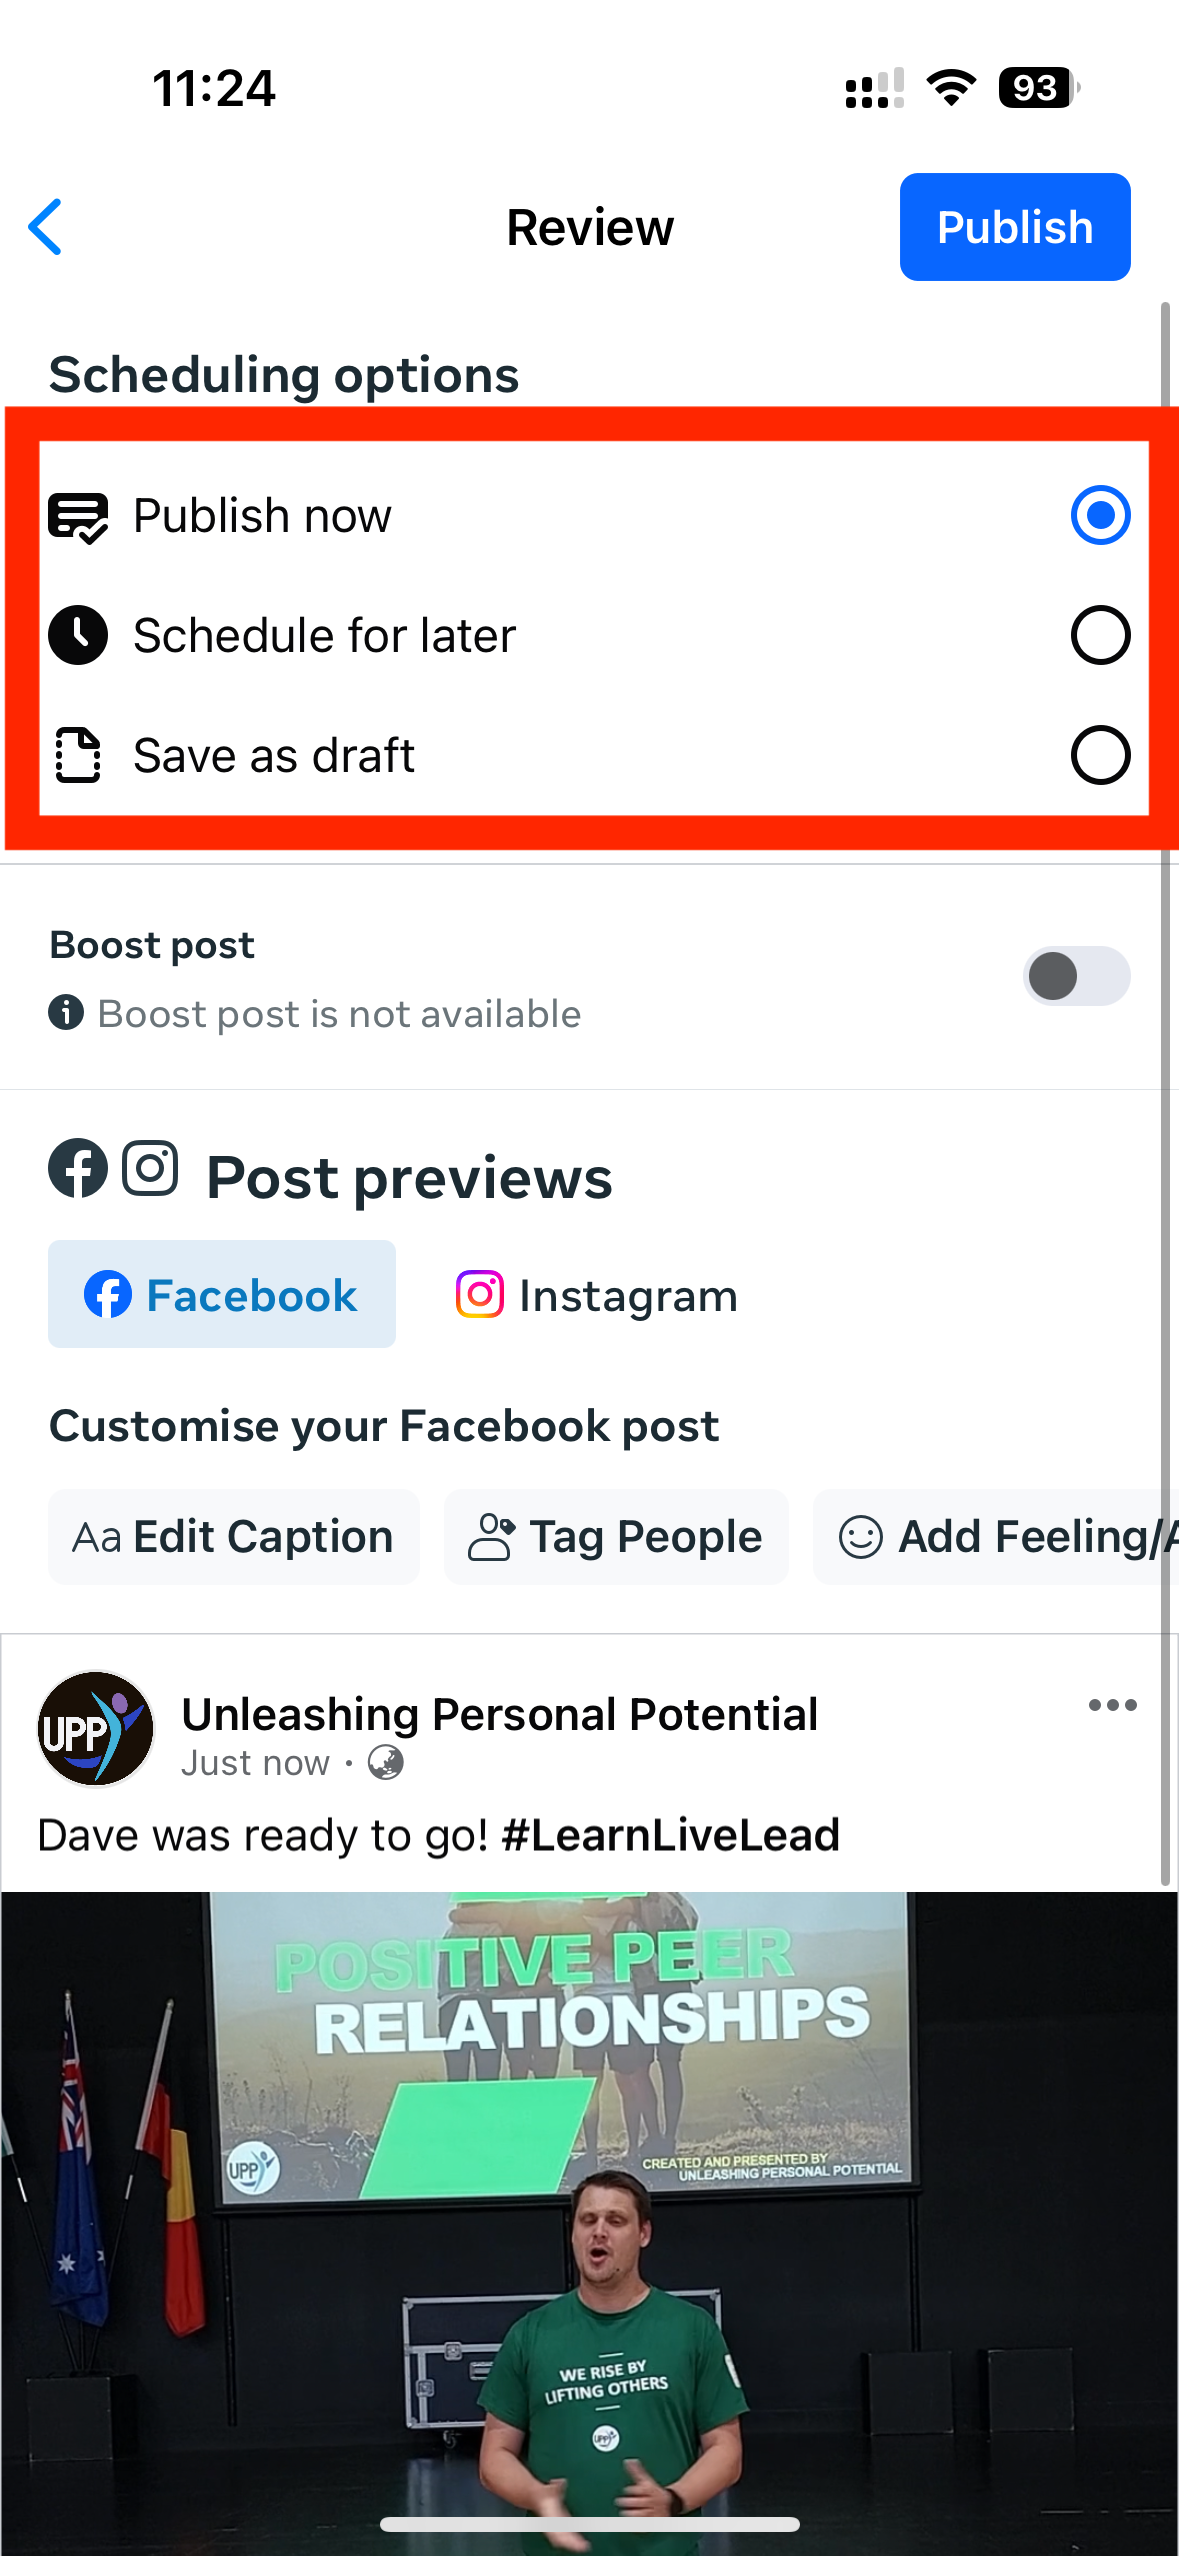
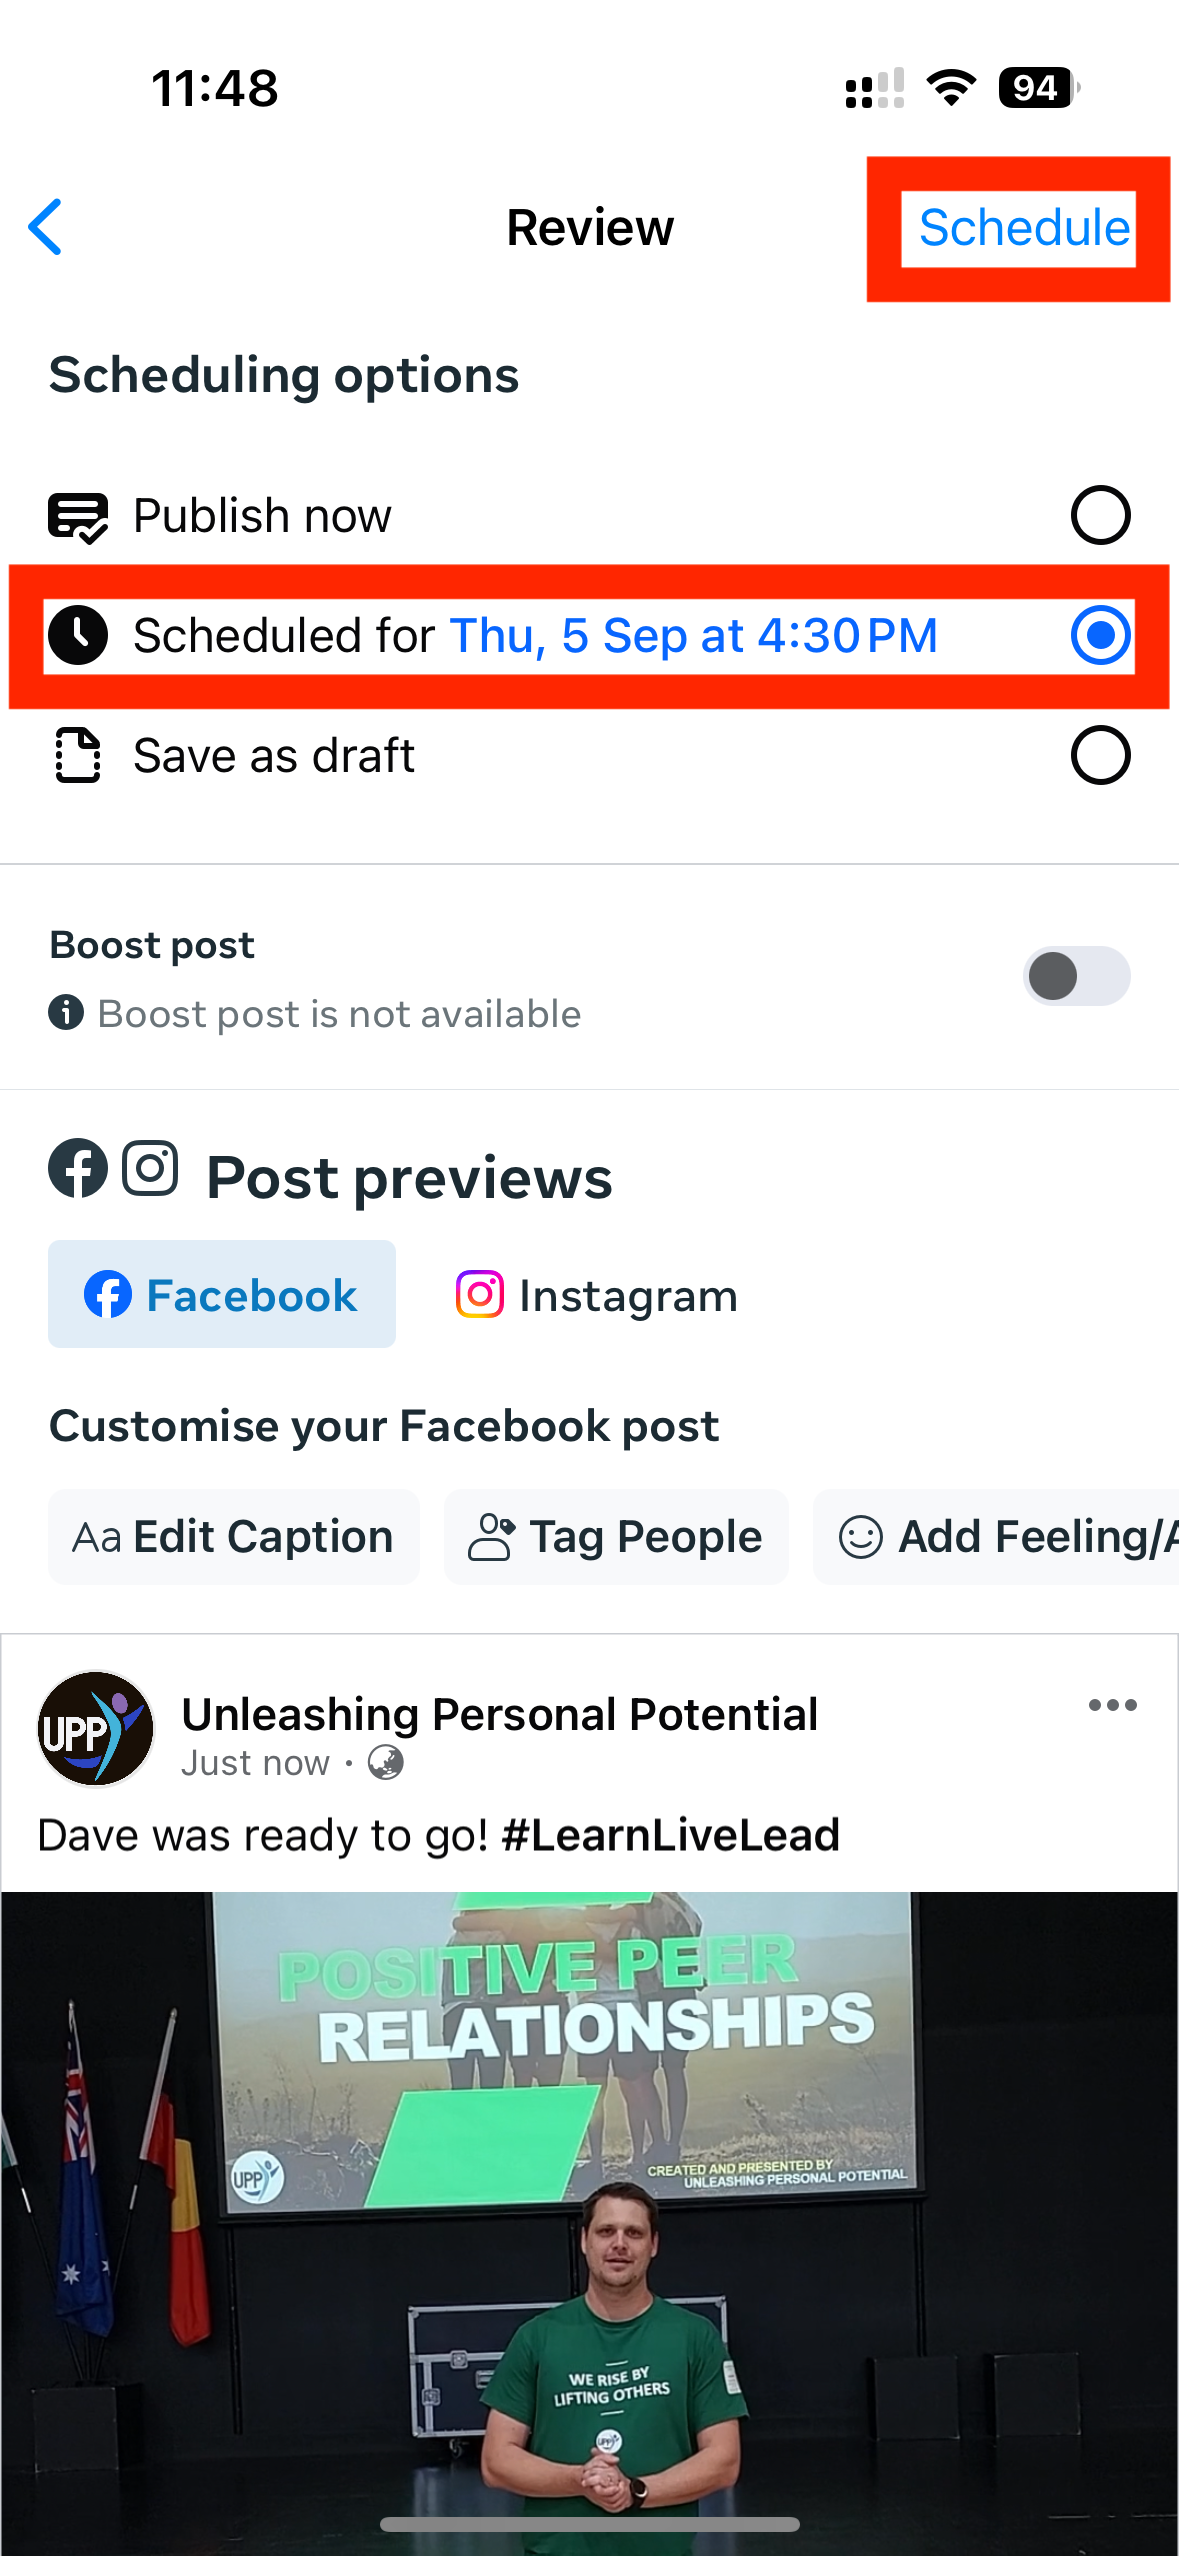
Review all the details of the draft post
Check the post previews at the bottom of the page to ensure that the post is looking correct.
NOTE: It is difficult to edit certain details of the post once fully published (like video length or volume), so any mistakes means posts must be deleted and then reuploaded with corrections.
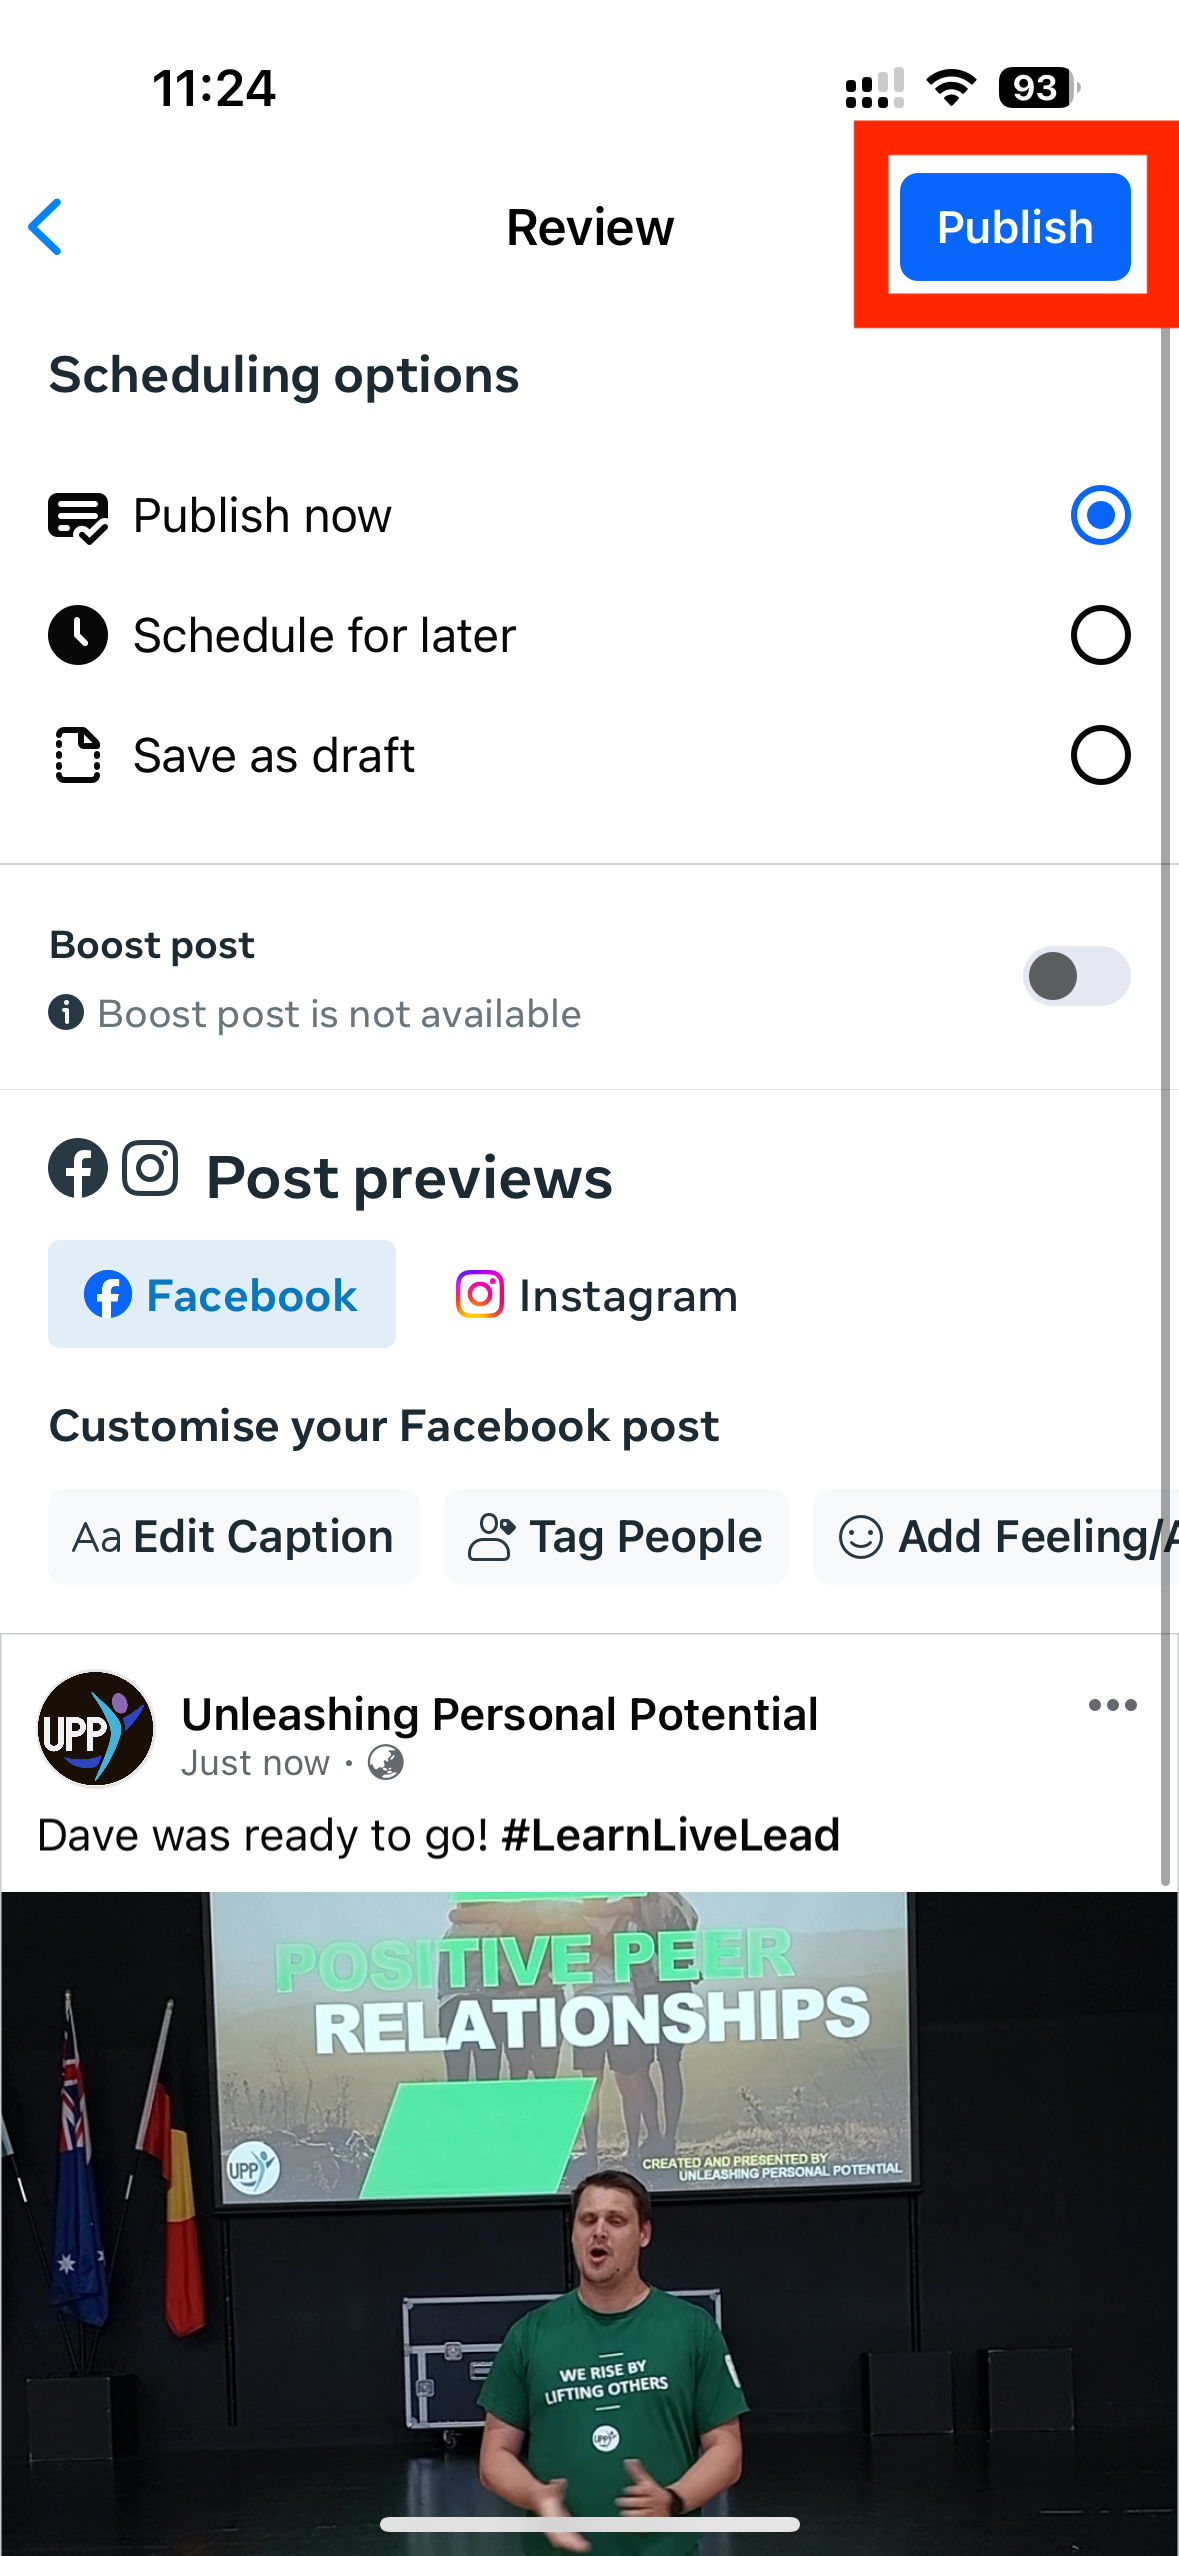
FOR IMMEDIATE POST:
Press “Publish” at the top of the page in order to publish the post to the selected socials.
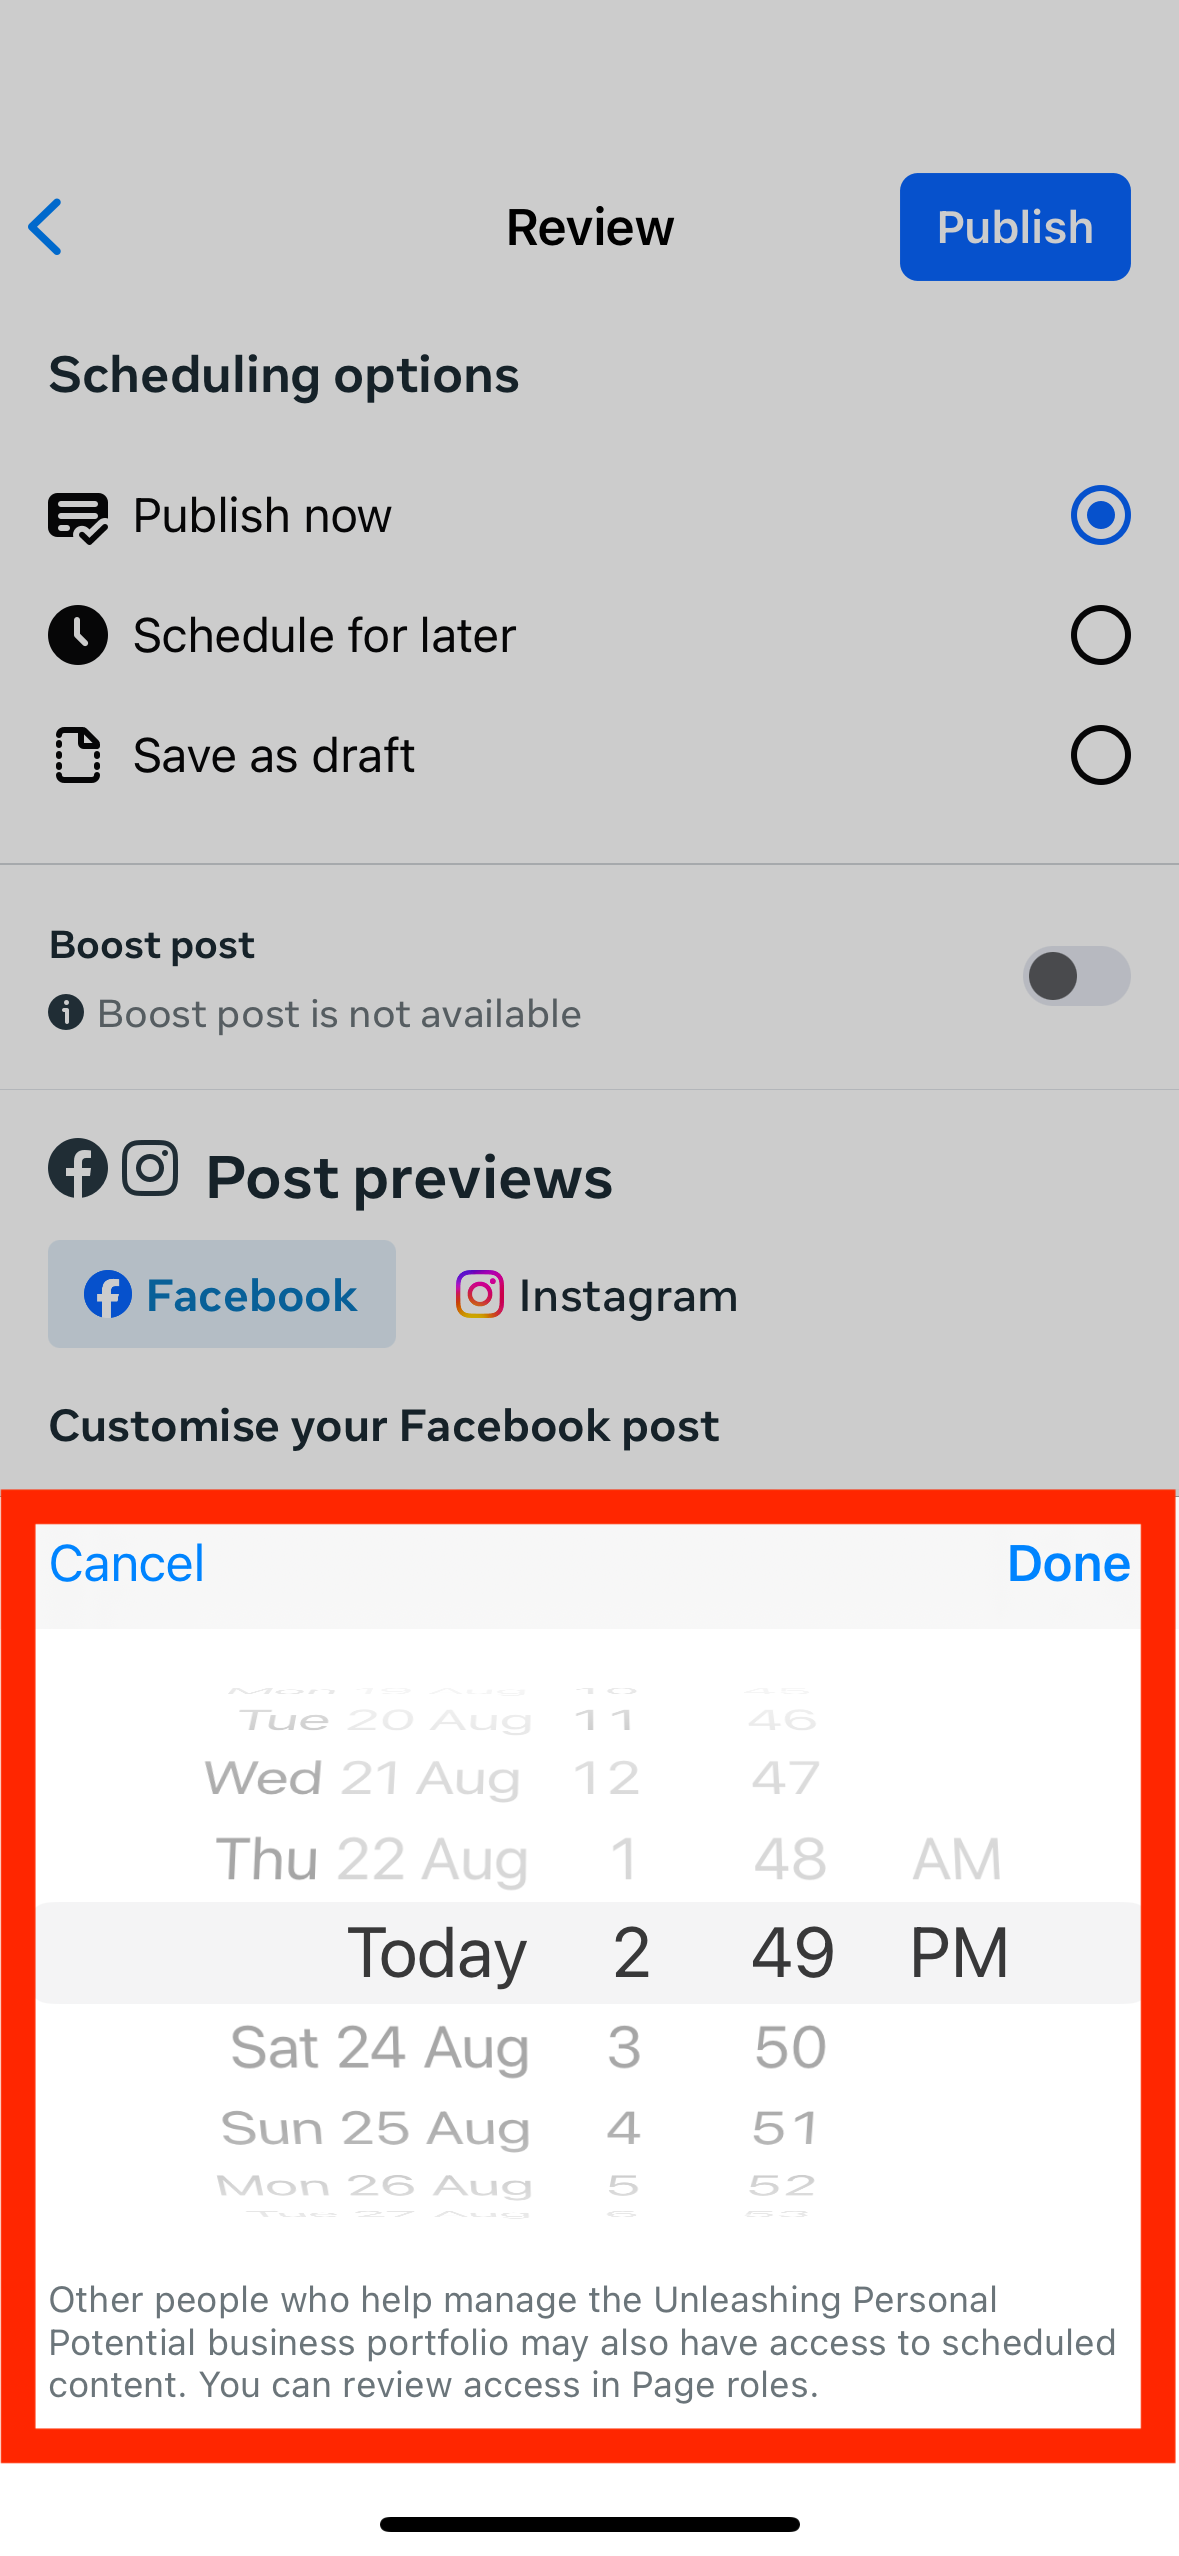
FOR SCHEDULED POST: Select “Schedule for later”
When selected, you may schedule a post for up to 30 days in advance, at the time of day of your choosing.
Select “Done” to confirm selection
Then press “Schedule”
TO POST IMMEDIATELY:
TO SCHEDULE:
HOW TO DELETE CONTENT FROM UPP SOCIALS
HOW TO DELETE STORIES
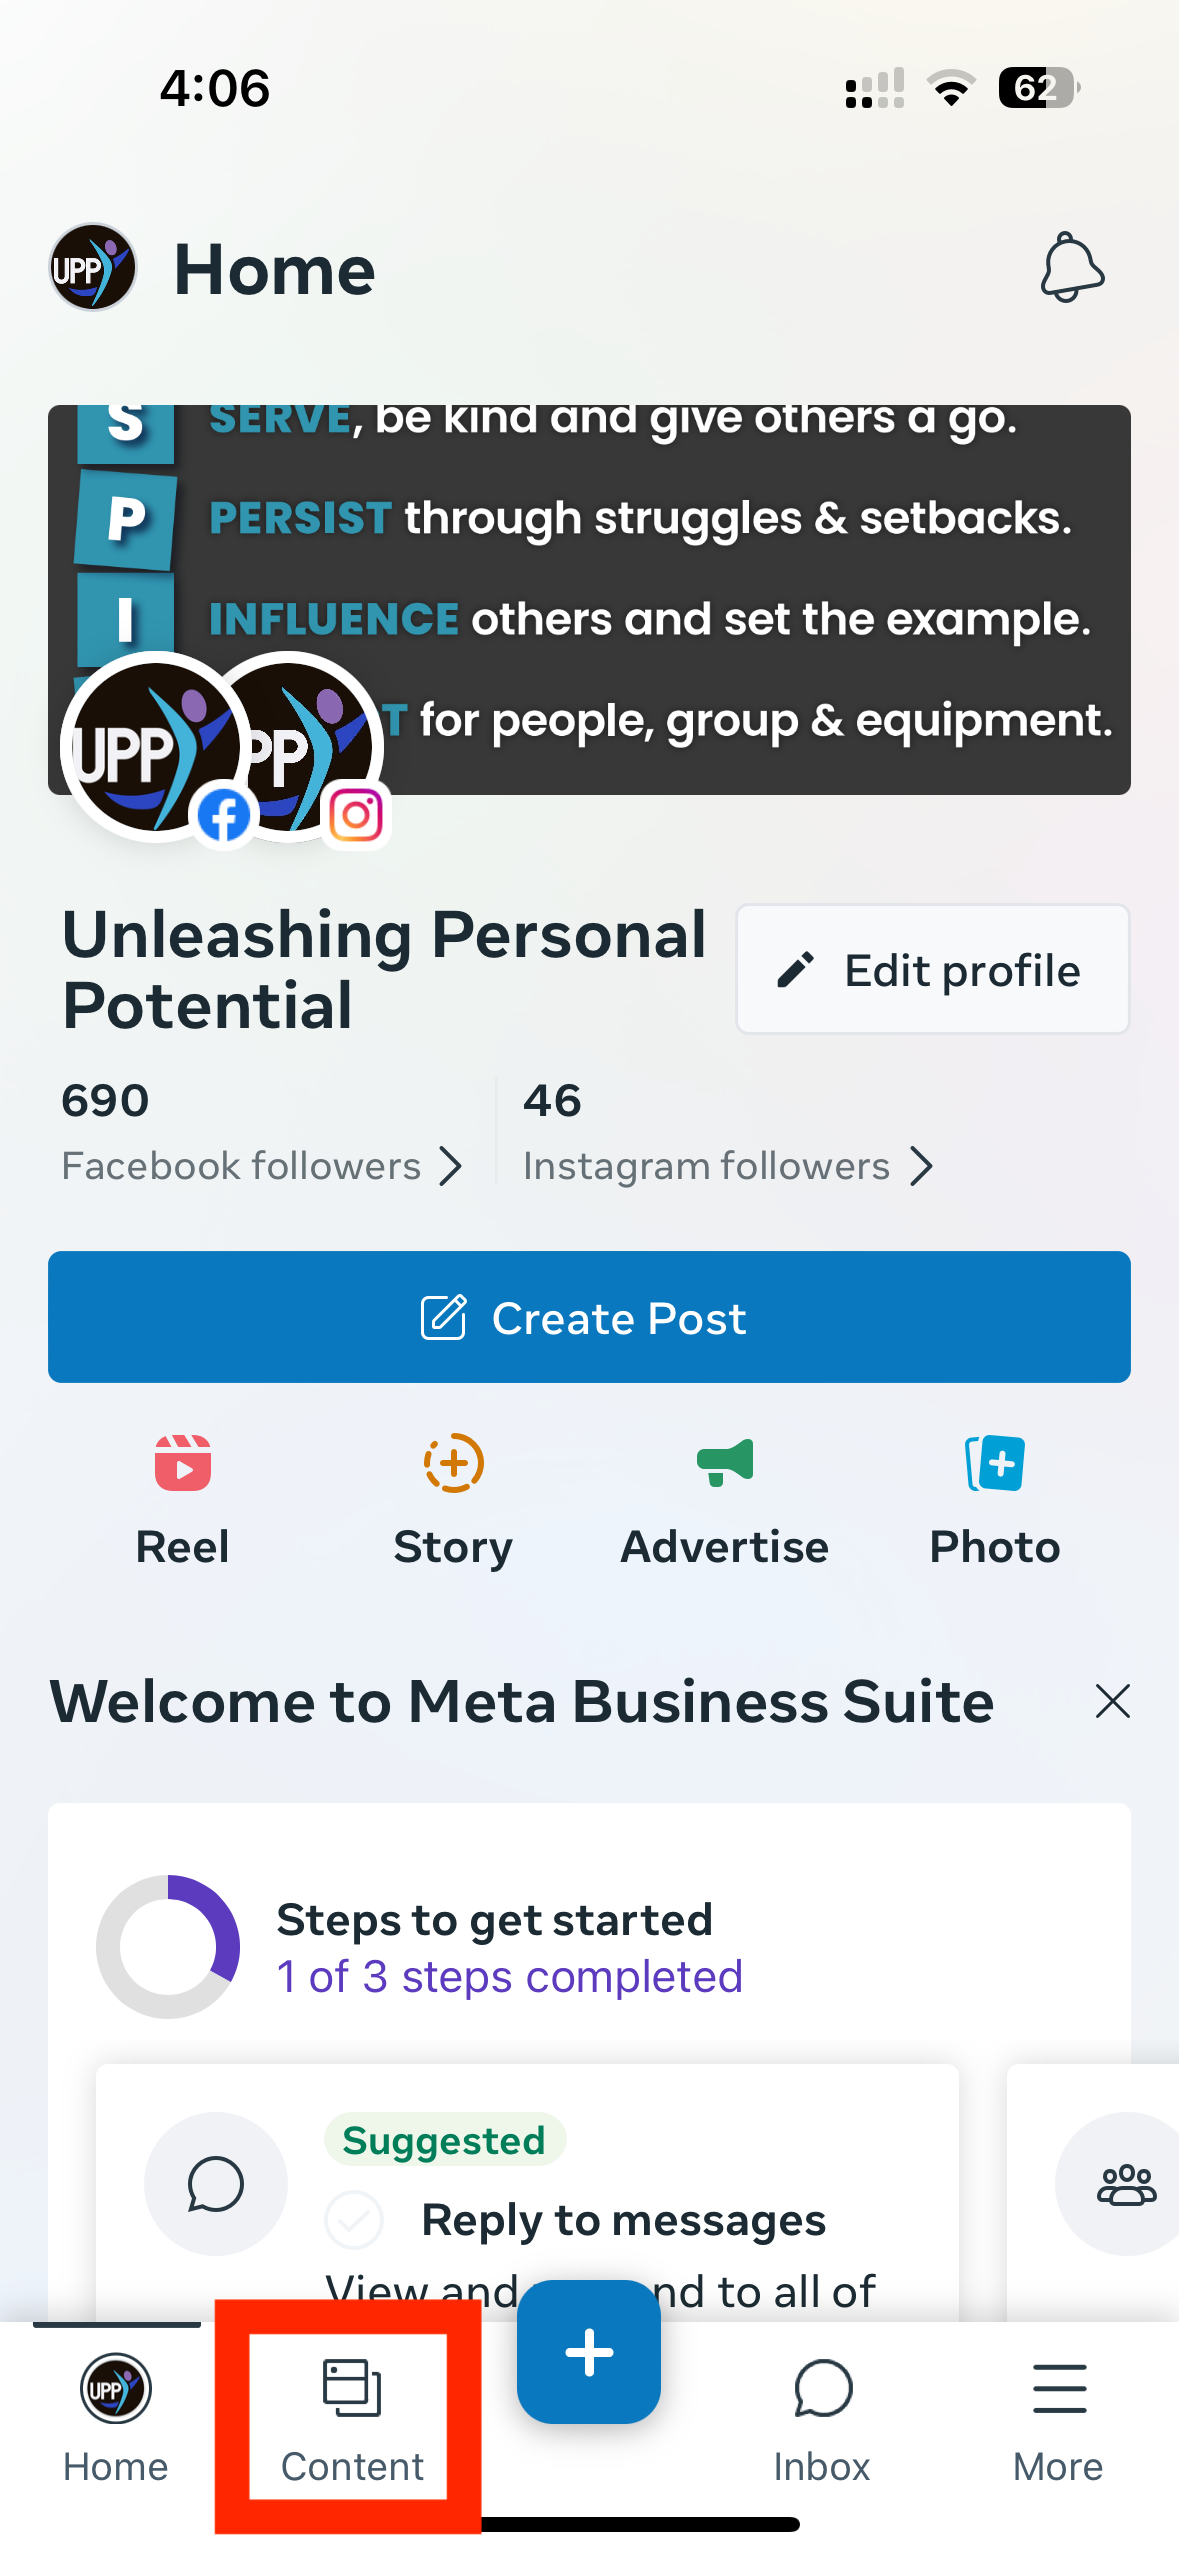
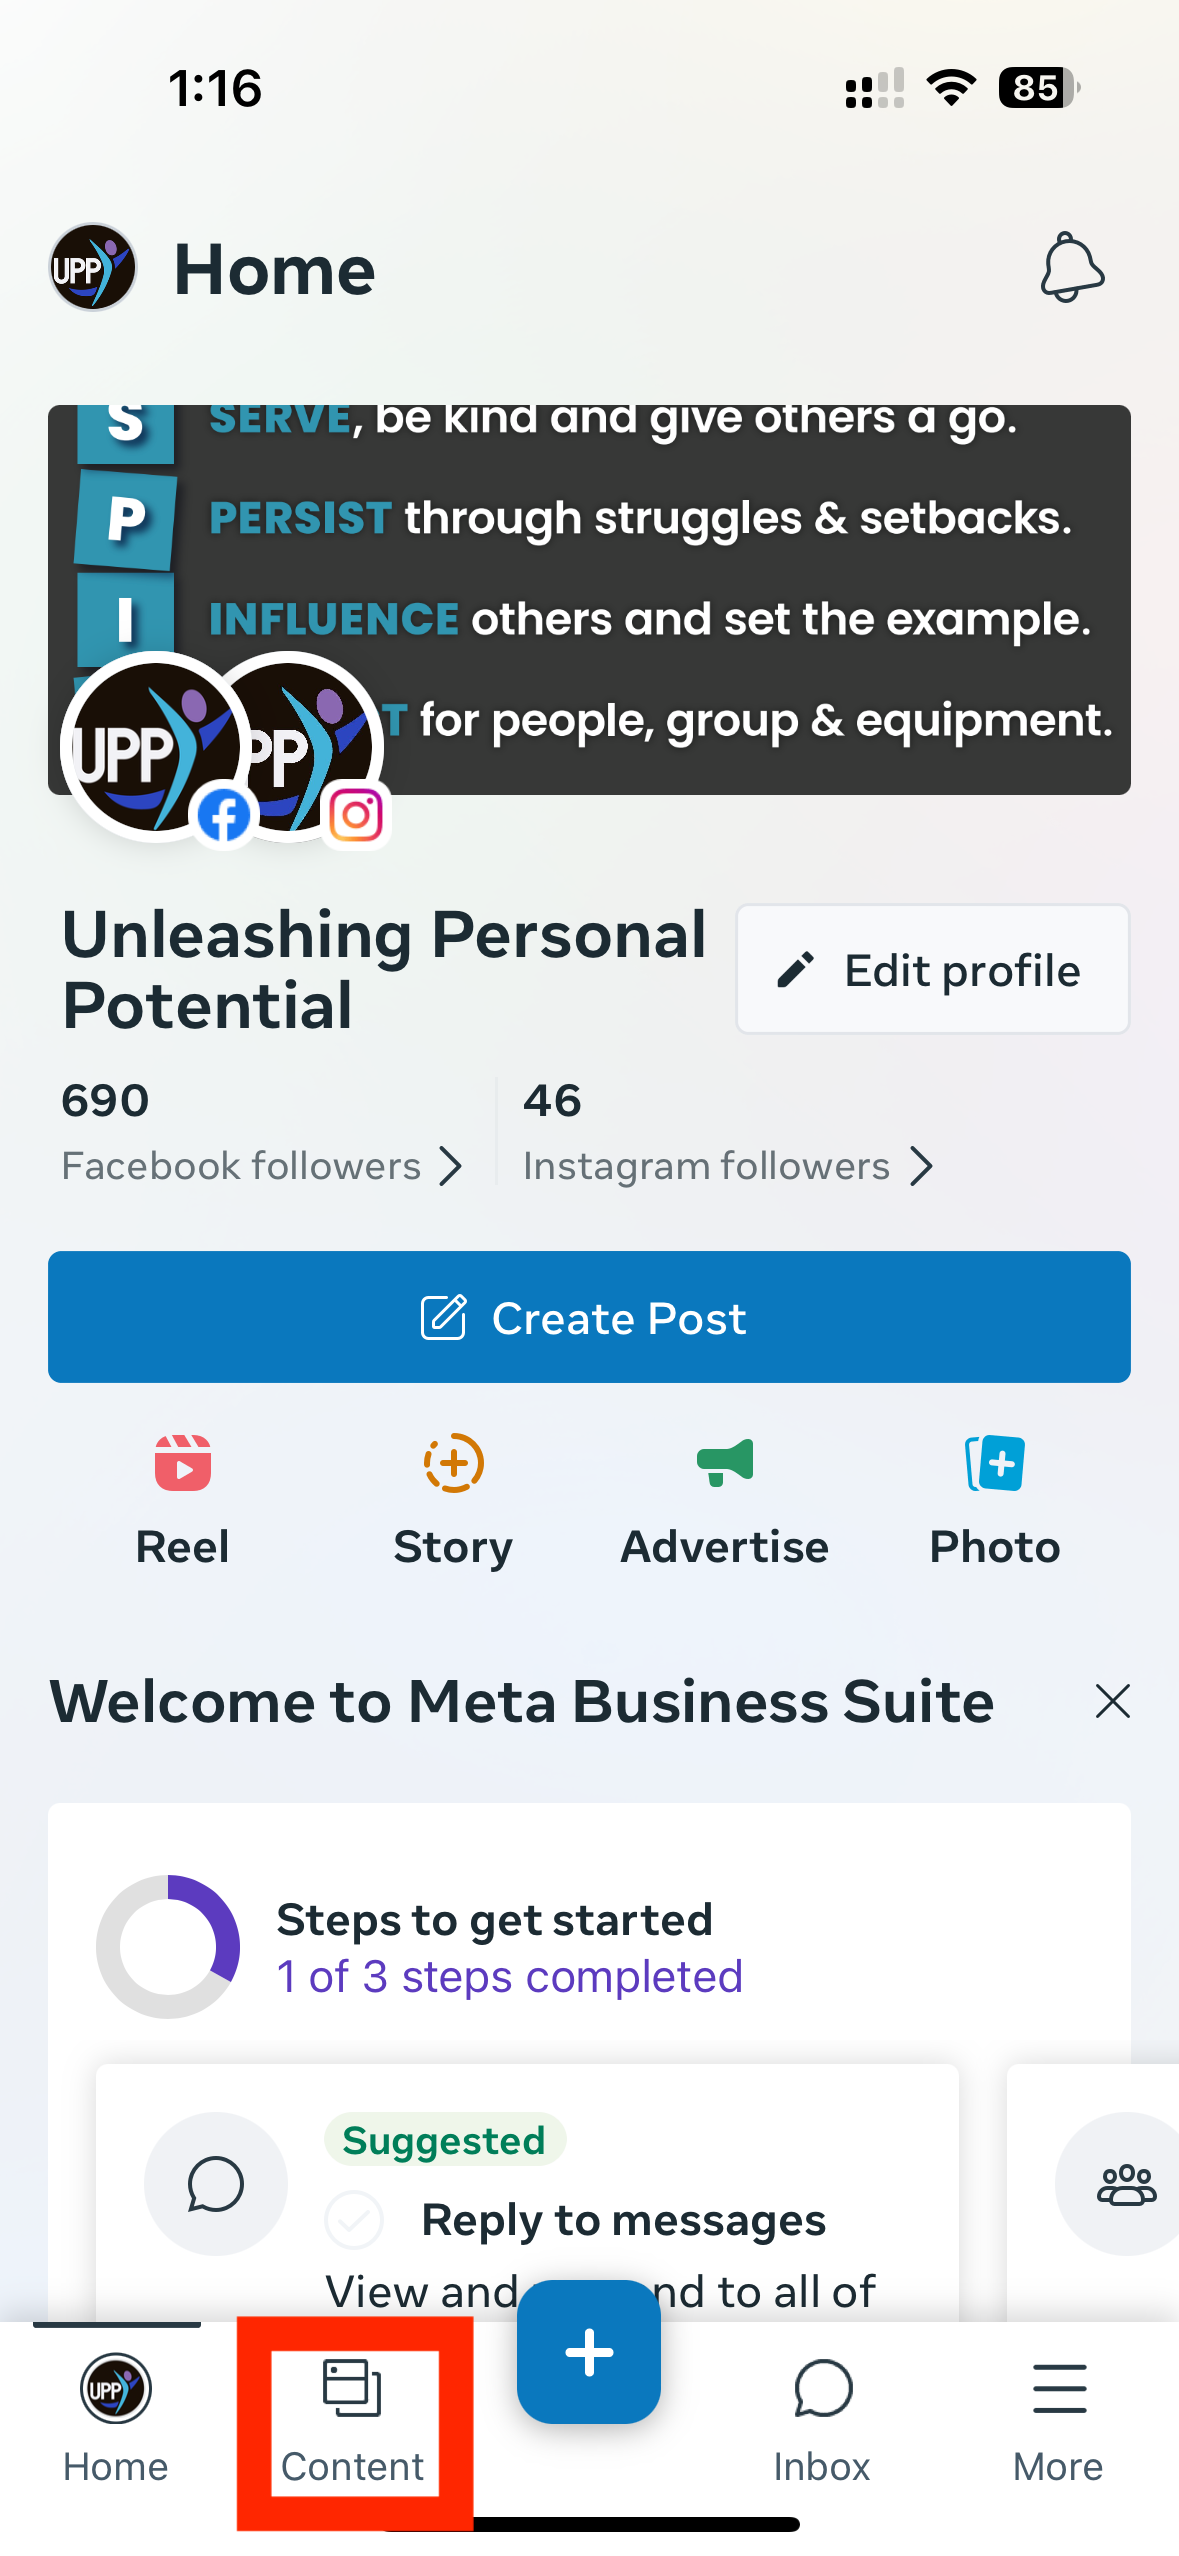
Step 1: Select “Content” on the bottom of the screen
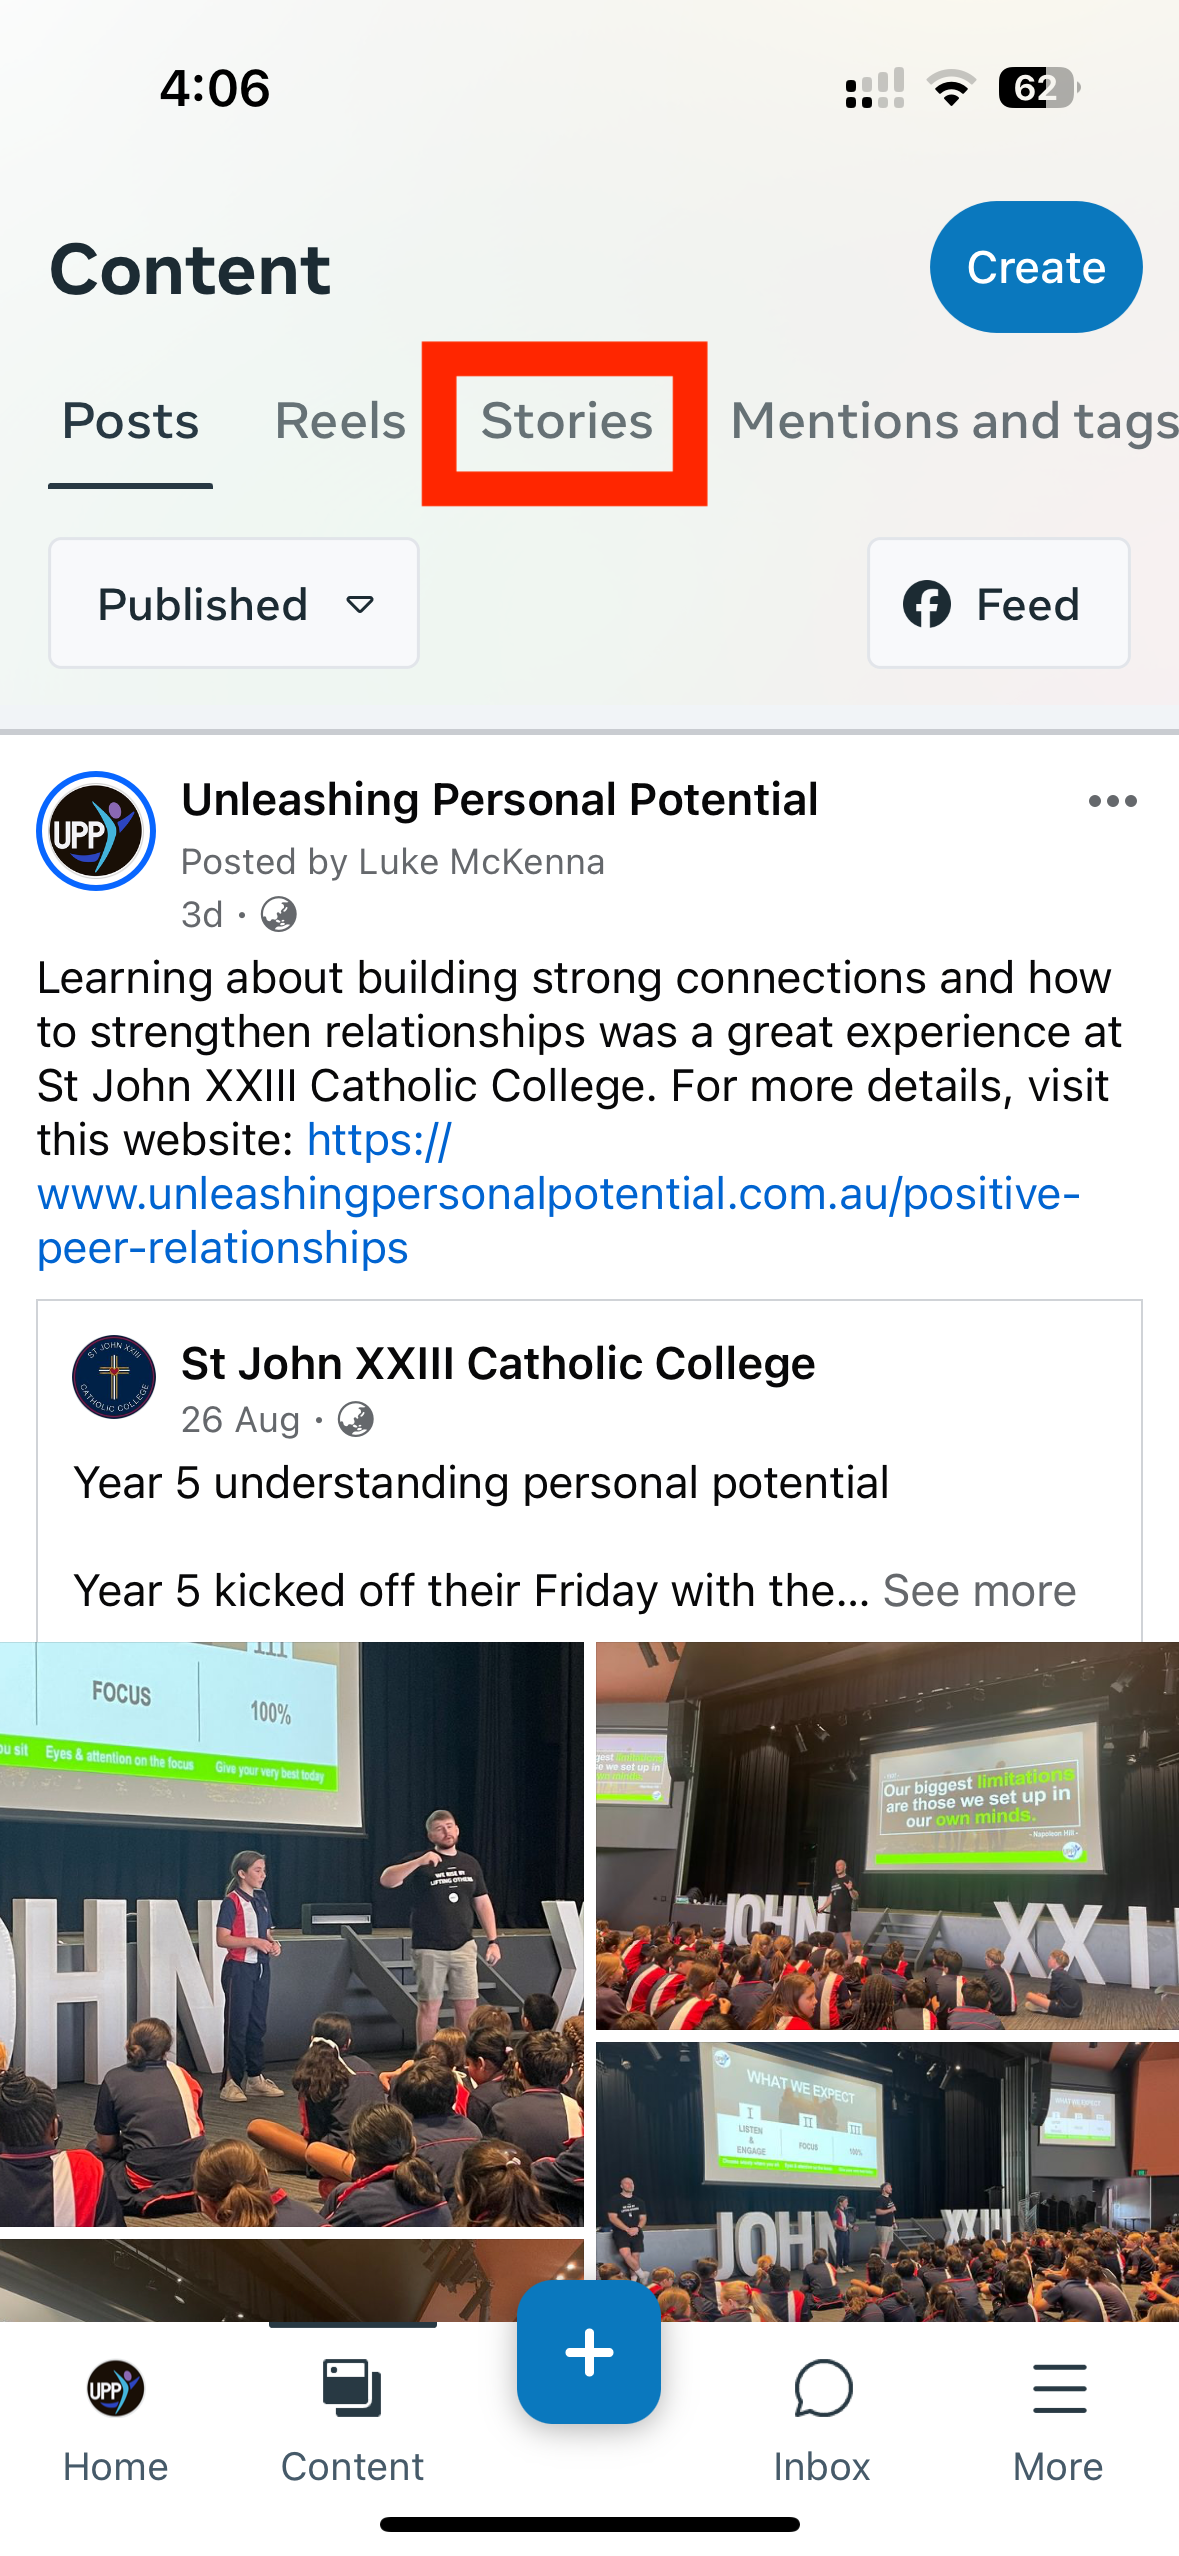
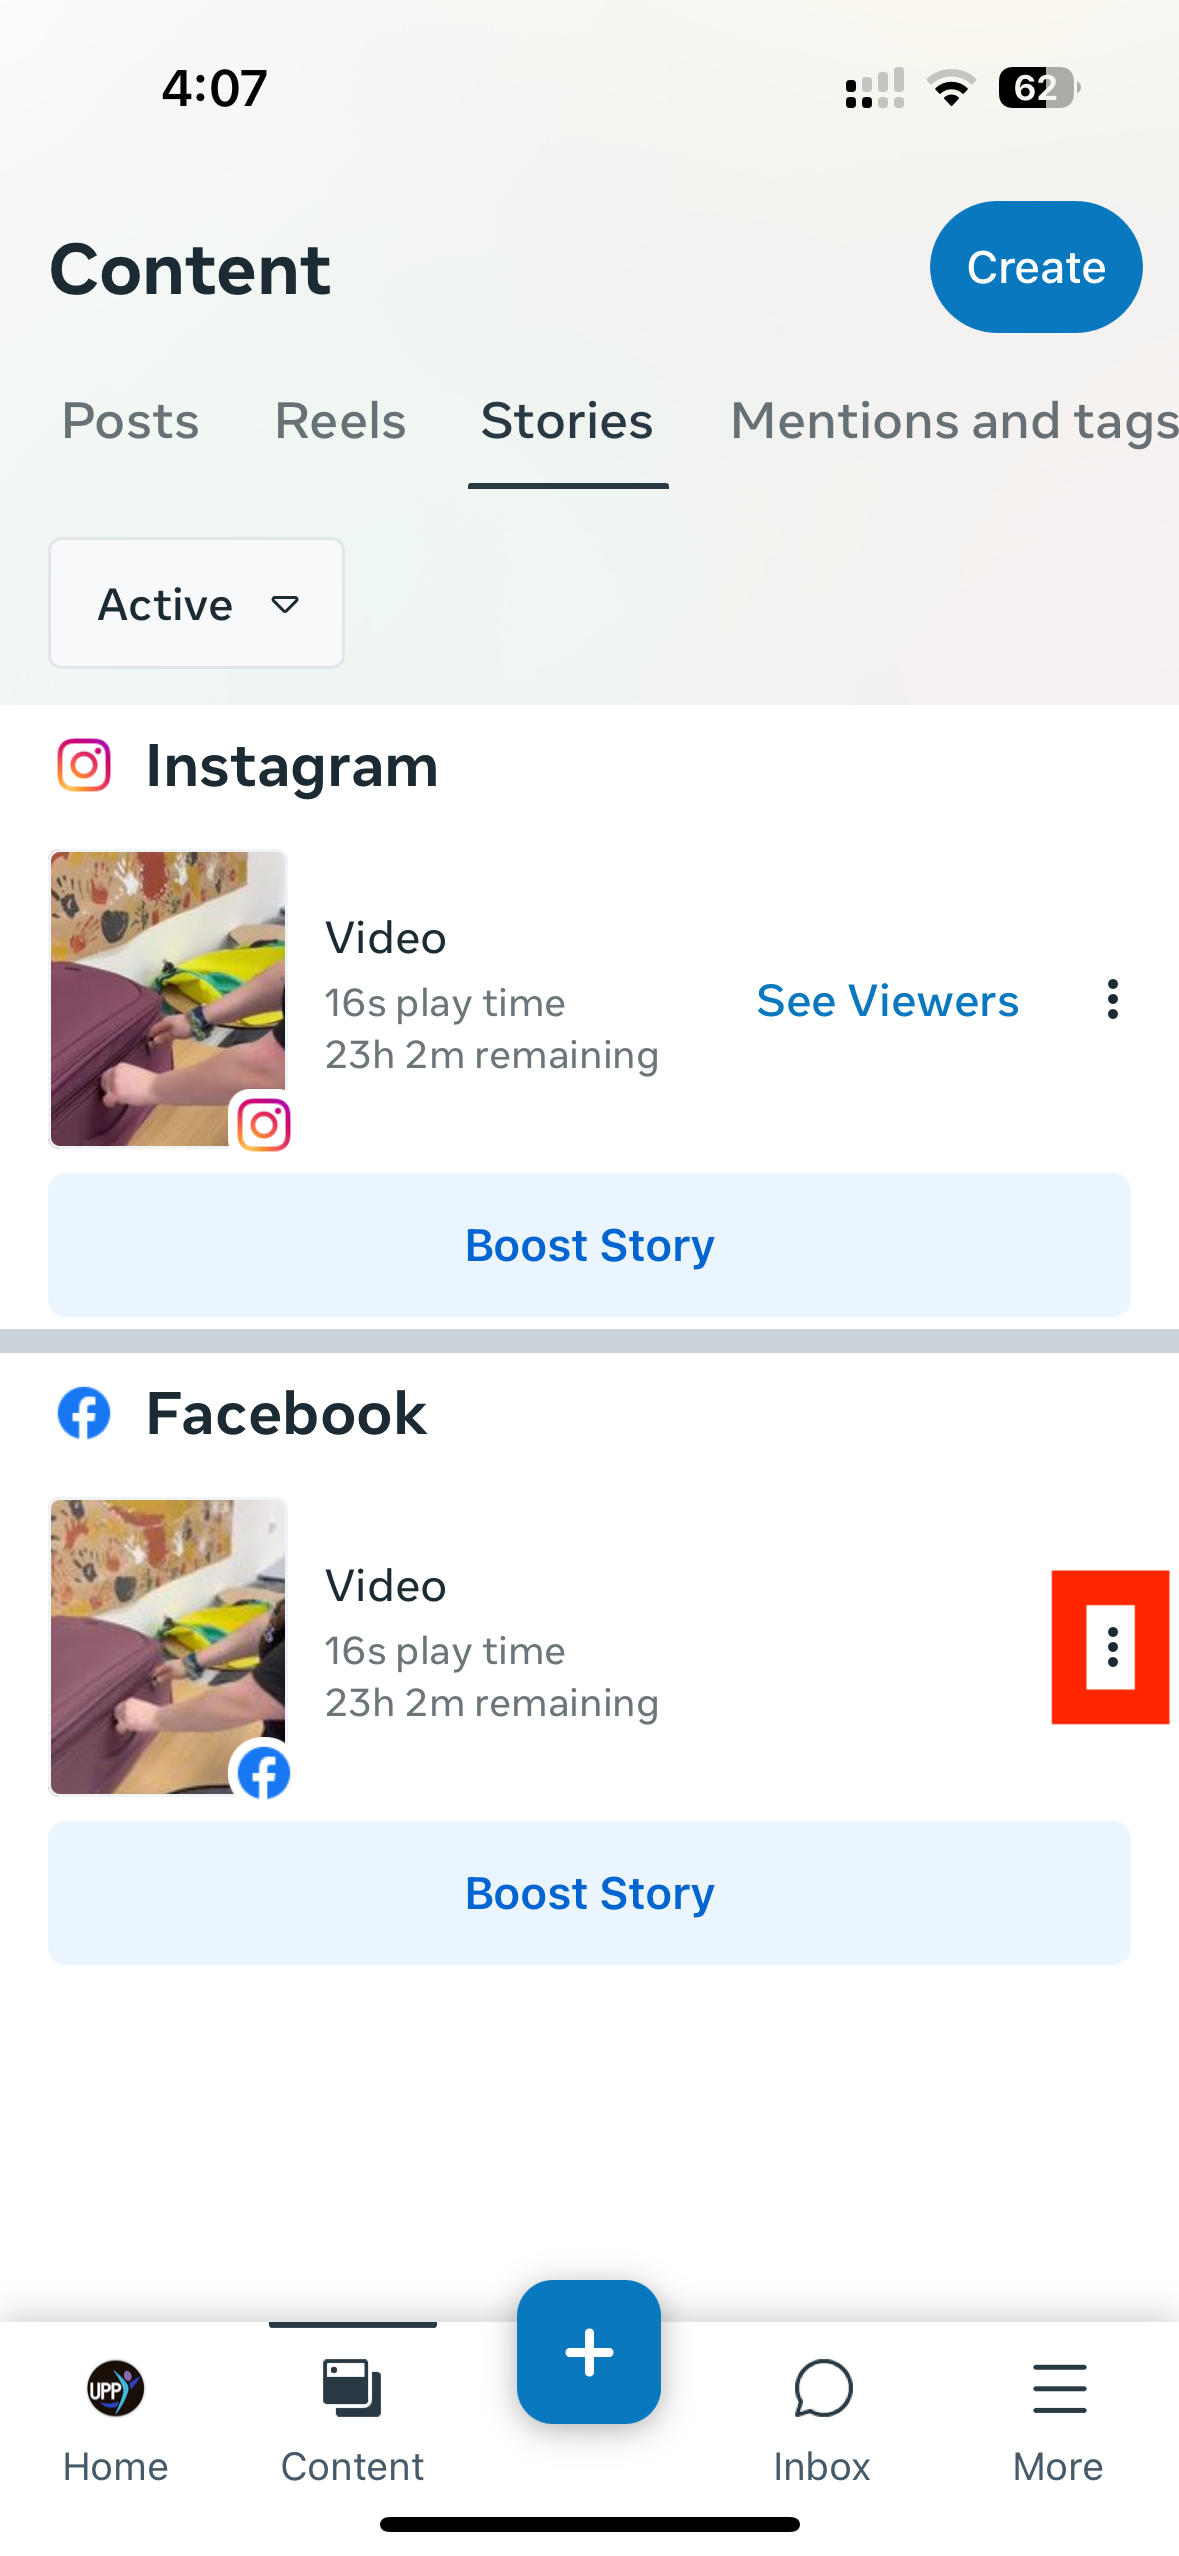
Step 2: Select “stories” at the top of the screen
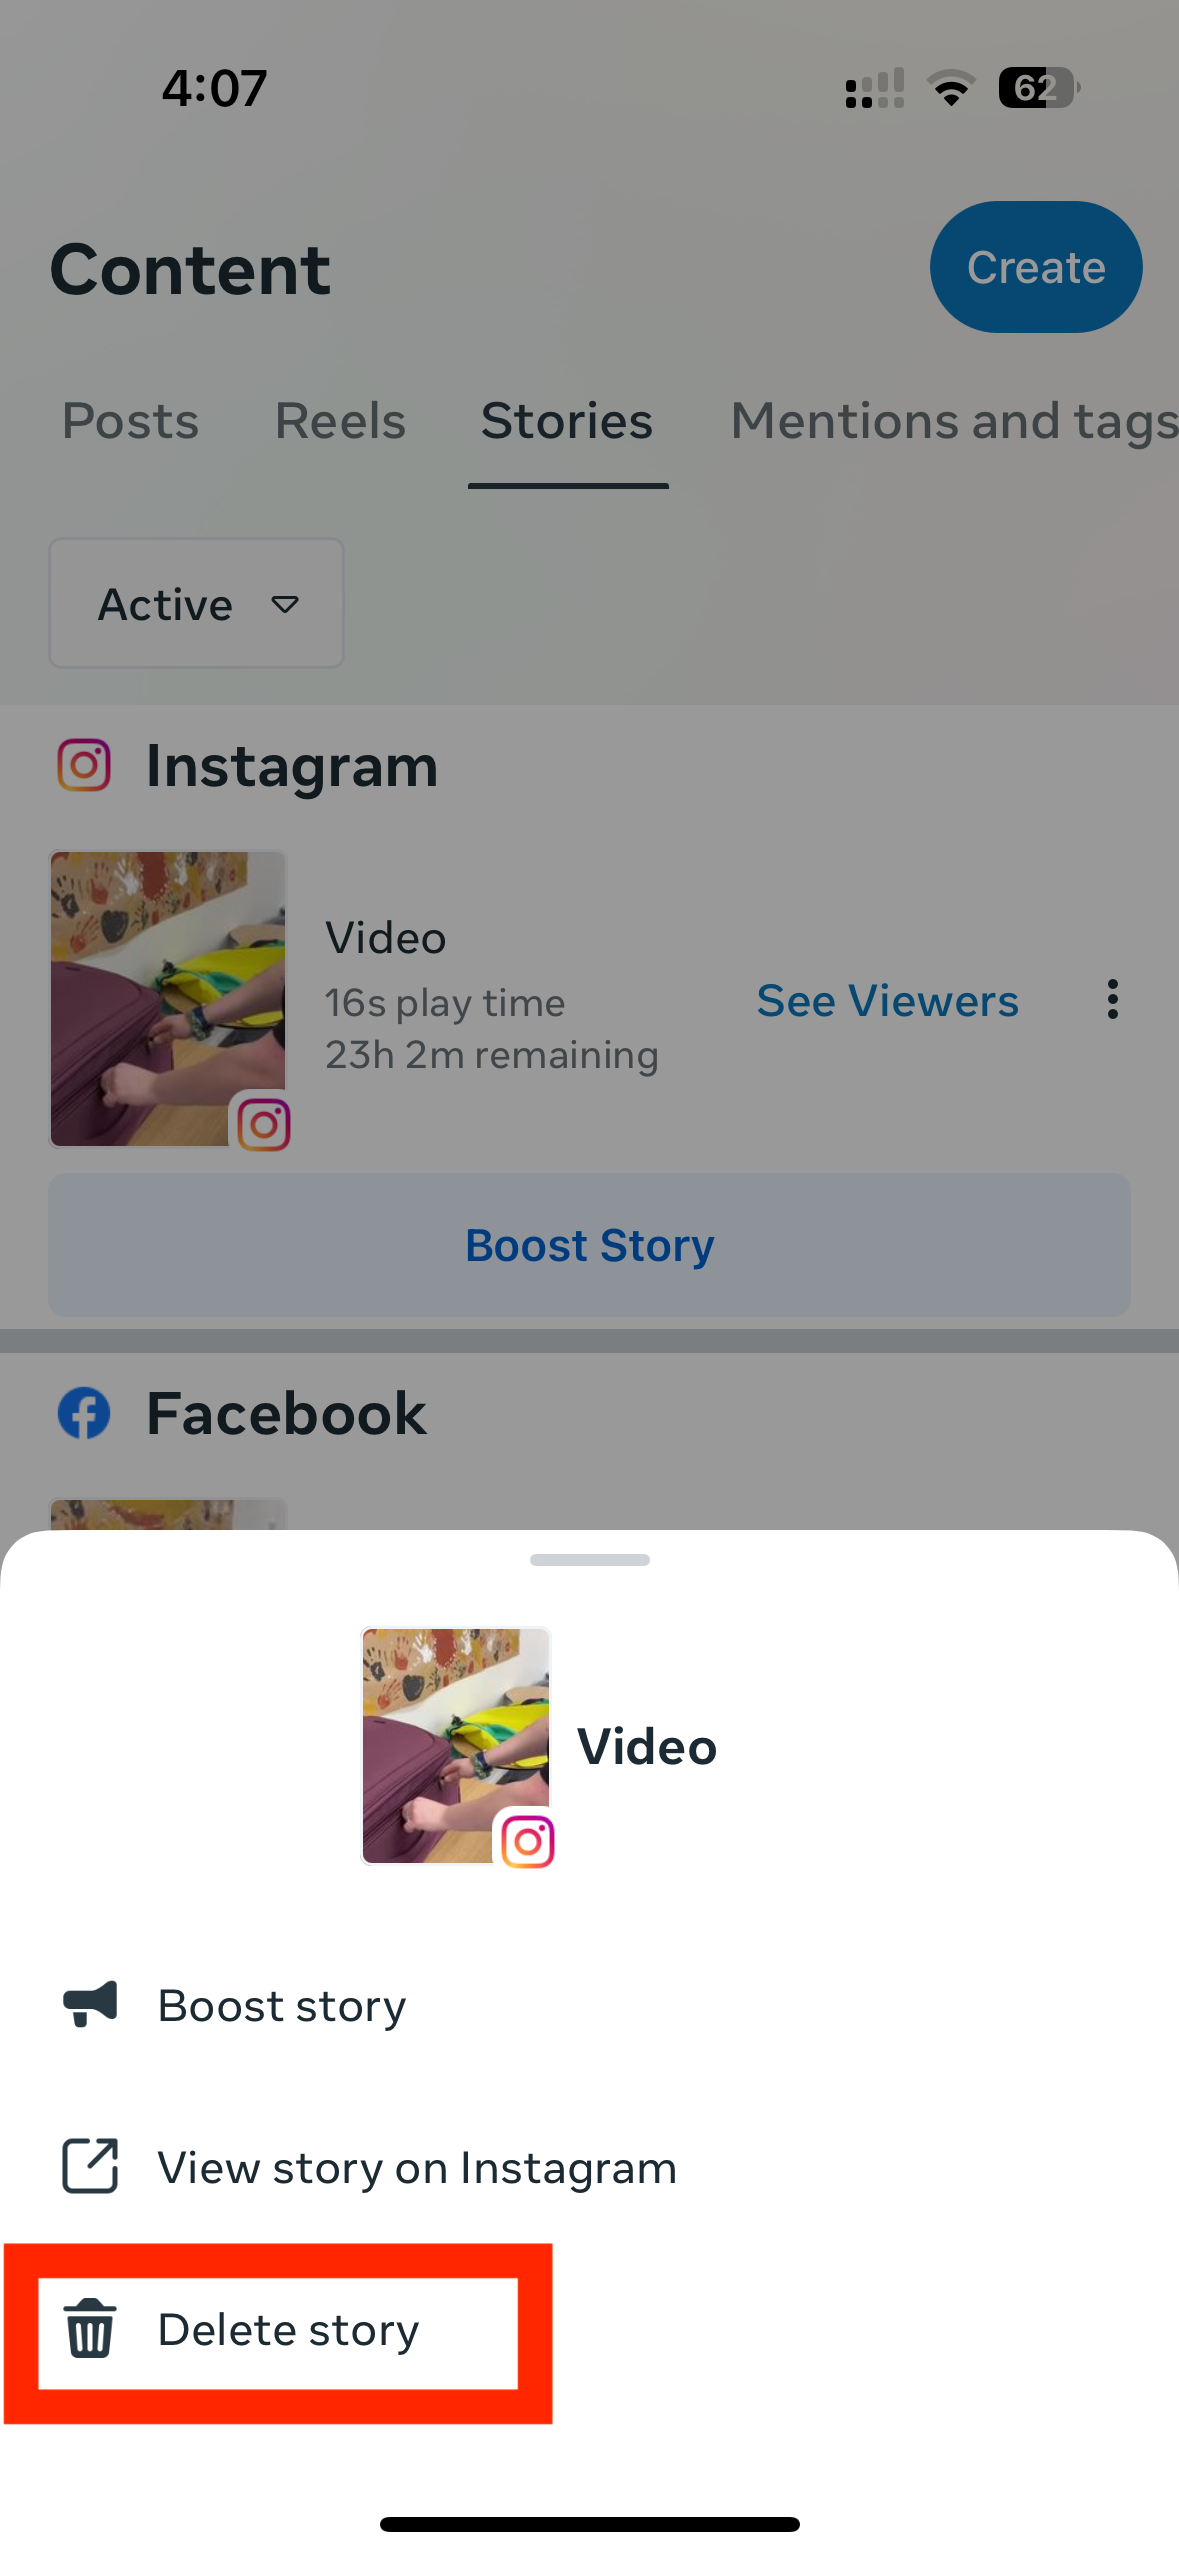
Step 3: deleting story from instagram
Press the three dots in the top right hand corner of the story in Instagram
Select “Delete story”
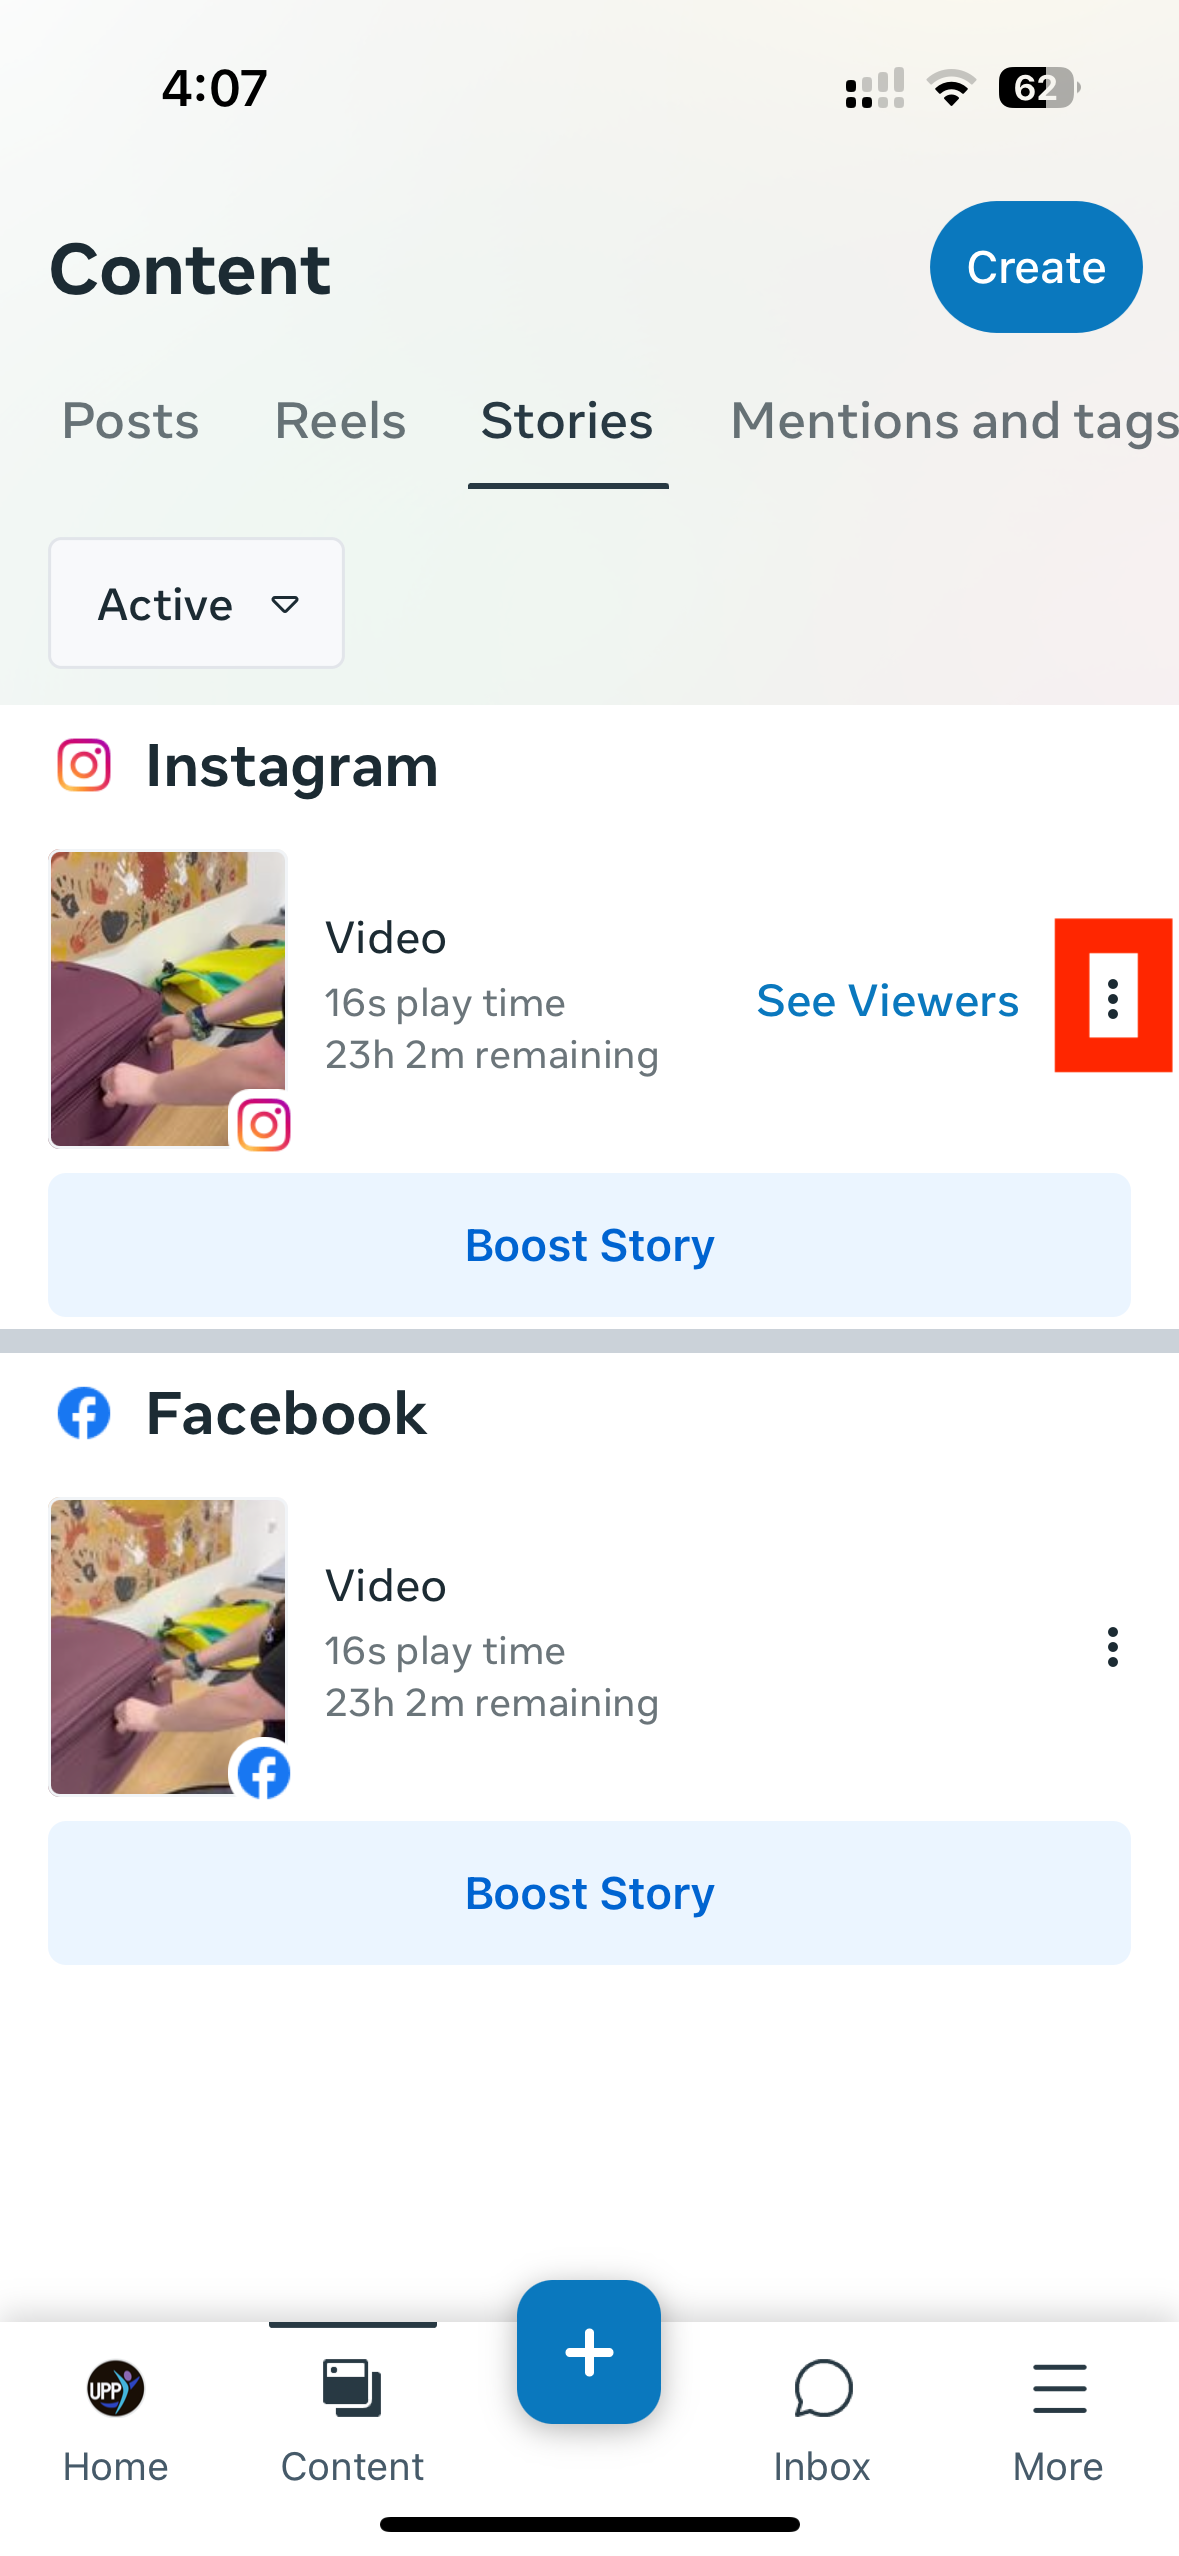
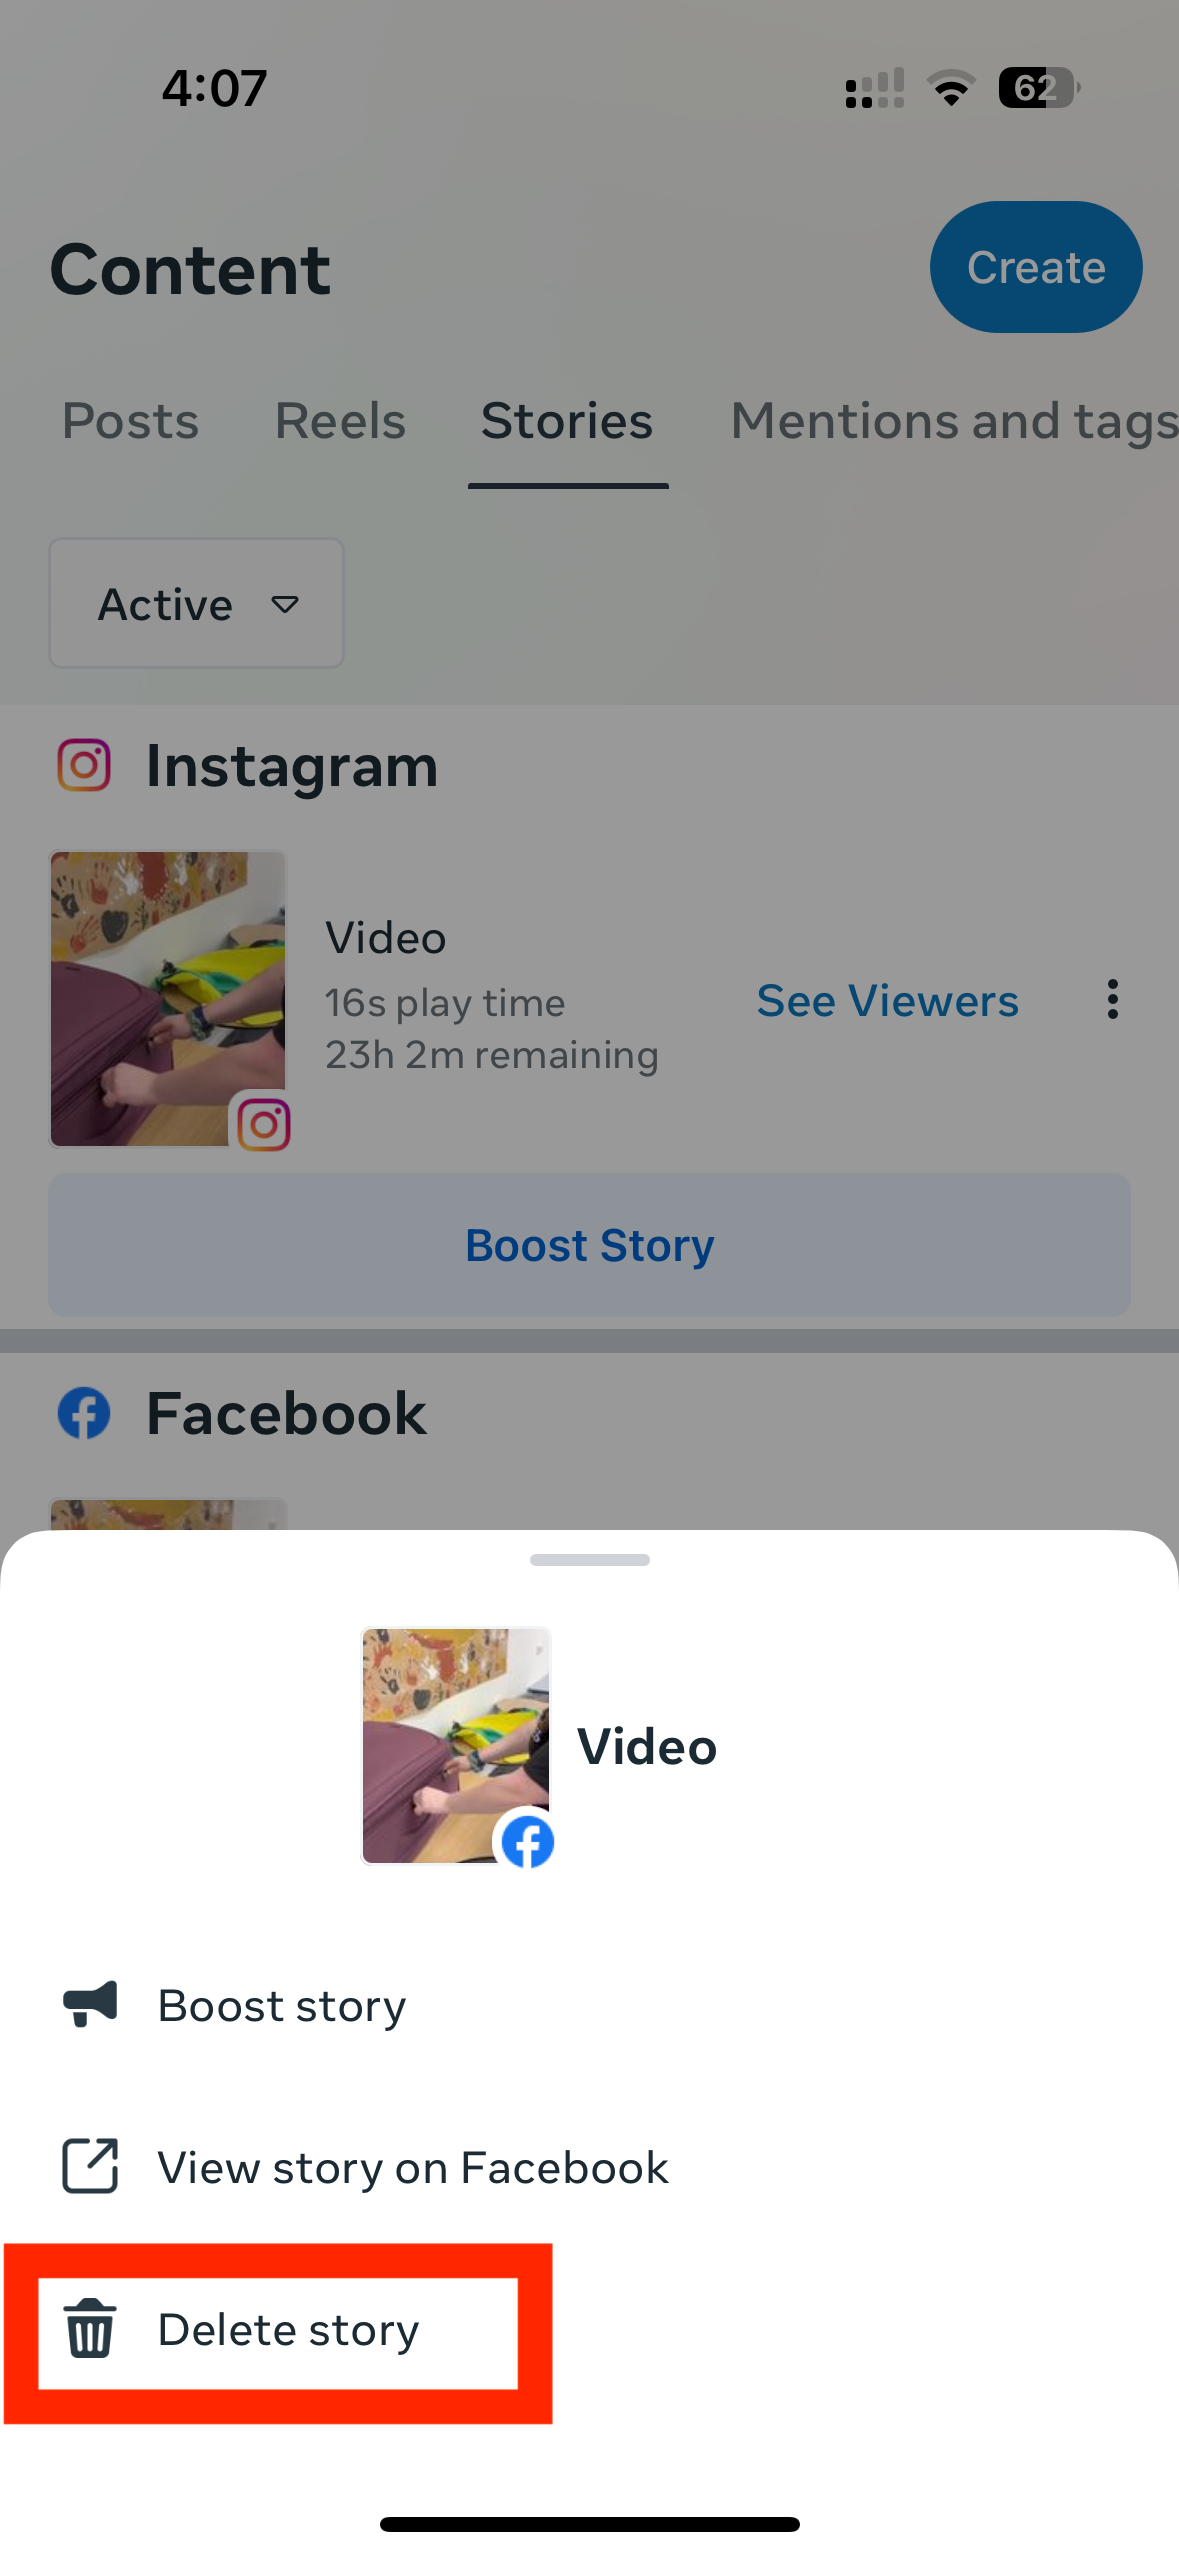
Step 4: deleting story from FACEBOOK
Press the three dots in the top right hand corner of the story in Facebook
Select “Delete story”
HOW TO DELETE POSTS
Step 1: Select “Content” on the bottom of the screen
Step 2: Scroll down to find the post that you wish to delete
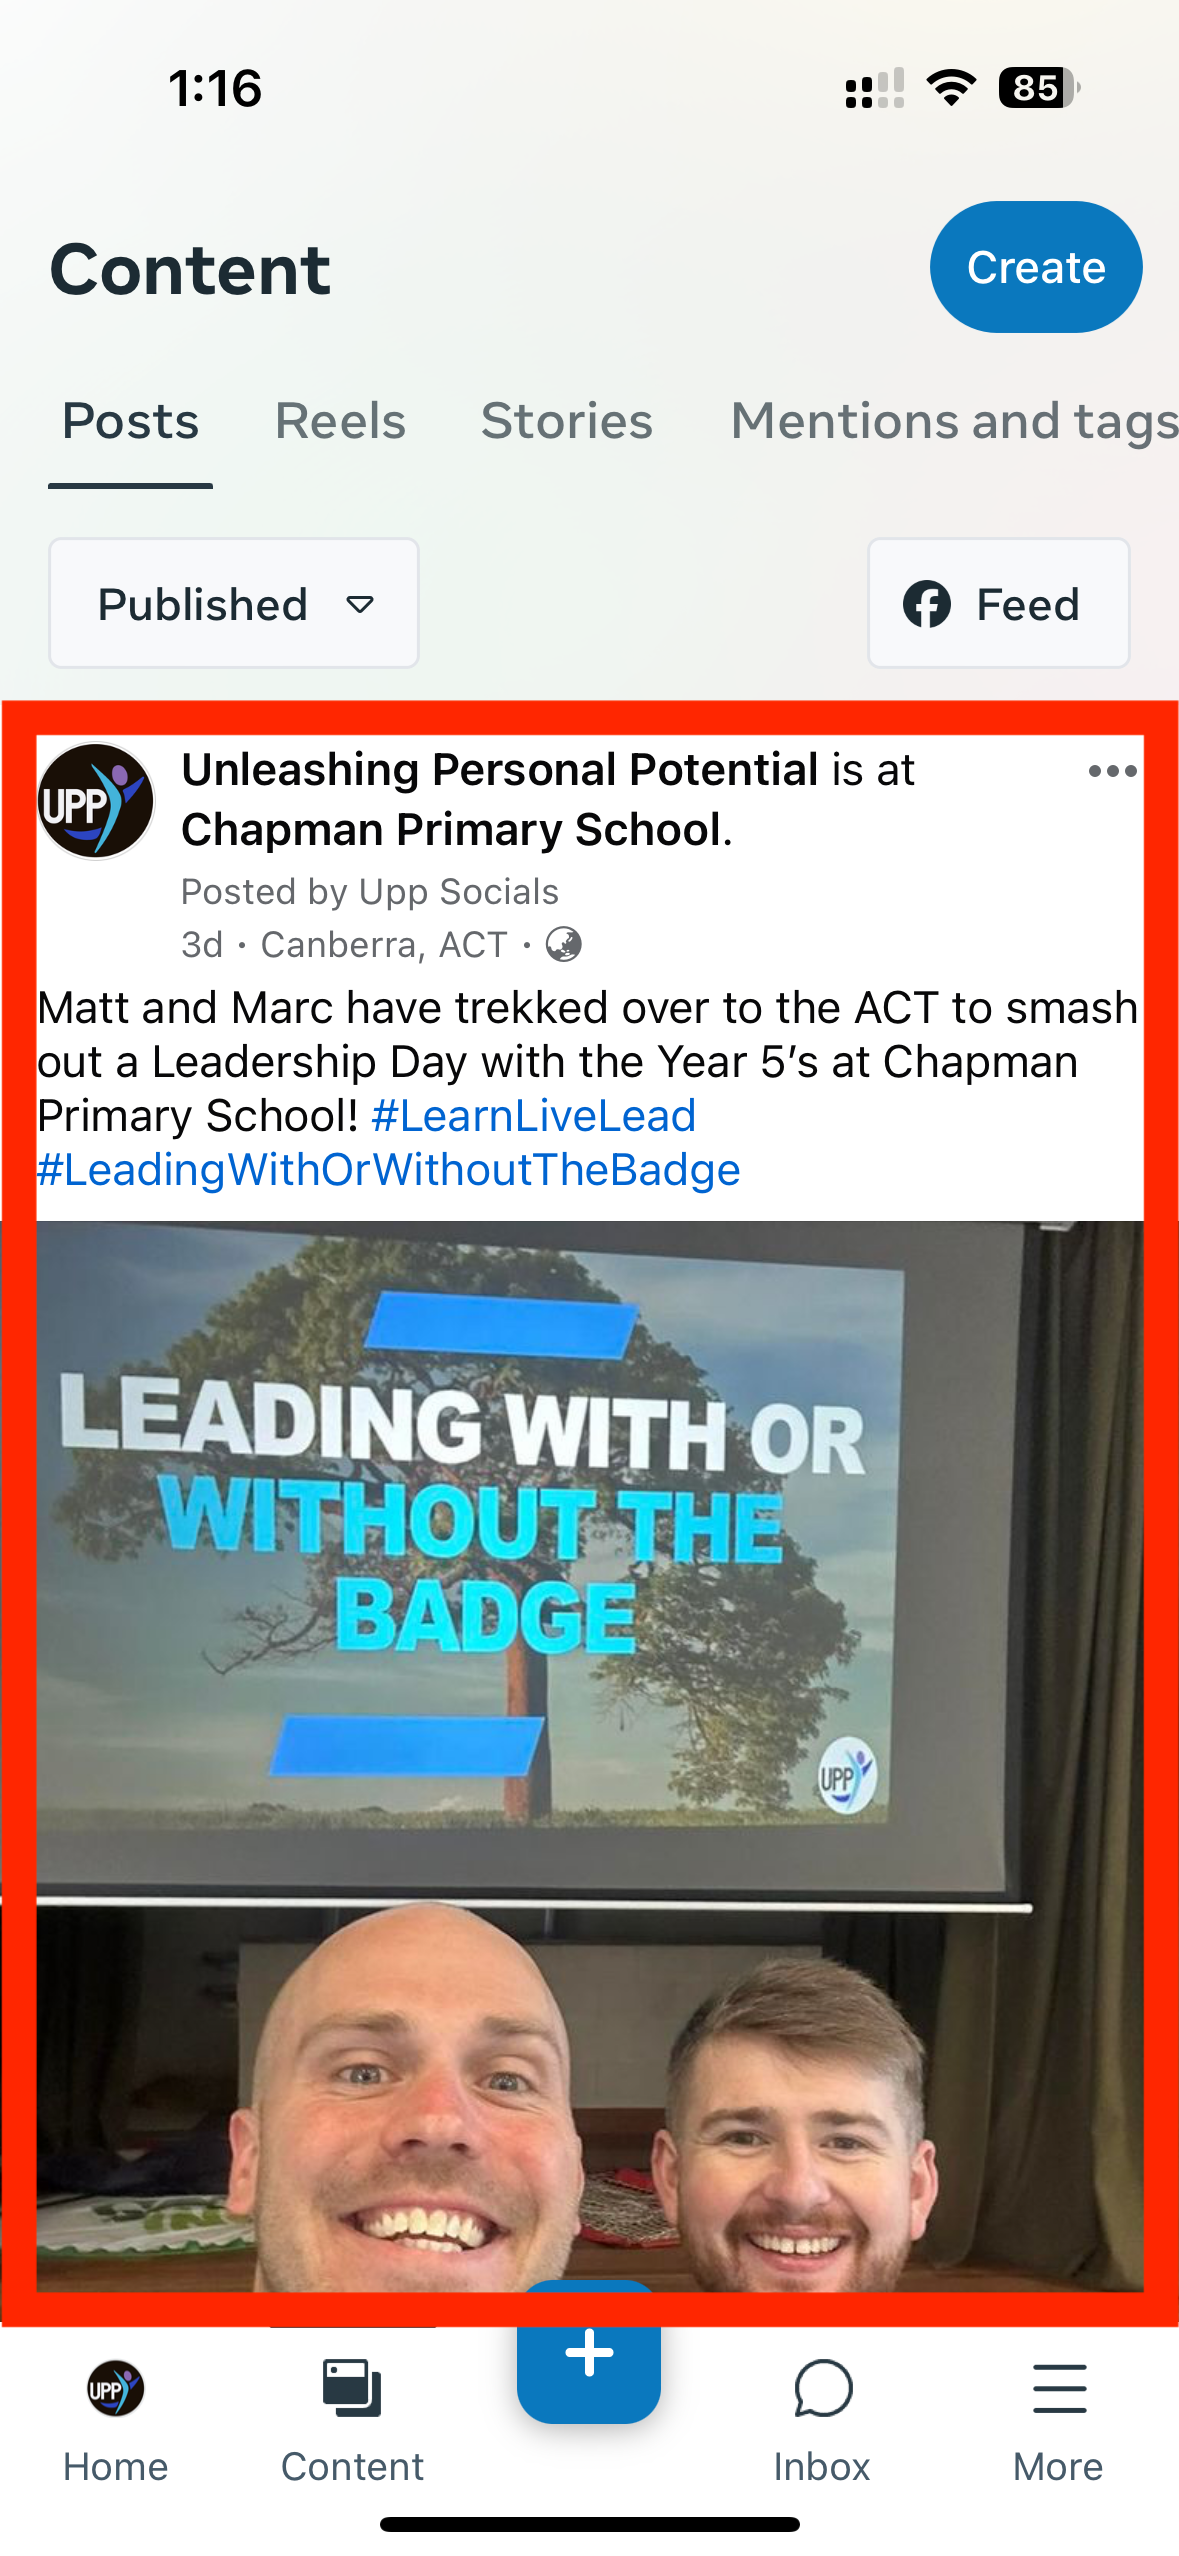
Step 3: Press the “…” on the top right hand corner of the post
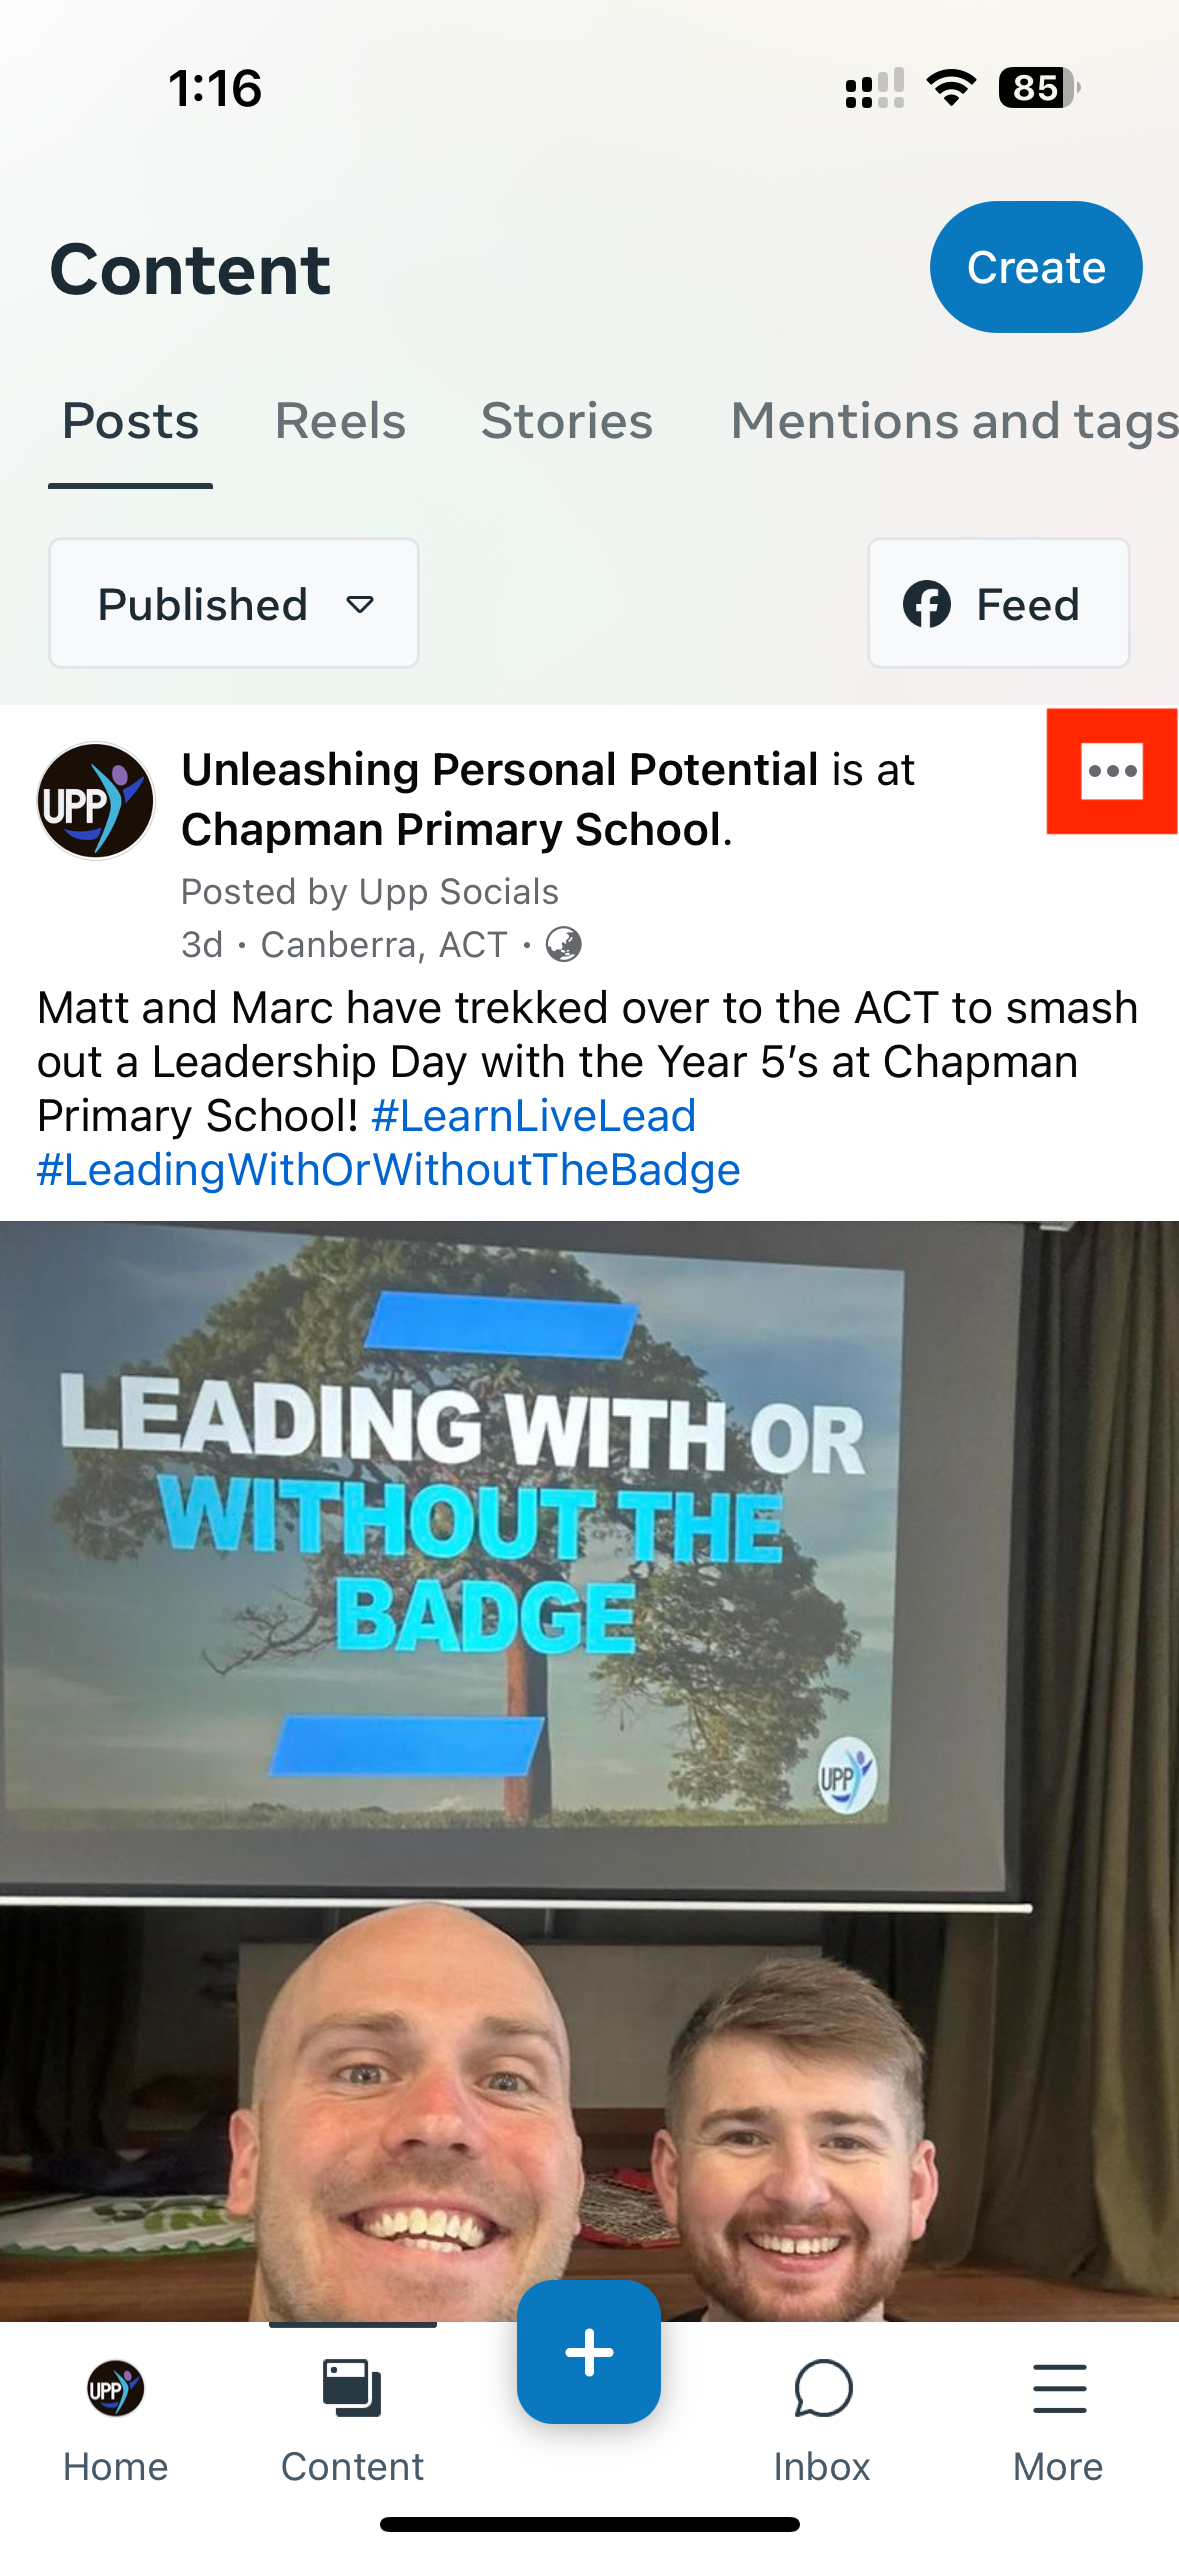
Step 4: Select “Delete”
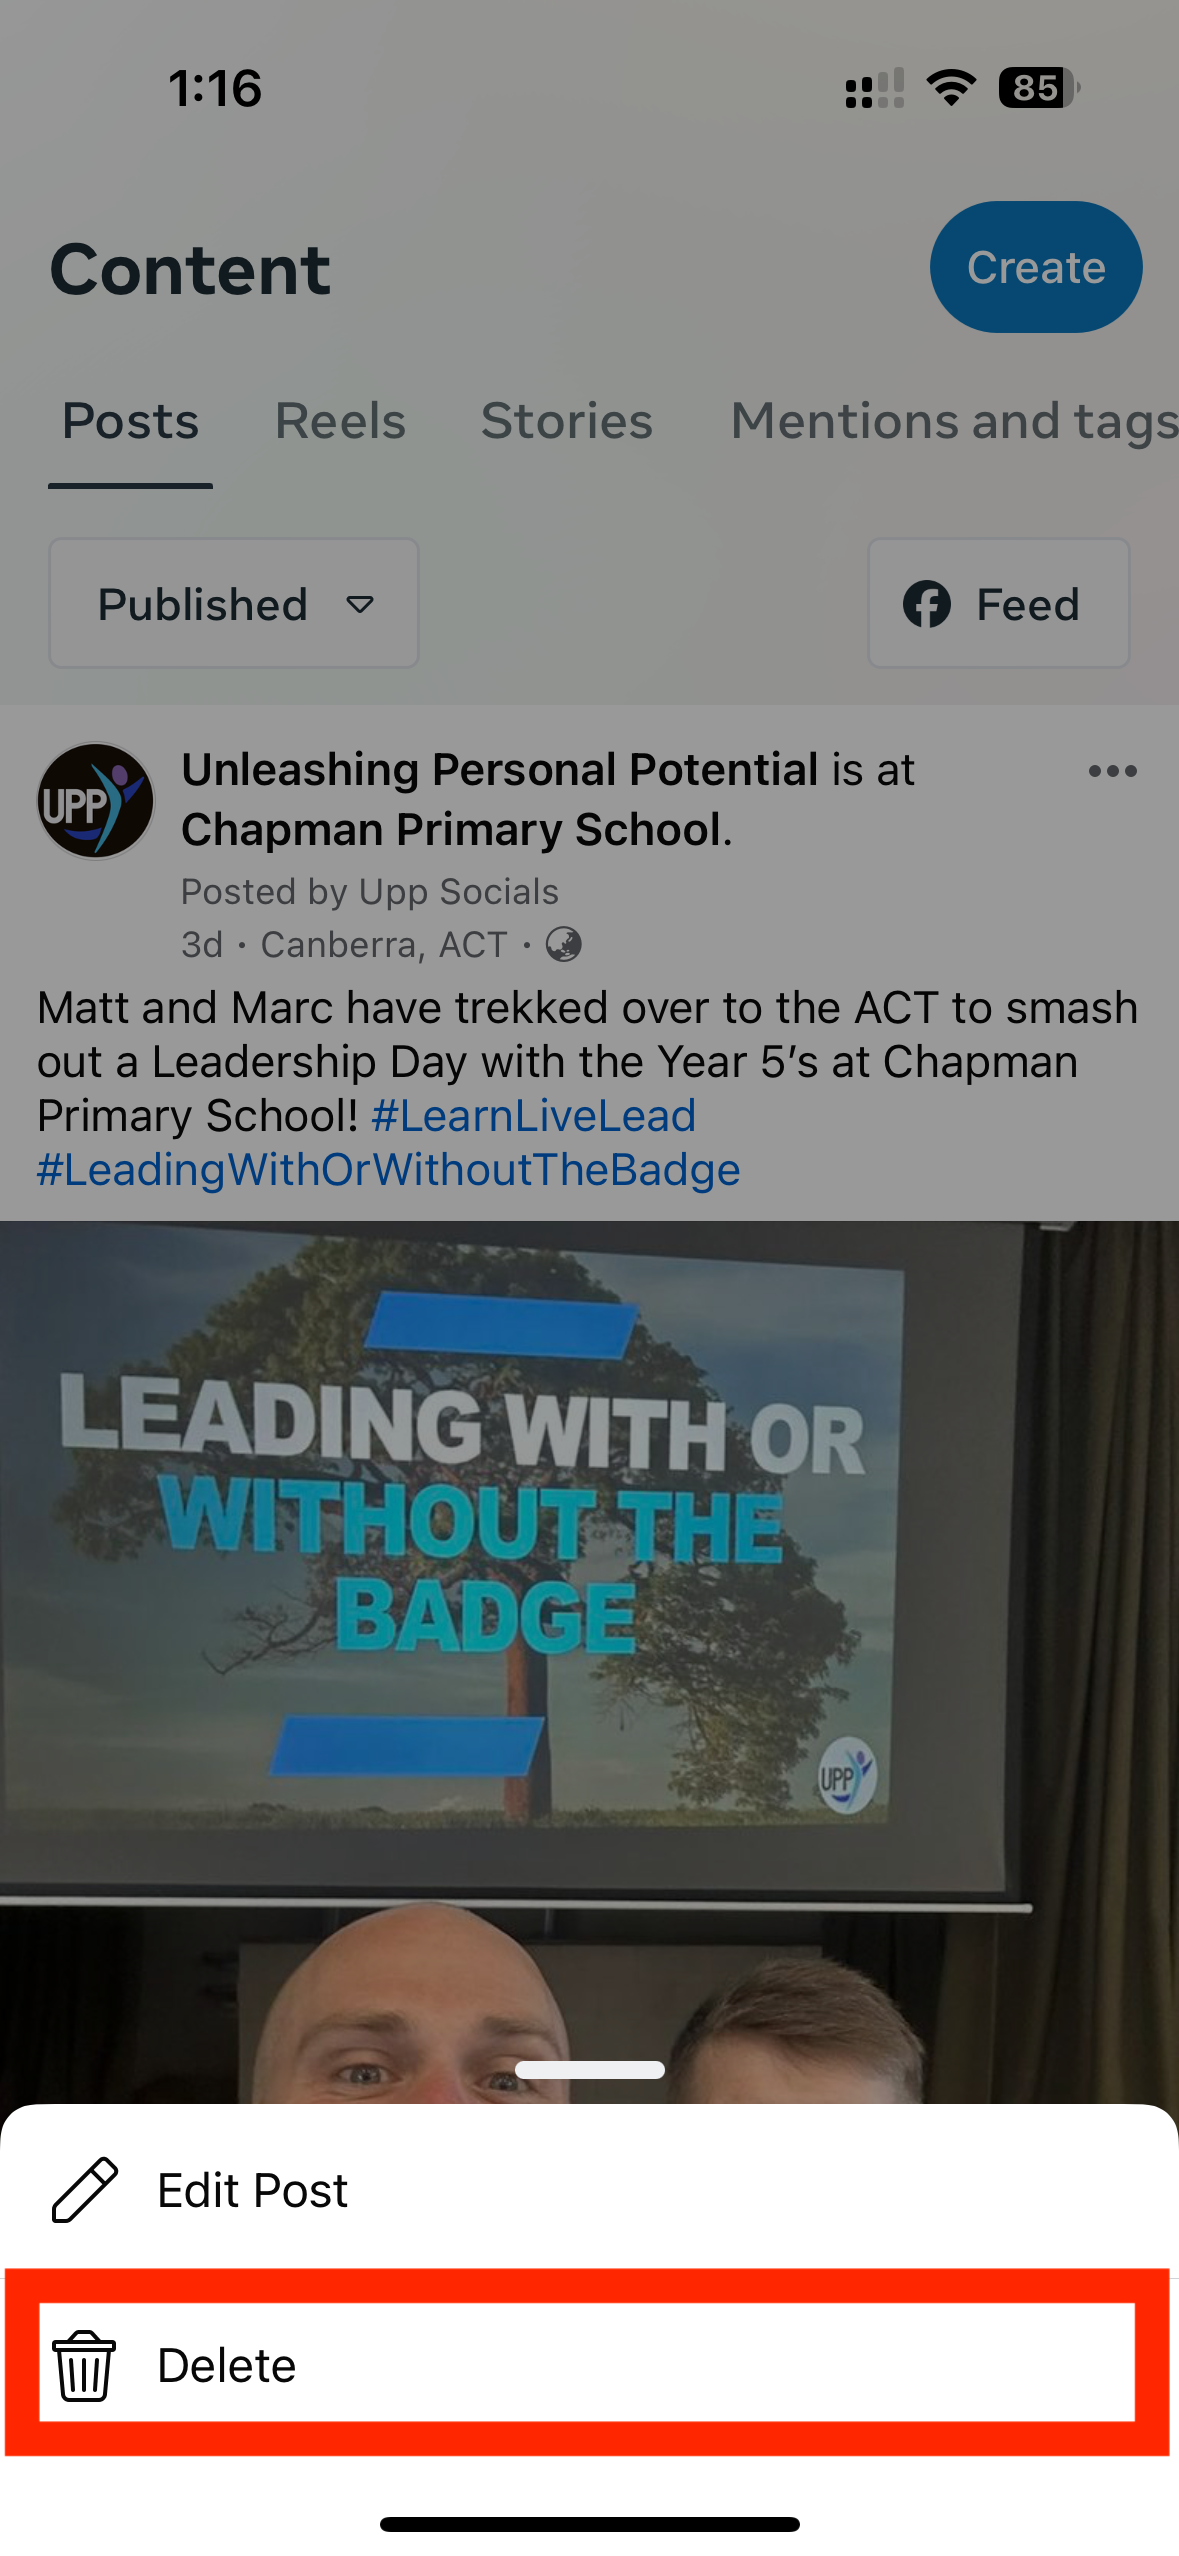
Step 5: Confirm you want to delete the post by selecting “Delete Post”

HOW TO CREATE/ADD STORIES TO INSTAGRAM HIGHLIGHTS (ONLY AVAILABLE VIA DESKTOP)
HOW TO CREATE NEW INSTAGRAM HIGHLIGHTS SET
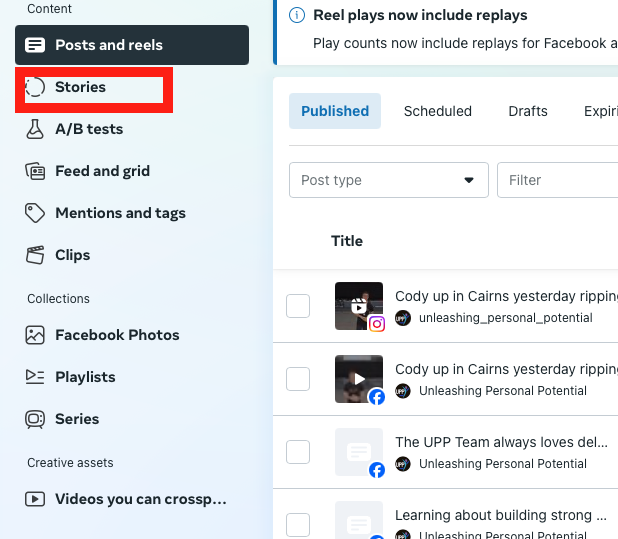
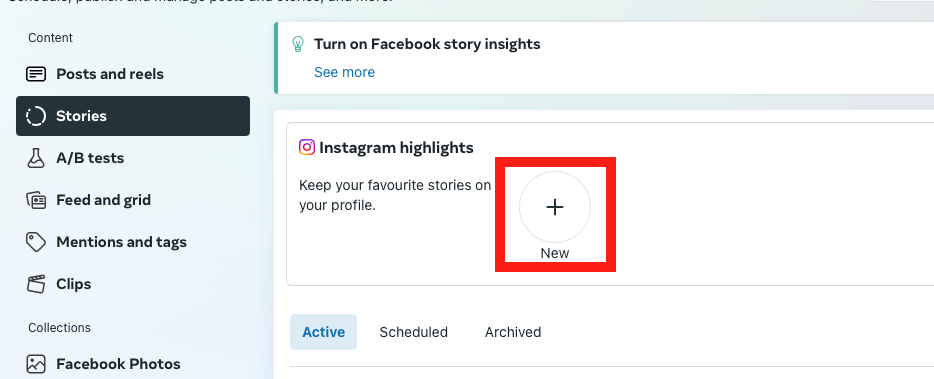
Step 1: Select “Content” on the LEFT HAND SIDE OF THE SCREEN

STEP 2: SELECT “STORIES” UNDERNEATH THE “CONTENT” LIST ON THE LEFT HAND SIDE OF THE SCREEN
STEP 3: SELECT “NEW” IN THE “INSTAGRAM HIGHLIGHTS” SECTION
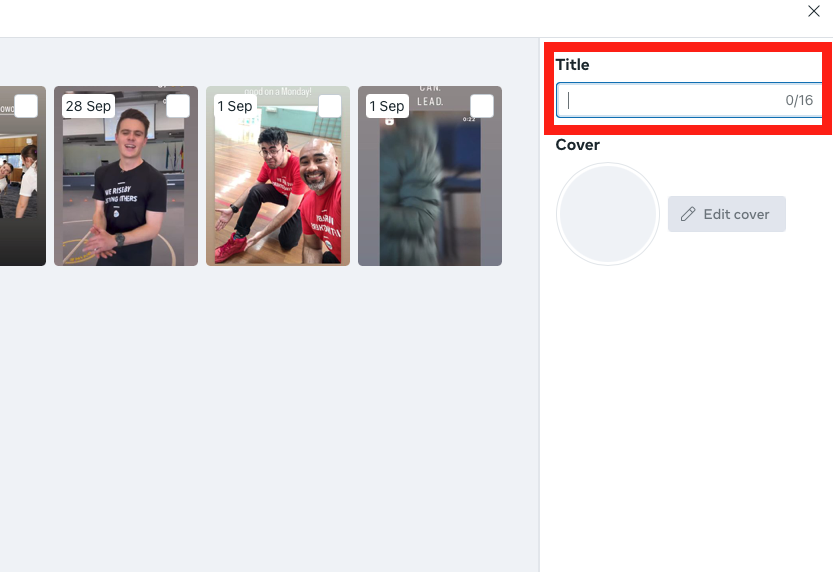
STEP 4: ENTER THE TITLE FOR THE HIGHLIGHT SET IN THE TOP RIGHT HAND CORNER OF THE NEW WINDOW
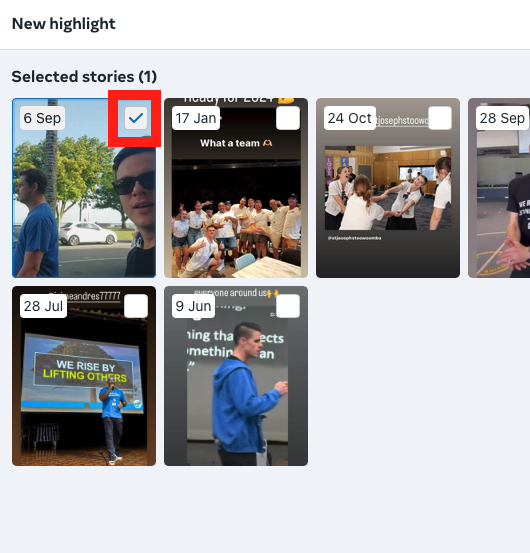
STEP 5: SELECT THE ARCHIVED STORIES YOU WISH TO ADD TO THE NEW SET
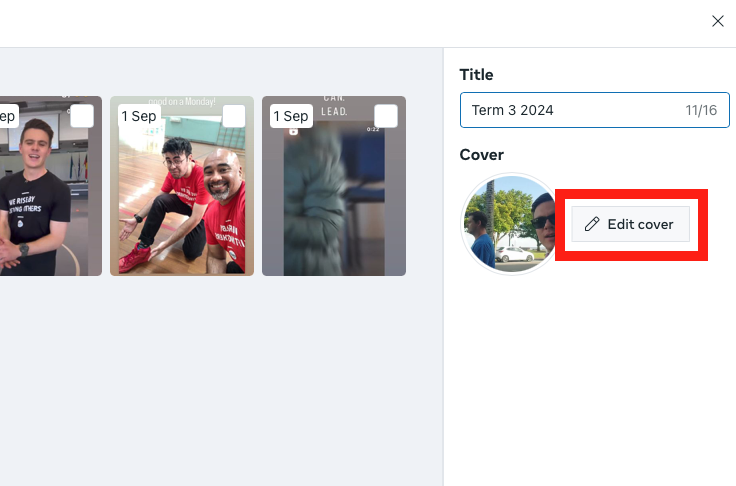
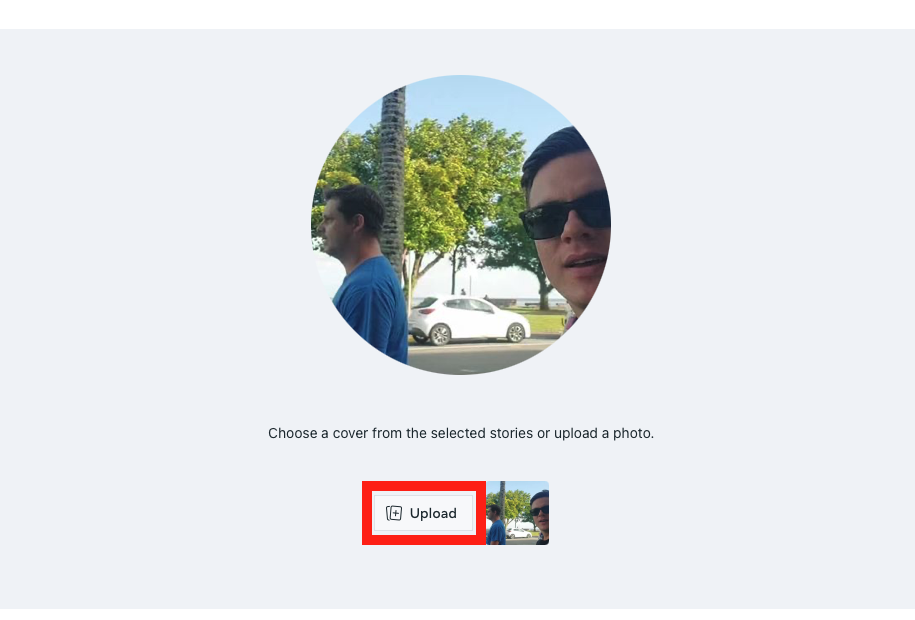
(OPTIONAL STEP: CHANGE COVER PHOTO OF HIGHLIGHT SET)
Select “Edit cover” on the right hand side of the window
Press “Upload”
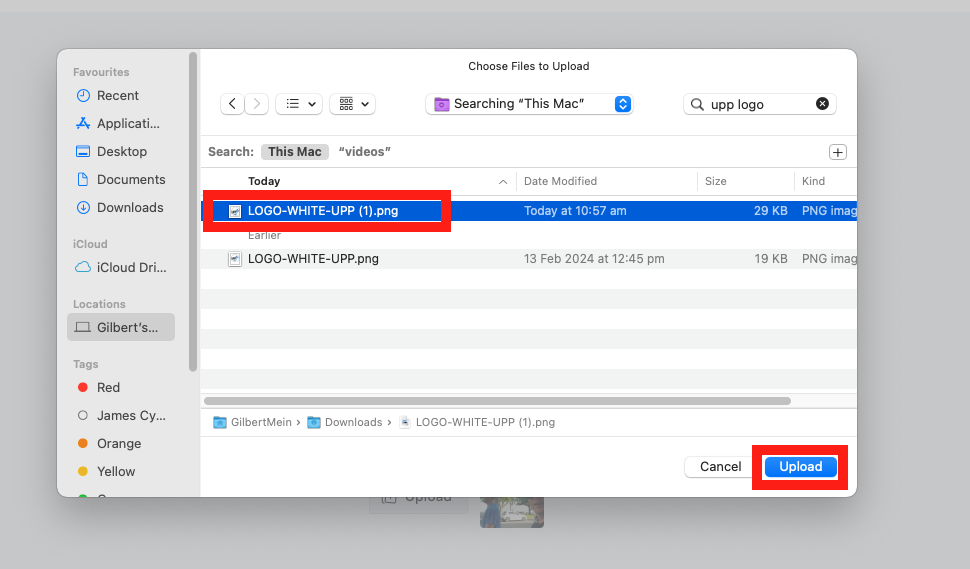
In the new window, find the image file you wish to use, then select “Upload”
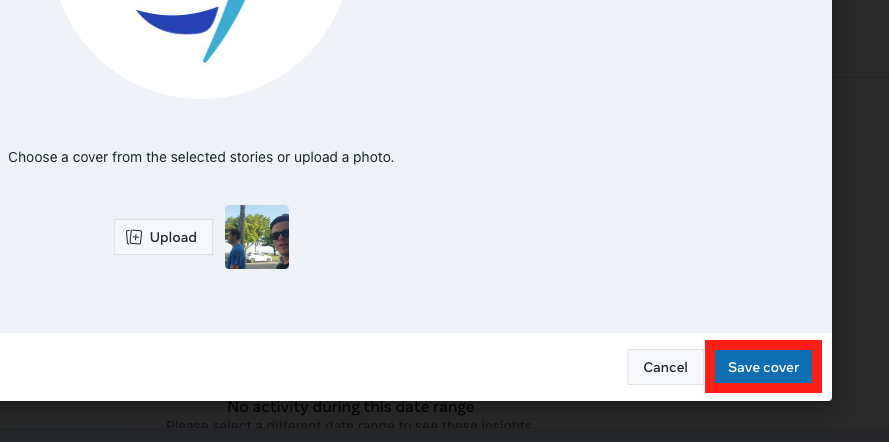
Select “Save cover” to confirm the new cover image
This will allow the cover image to be a chosen image of the team, or the UPP logo
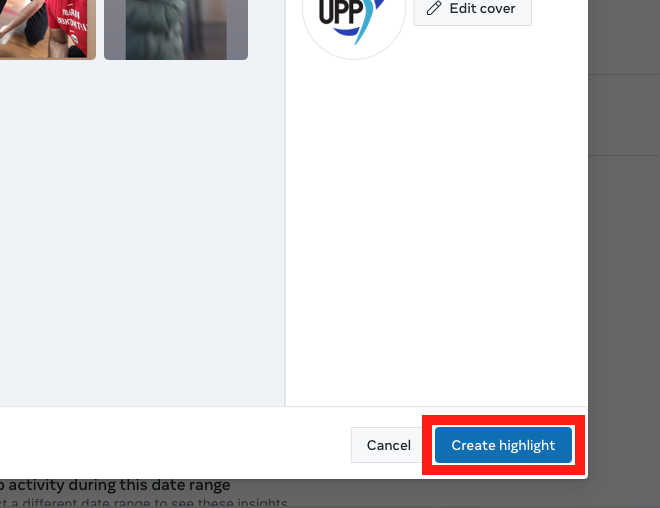
Final step: confirm and create the new highlight set by selecting “create highlight” at the bottom right hand corner of the window
HOW TO add NEW INSTAGRAM stories to a pre-existing HIGHLIGHTS SET
Step 1: Find the current highlight sets
Follow Steps 1 & 2 of the previous instructions
Select pre-existing Highlights set to which you want to add new stories

Step 2: add new stories to highlight set and confirm
Select the new stories you wish to add to the Highlight set
Select “Save highlight” in the bottom right hand corner of the window to publish selection
