Creating a Google Form in Google Drive
a “how to” process
This process explains the step by step process of creating and editing a google form and then analysing the responses. Google forms are an easy and effective way to gather ideas and feedback from the UPP team and have previously been used to collect feedback from Team Intensives.
STEP 1:
Log on to Google Drive.
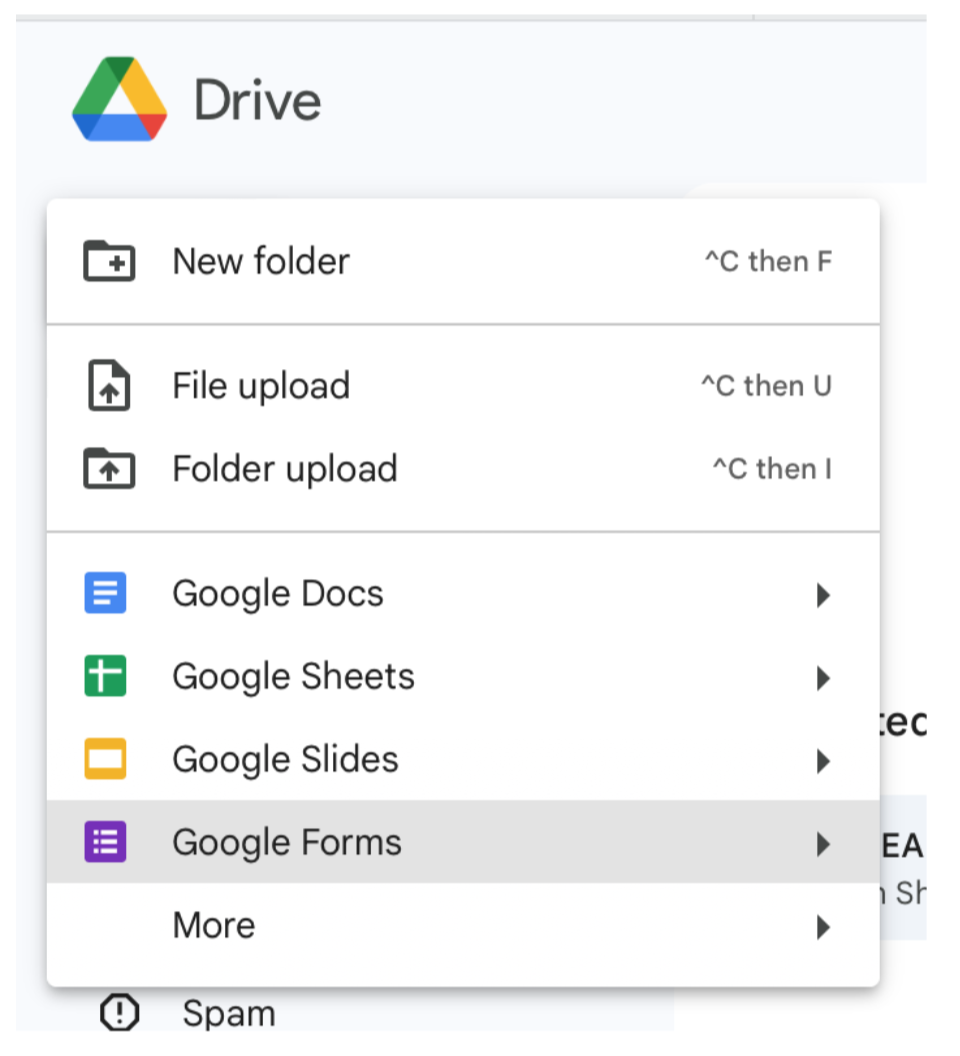
STEP 2:
Click on the “New” button in the top left hand corner.

STEP 3:
Click on “Google Forms”.
STEP 4:
This will open a new window and a blank google form. This will exist in your own personal drive (My Drive).
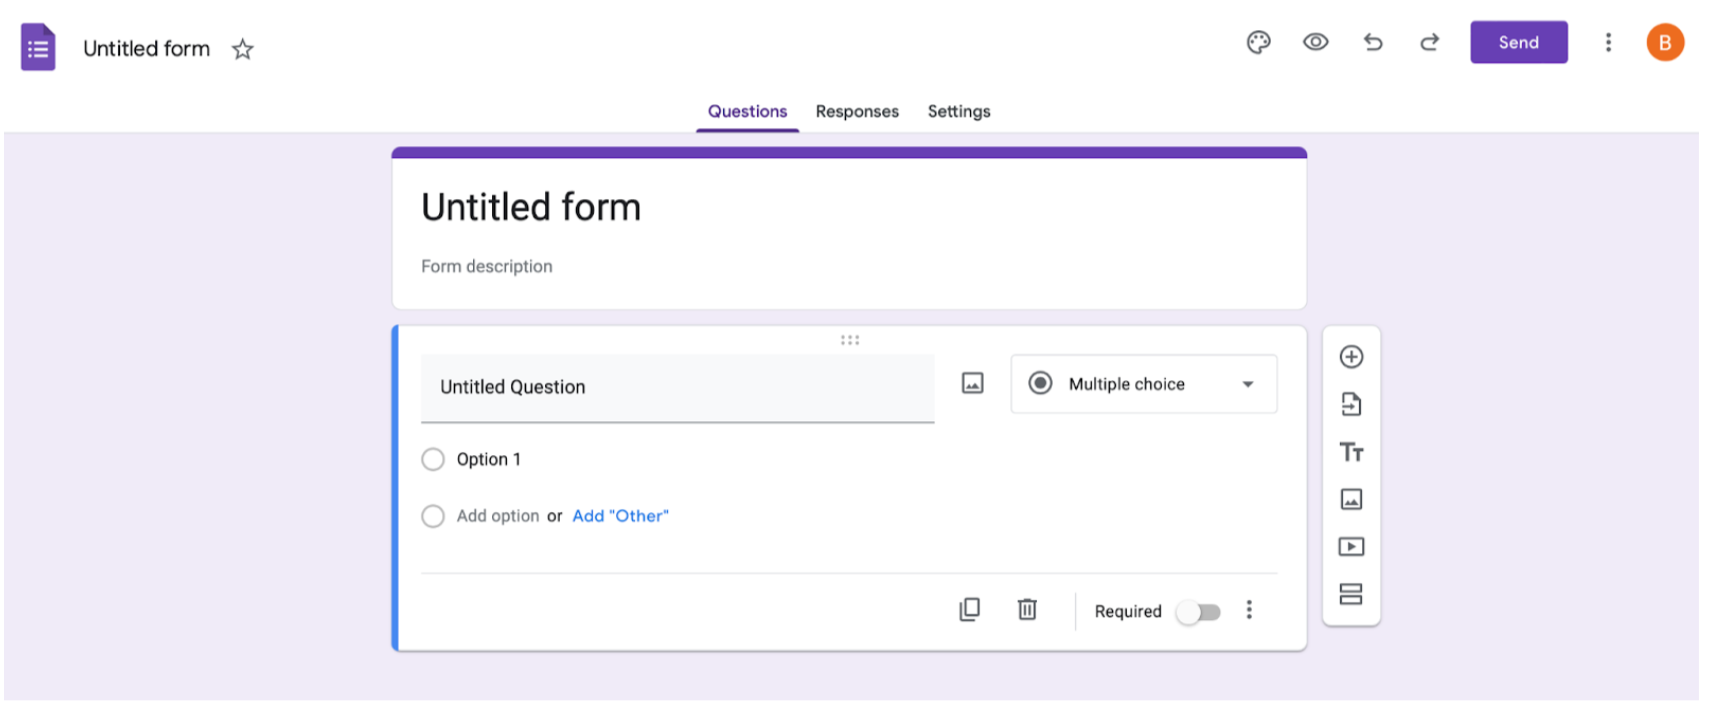
STEP 5
From here you can create your google form.
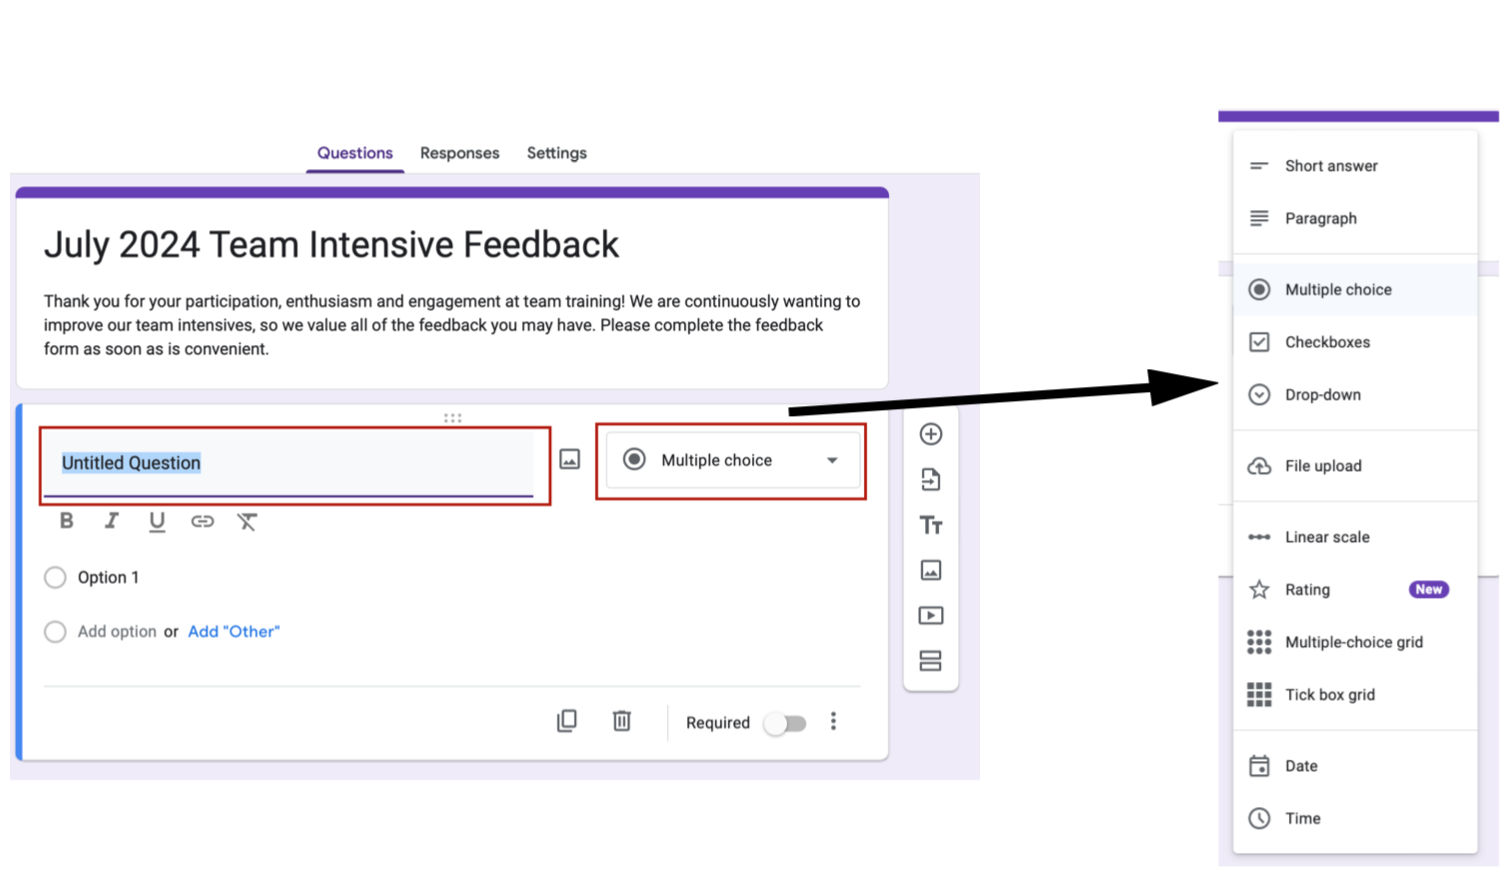
Give the form an appropriate title. Previous examples include “July 2024 Team Intensive Feedback” or “UPP Team Feedback”.
Write a description to help the recipients understand the purpose of the form and what the responses may be used for.
STEP 6:
Write your first question in the “Untitled Question” box.
You will then be able to decide how you would like the recipient(s) to respond. You may want to give a range of answers to be selected from, or the option for an answer to be typed. To change the response method, click on the “Multiple Choice” dropdown. The style you choose will apply to the selected question.
STEP 7:
If there are certain questions the team must answer, you can toggle the “Required” button on and off. This means the recipients will not have the option to not answer it or leave it blank.
If you would like all questions to be required, you will need to toggle the “required” button for each question.
Note: If you choose required, the recipient(s) must choose or type an answer and the form will not be able to be sent until all required questions are completed.

STEP 8:
Once you have written your first question, click the “+” button on the right hand side to add another question.
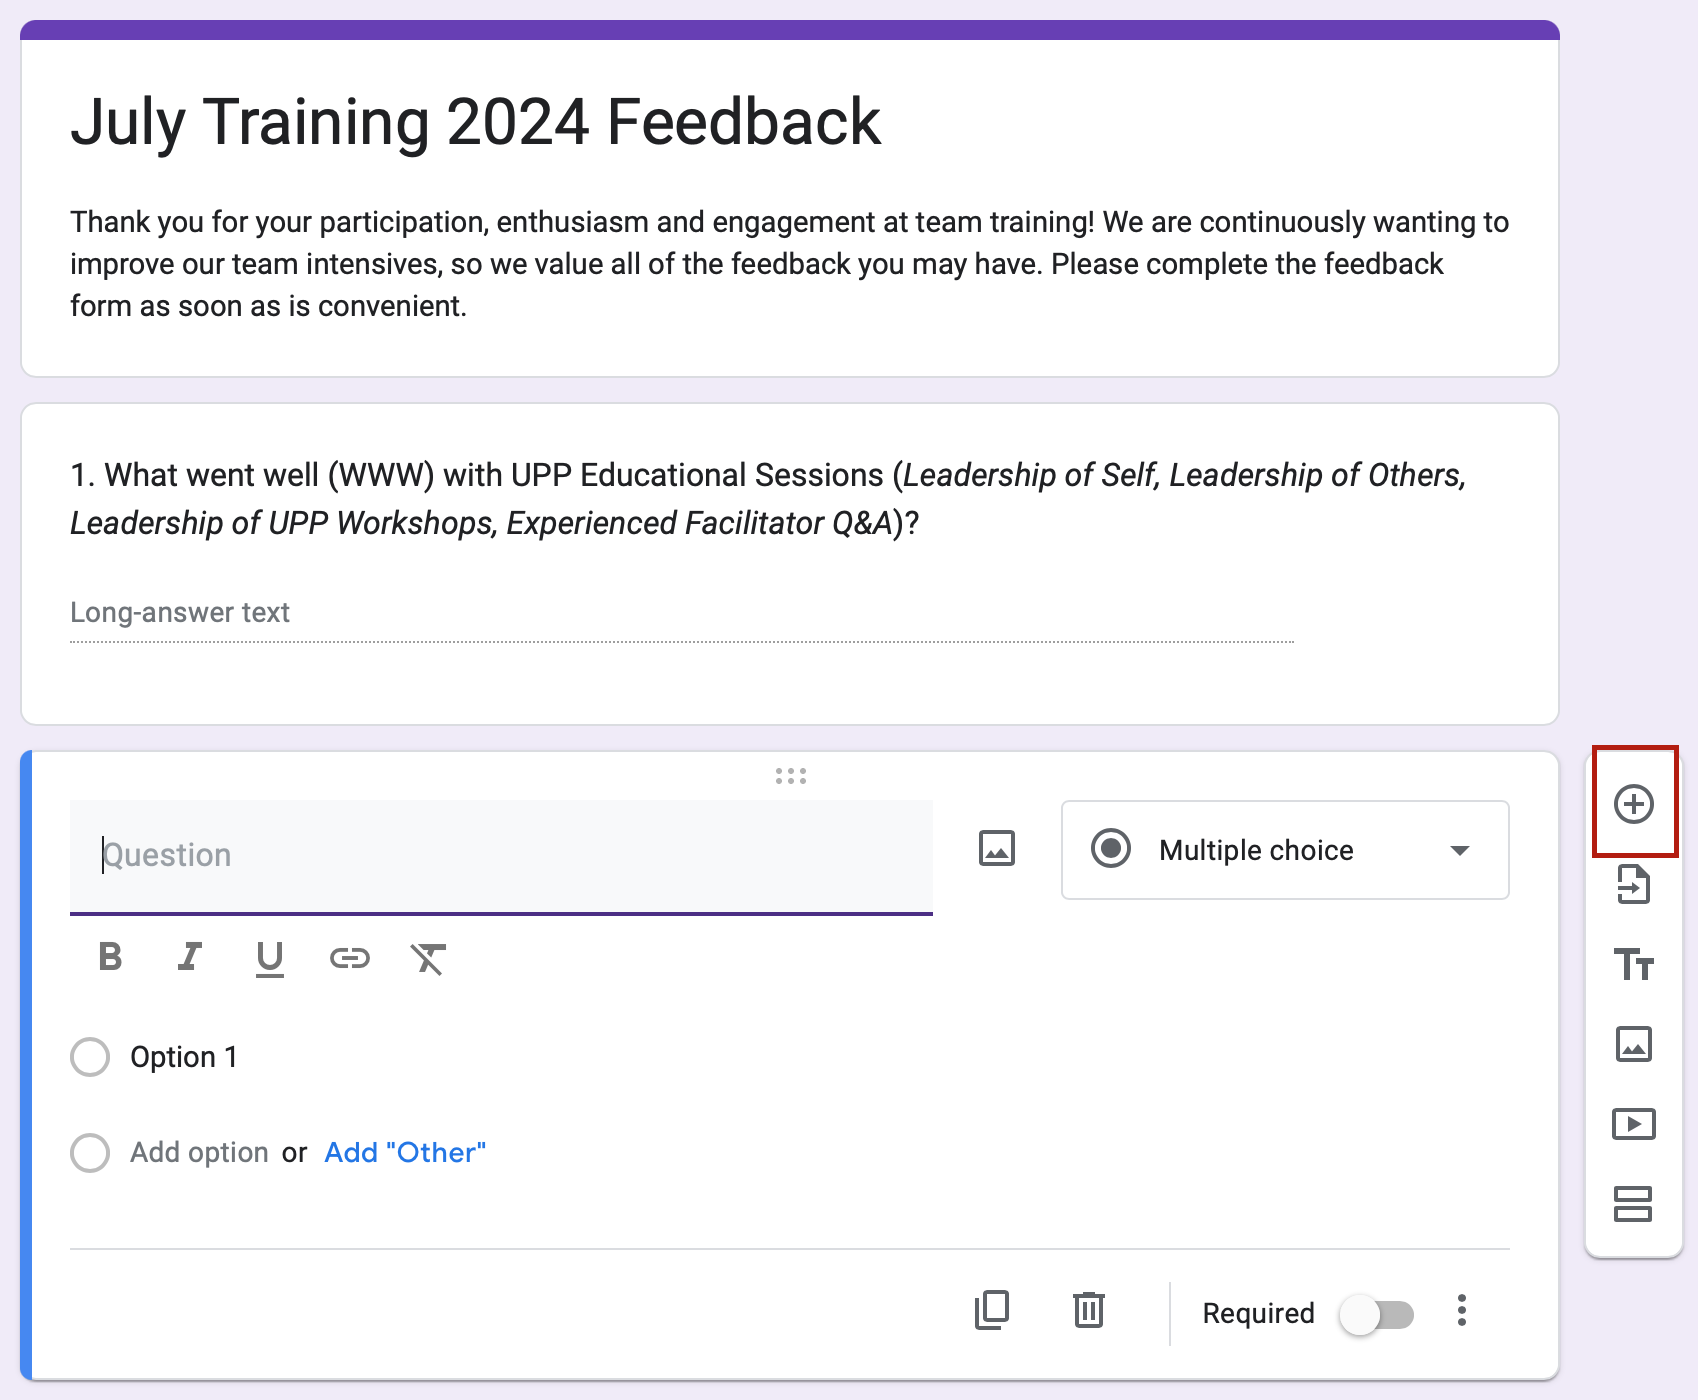
STEP 9:
Repeat Steps 6-8 until all questions have been written.
STEP 10:
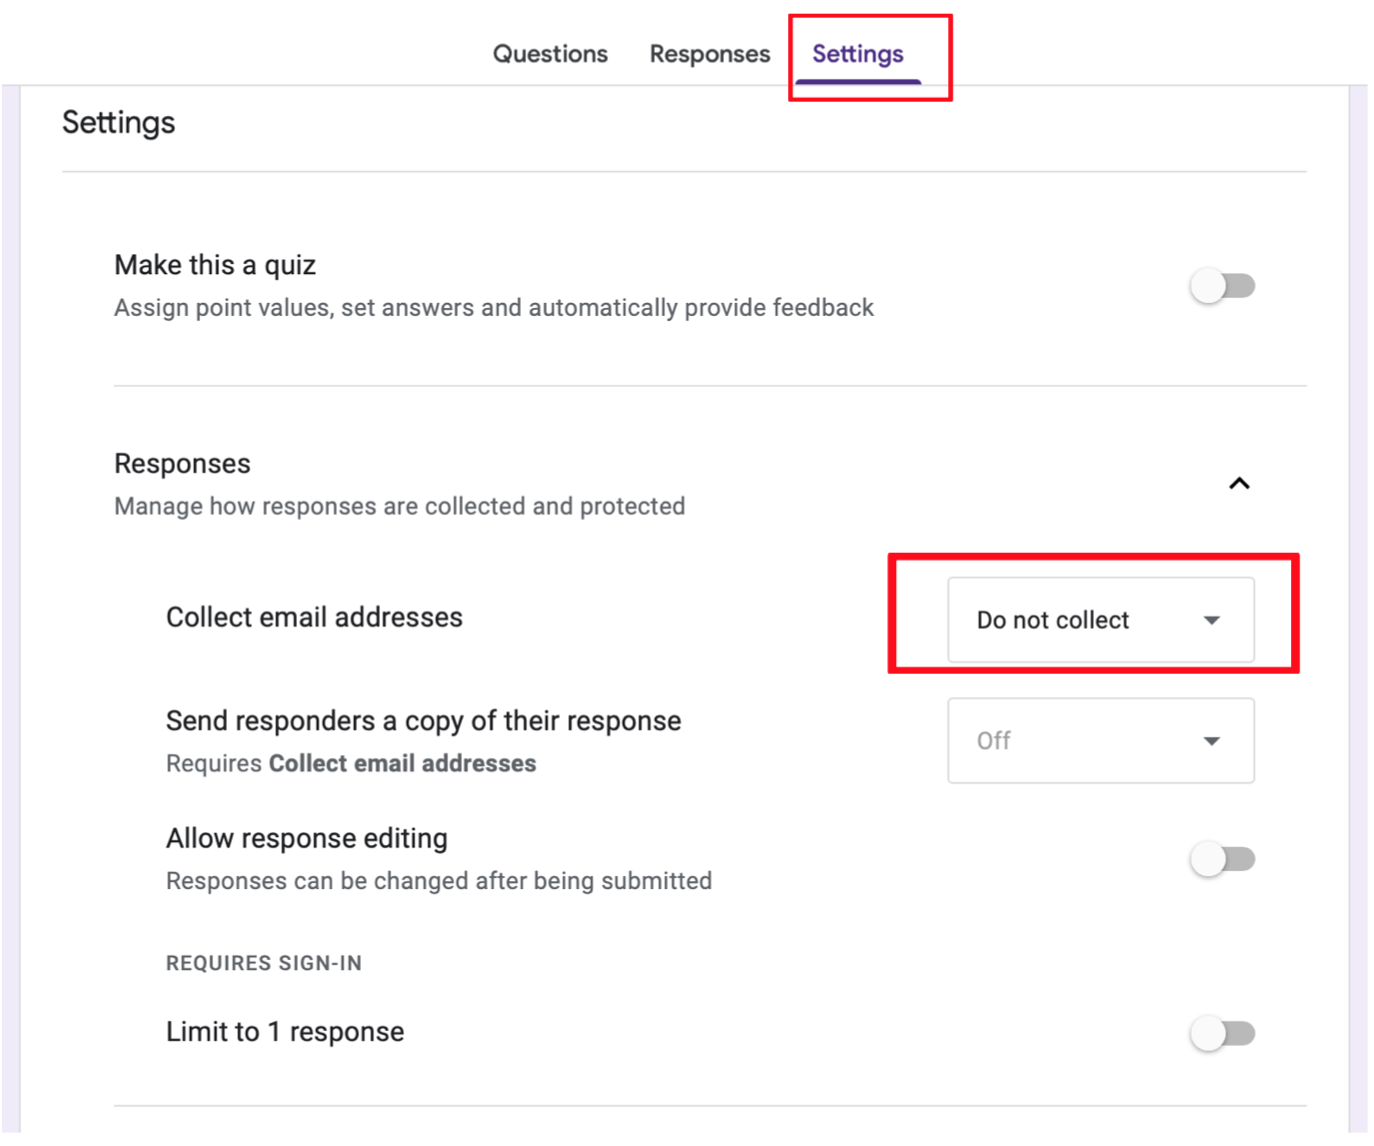
Decide whether you would like the responses to be anonymous or not.
Google Forms may default to collect the email addresses of the recipients.
If you do not want to collect email addresses to ensure anonymity, you can turn this feature off. To do this click on the “Settings” tab at the top and then click on the “Responses” drop down.
From here, you can either choose for responders to manually type in their email address, log in to their google account to complete the form or for no email addresses to be collected.
If you would like to give the option of both anonymity and known responses, you may want the first question of the form to be “Name” so the responders have the option to type their name. If you add a “Name” question at the start of the google form, you may need to re-number the questions that follow.
STEP 11:
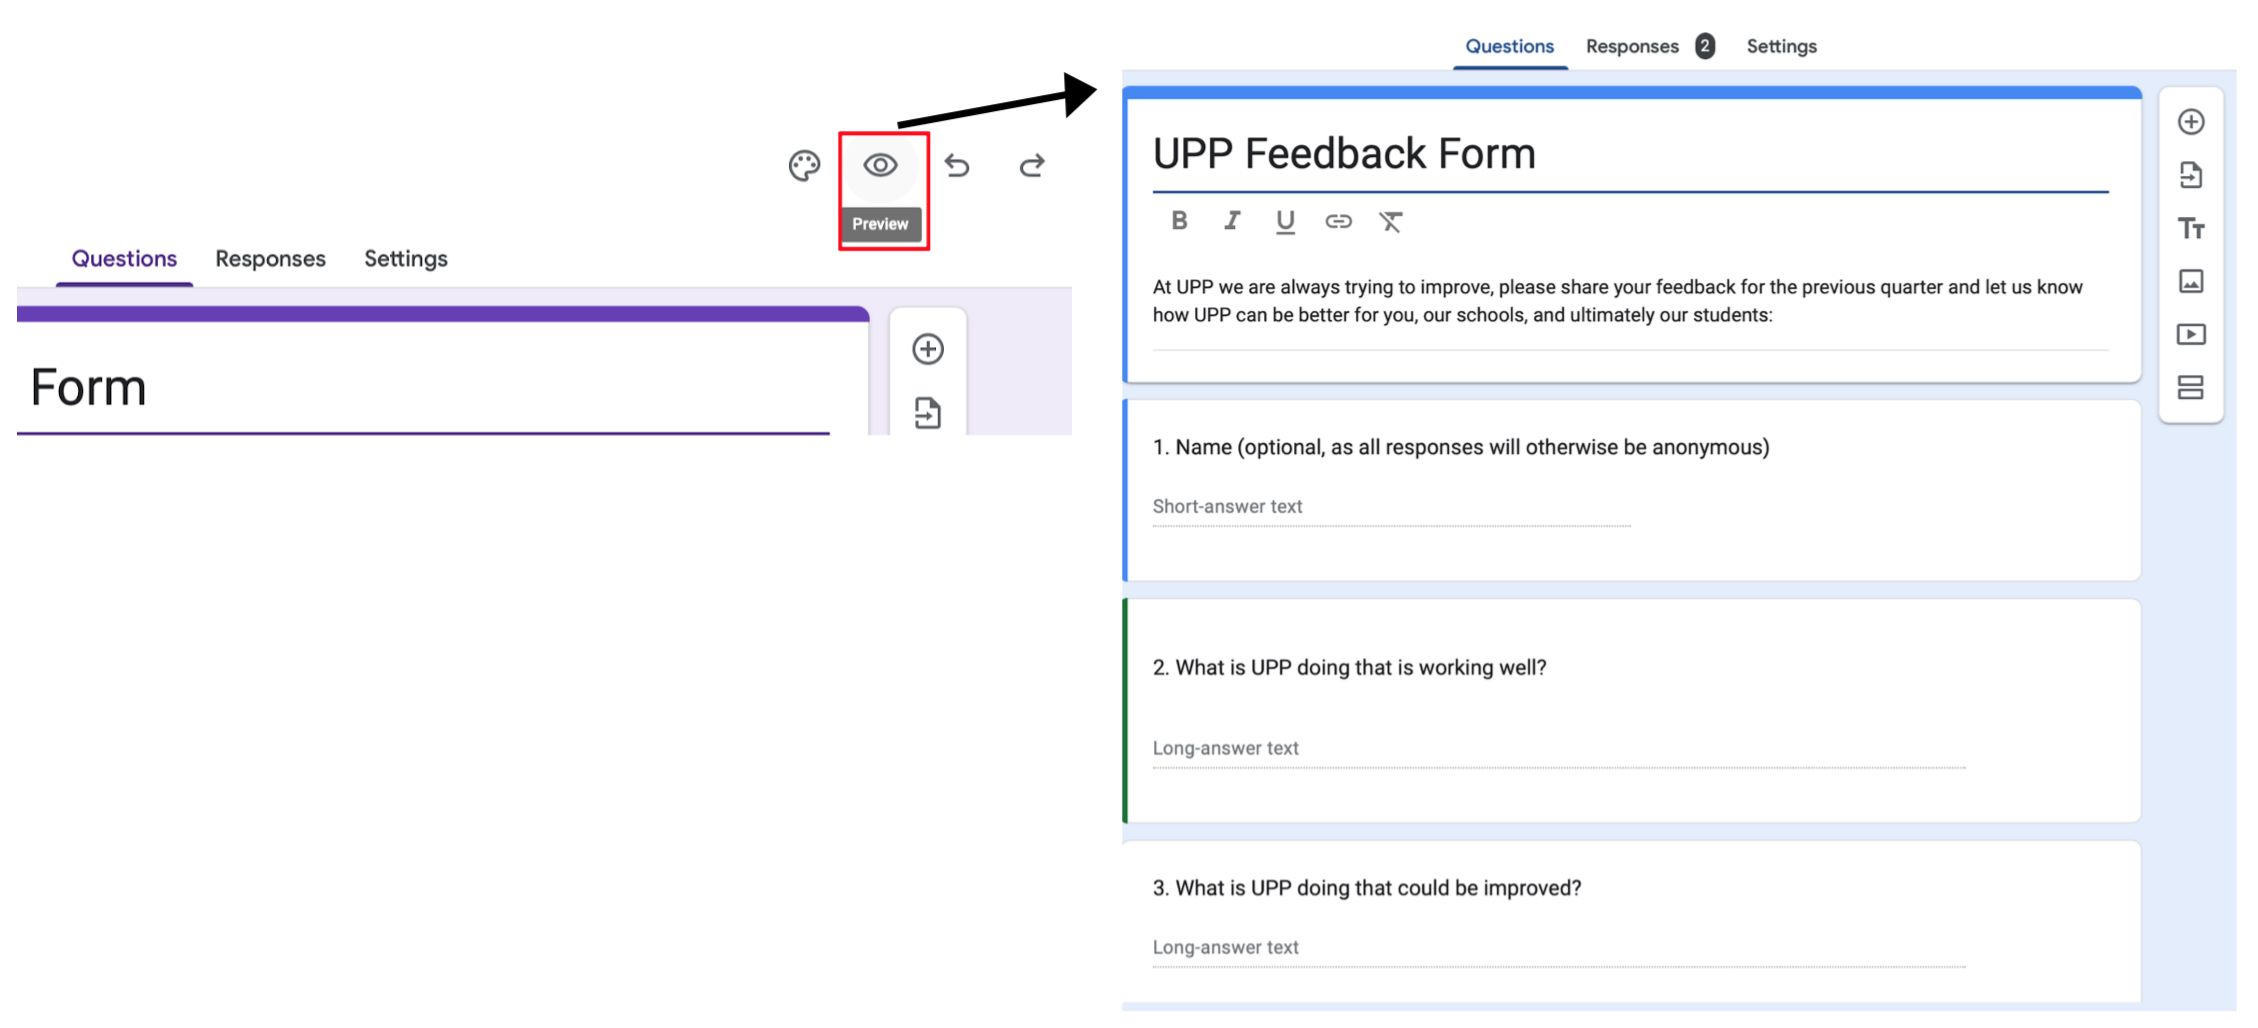
Once your Google Form is completed, use the preview button to view the form as your recipients will see it.
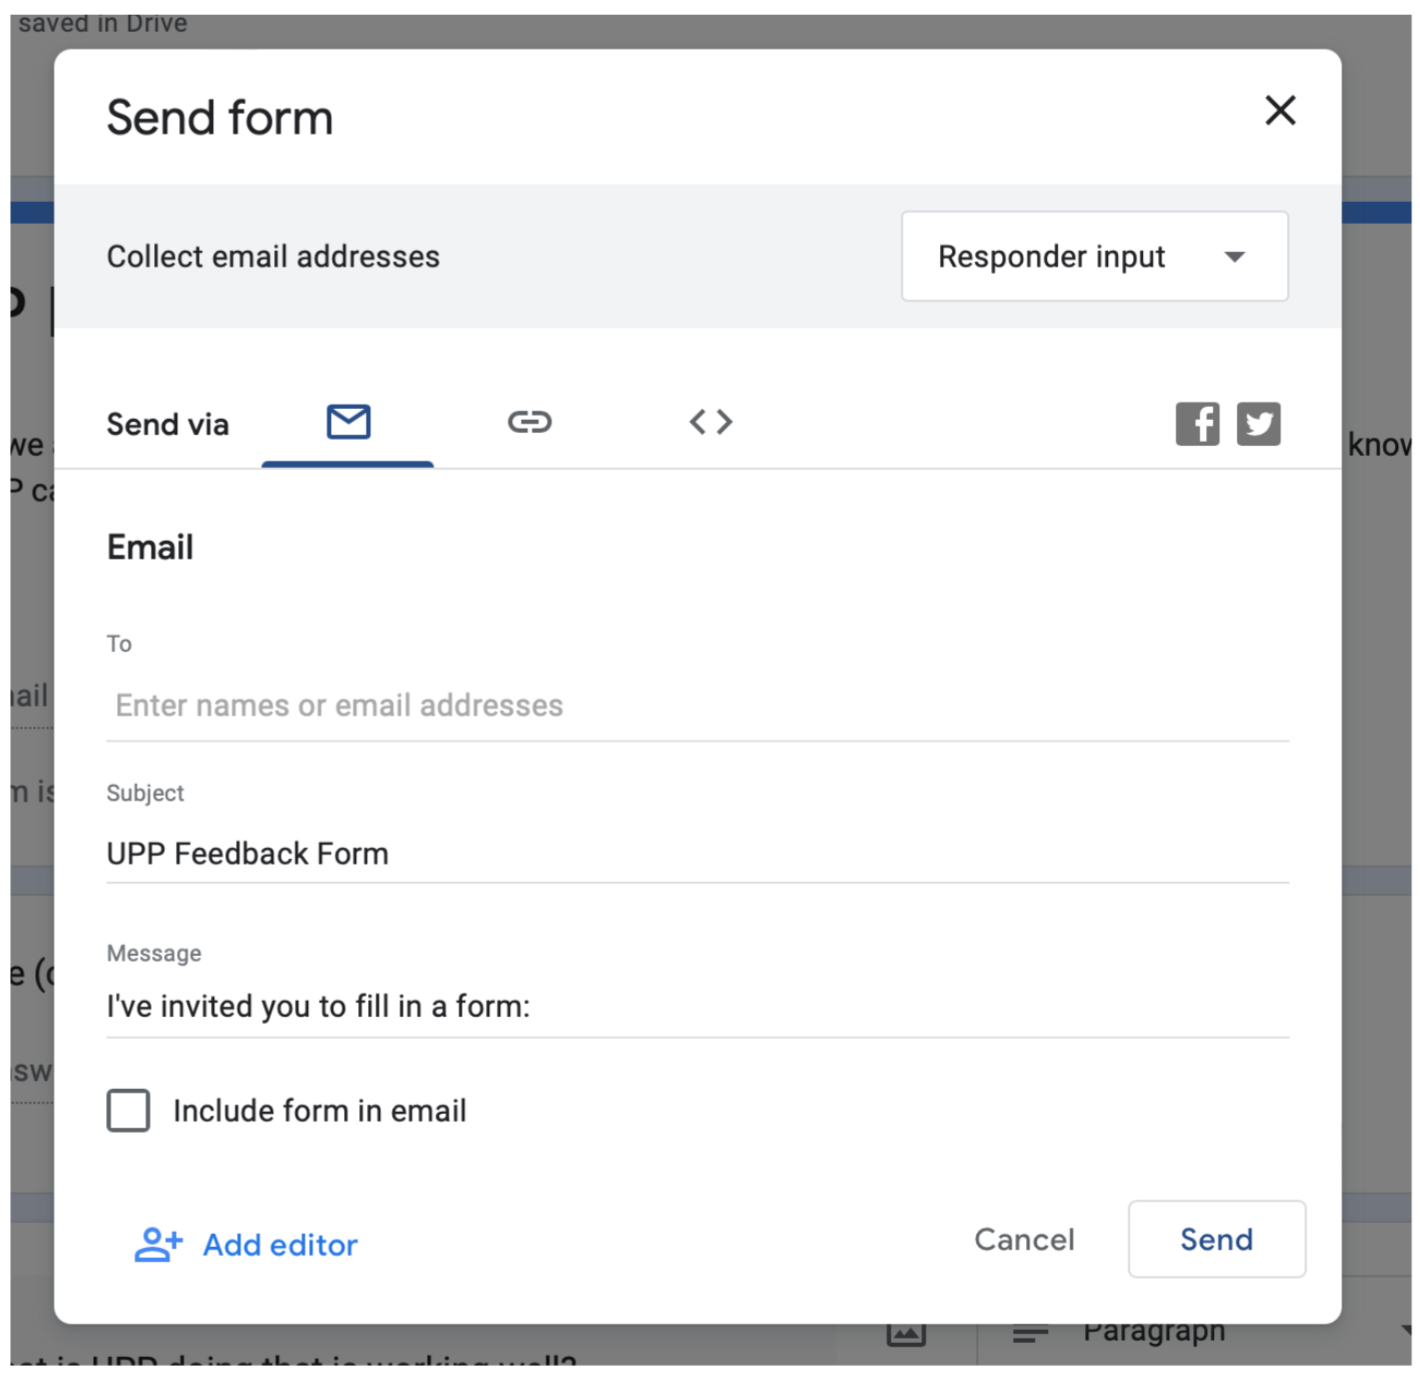
STEP 12:
Step: Once you have previewed your Google Form and you are ready to send, press “Send”. You will then have the option to send via email or a link.
PART 2: Receiving and Analysing Responses
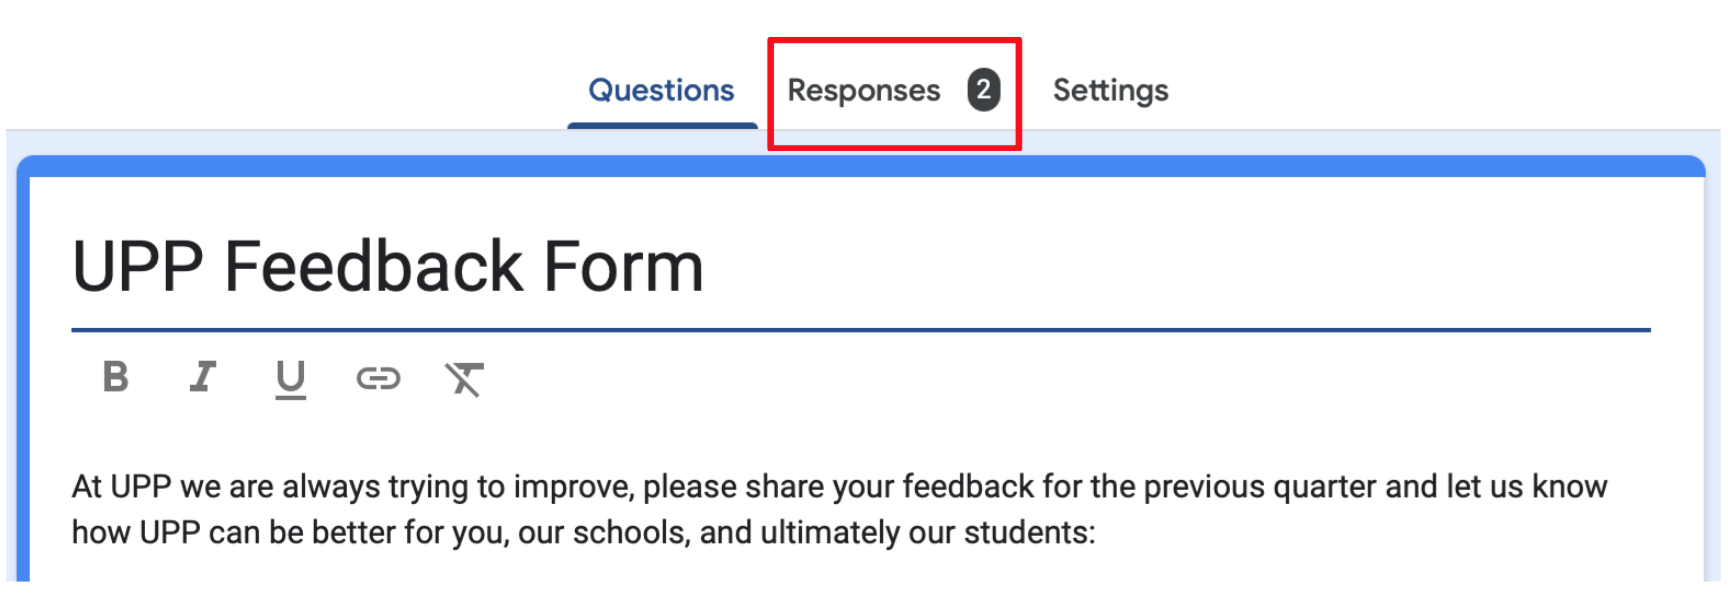
STEP 1:
When a recipient responds to the google form, this will appear in the “Responses” tab. The number next to the responses tab indicates how many people have completed the form.
STEP 2:
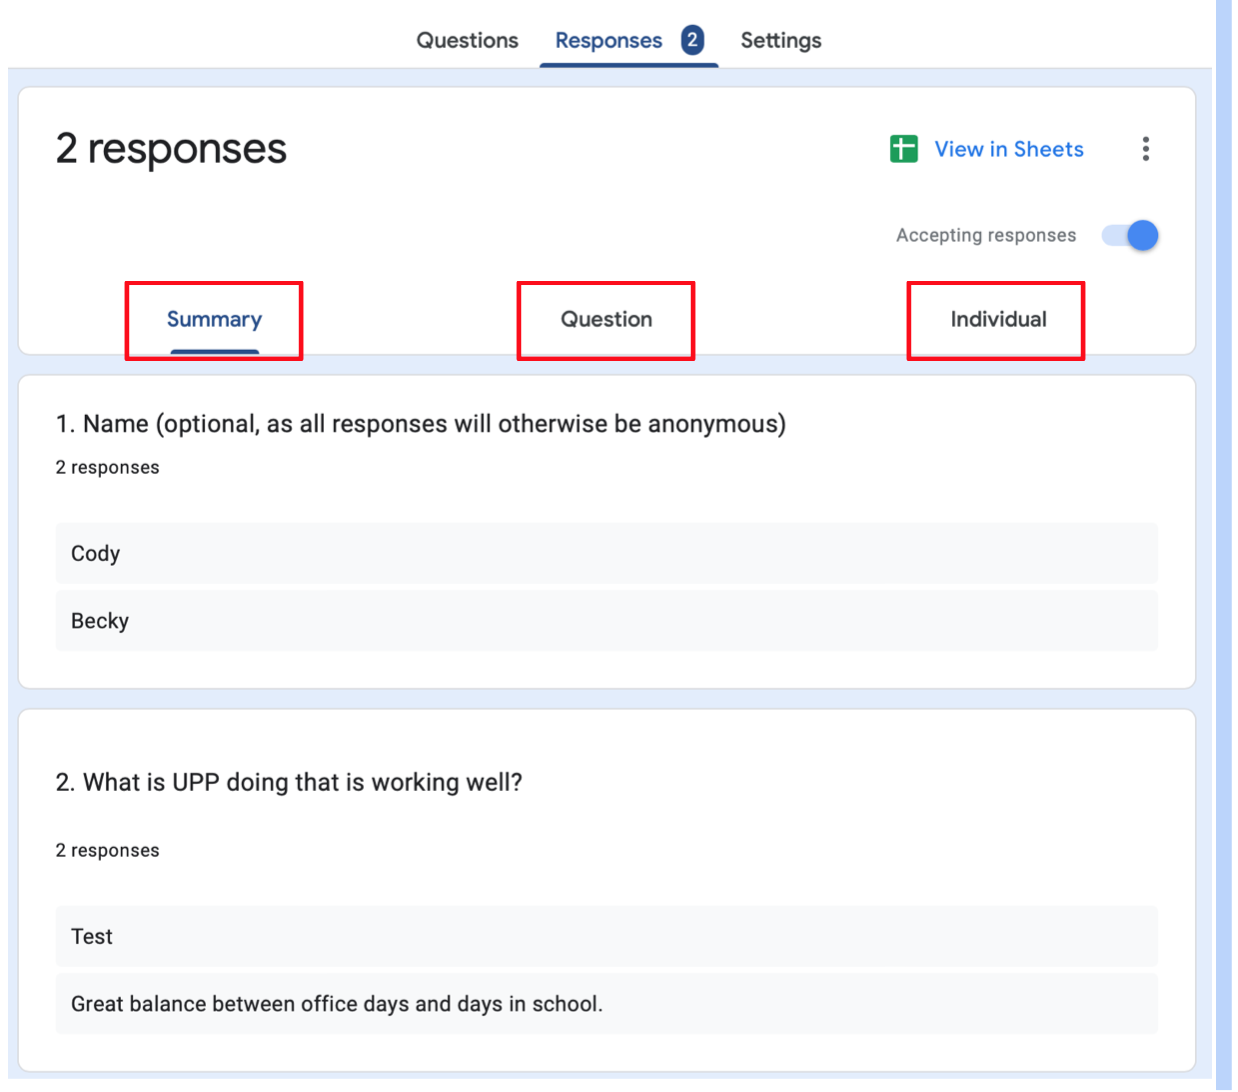
You can sort the responses in 3 different ways:
Summary: Displays all responses for all questions.
Question: Shows answers for individual questions
Individual: Shows answers to all questions from an individual recipient.
STEP 3:
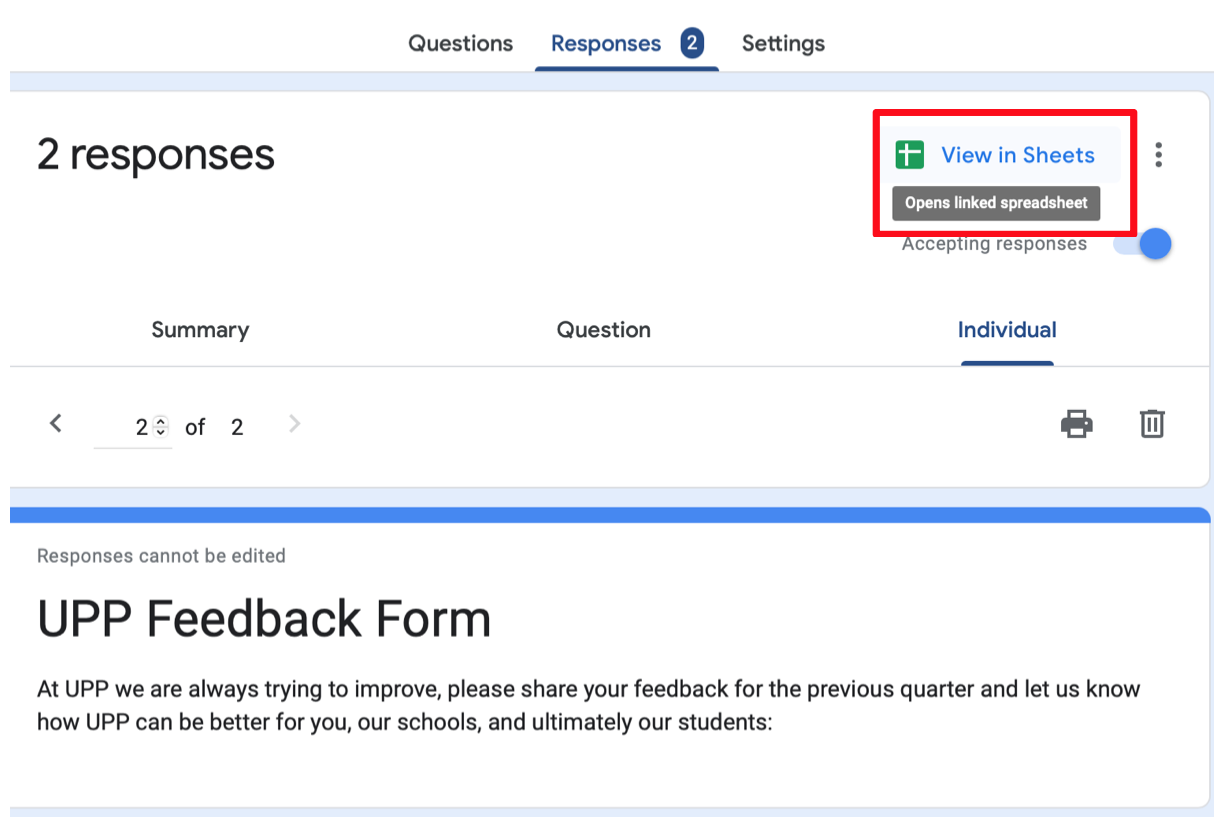
For easier analysis and comparison of answers, the responses can be exported into a google sheet.
Click on the responses tab
Click on “View in sheets”
Google Sheets will open in a new window

STEP 4:
As the Google Form was created in your own personal drive, the google sheets document (pictured above) will also automatically save to your own drive.
STEP 5:
You may need to share the form and responses with other users, such as the UPP Leadership Team. To move the google form and/or google sheet document of the collated responses into a shared area, click on the folder button next to the title of the google sheet. Choose the folder you wish to move the google sheet to.
Note: if you move the document to a folder with shared access, all users with access to the folder will be able to view the document(s).


Current location: This shows you the current folder the file is saved in. To find a folder saved in a different or shared area of Google Drive you may need to click on “All locations”.